2. Create a world with Lite Lobby
In the prepared addon, create the mission world, add Lite Lobby’s game mode and configure the in-game map. The example uses Everon.
Create the world
Section titled “Create the world”A world contains the map and the objects placed on it. Use Everon from the game to create a separate scene for our mission objects.
Open the map
Section titled “Open the map”In the main Workbench window, click World Editor under Quick Launch. This is the editor where we will place mission objects.
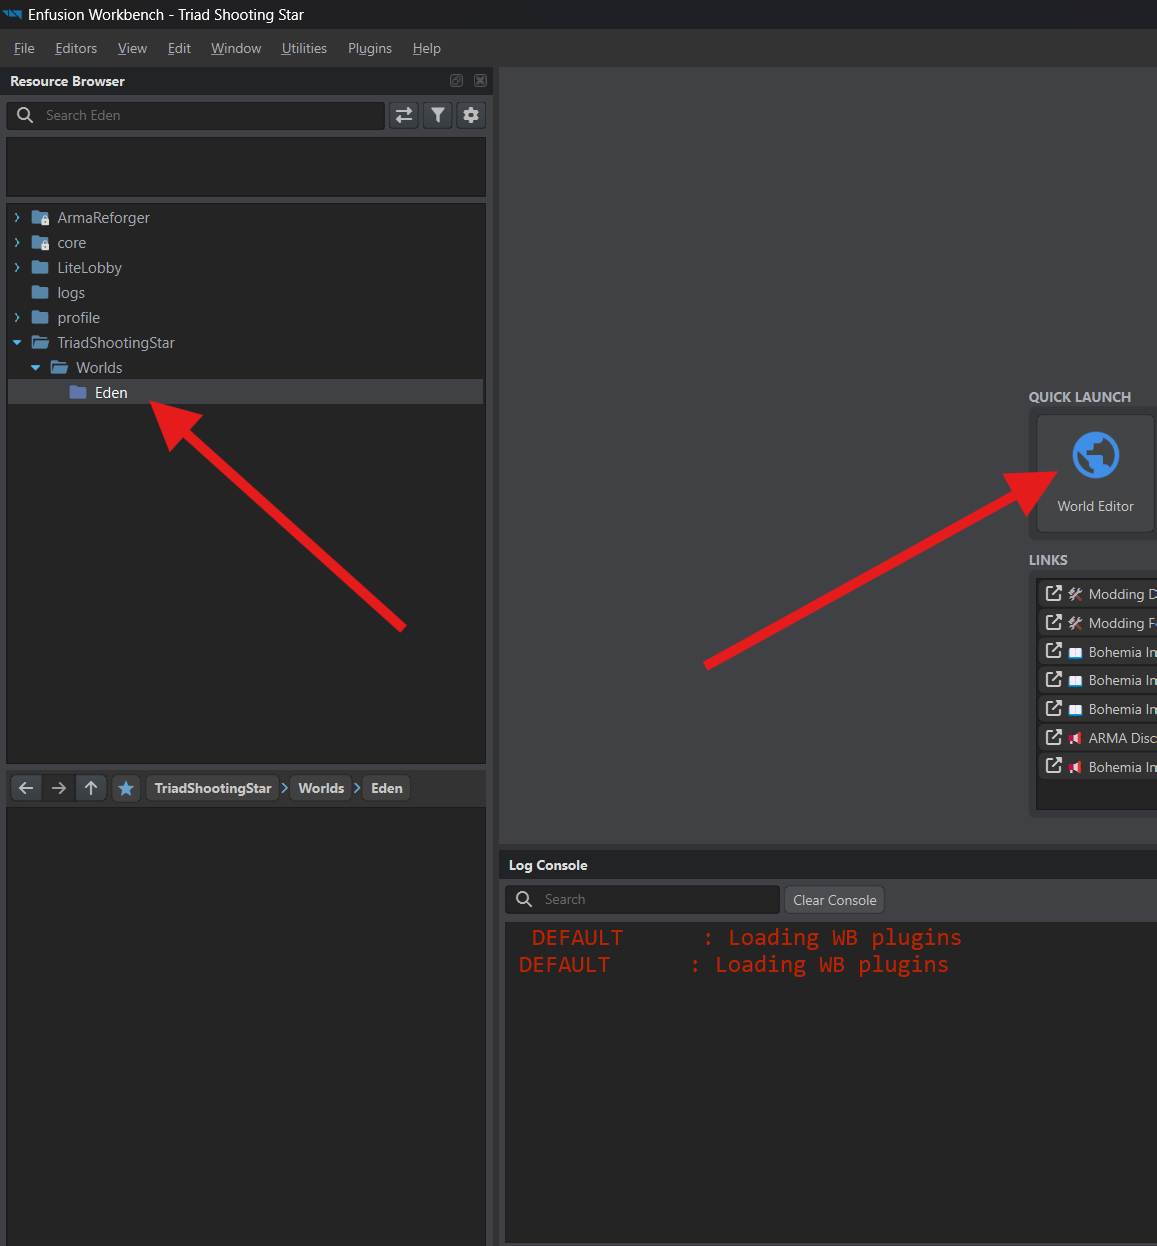
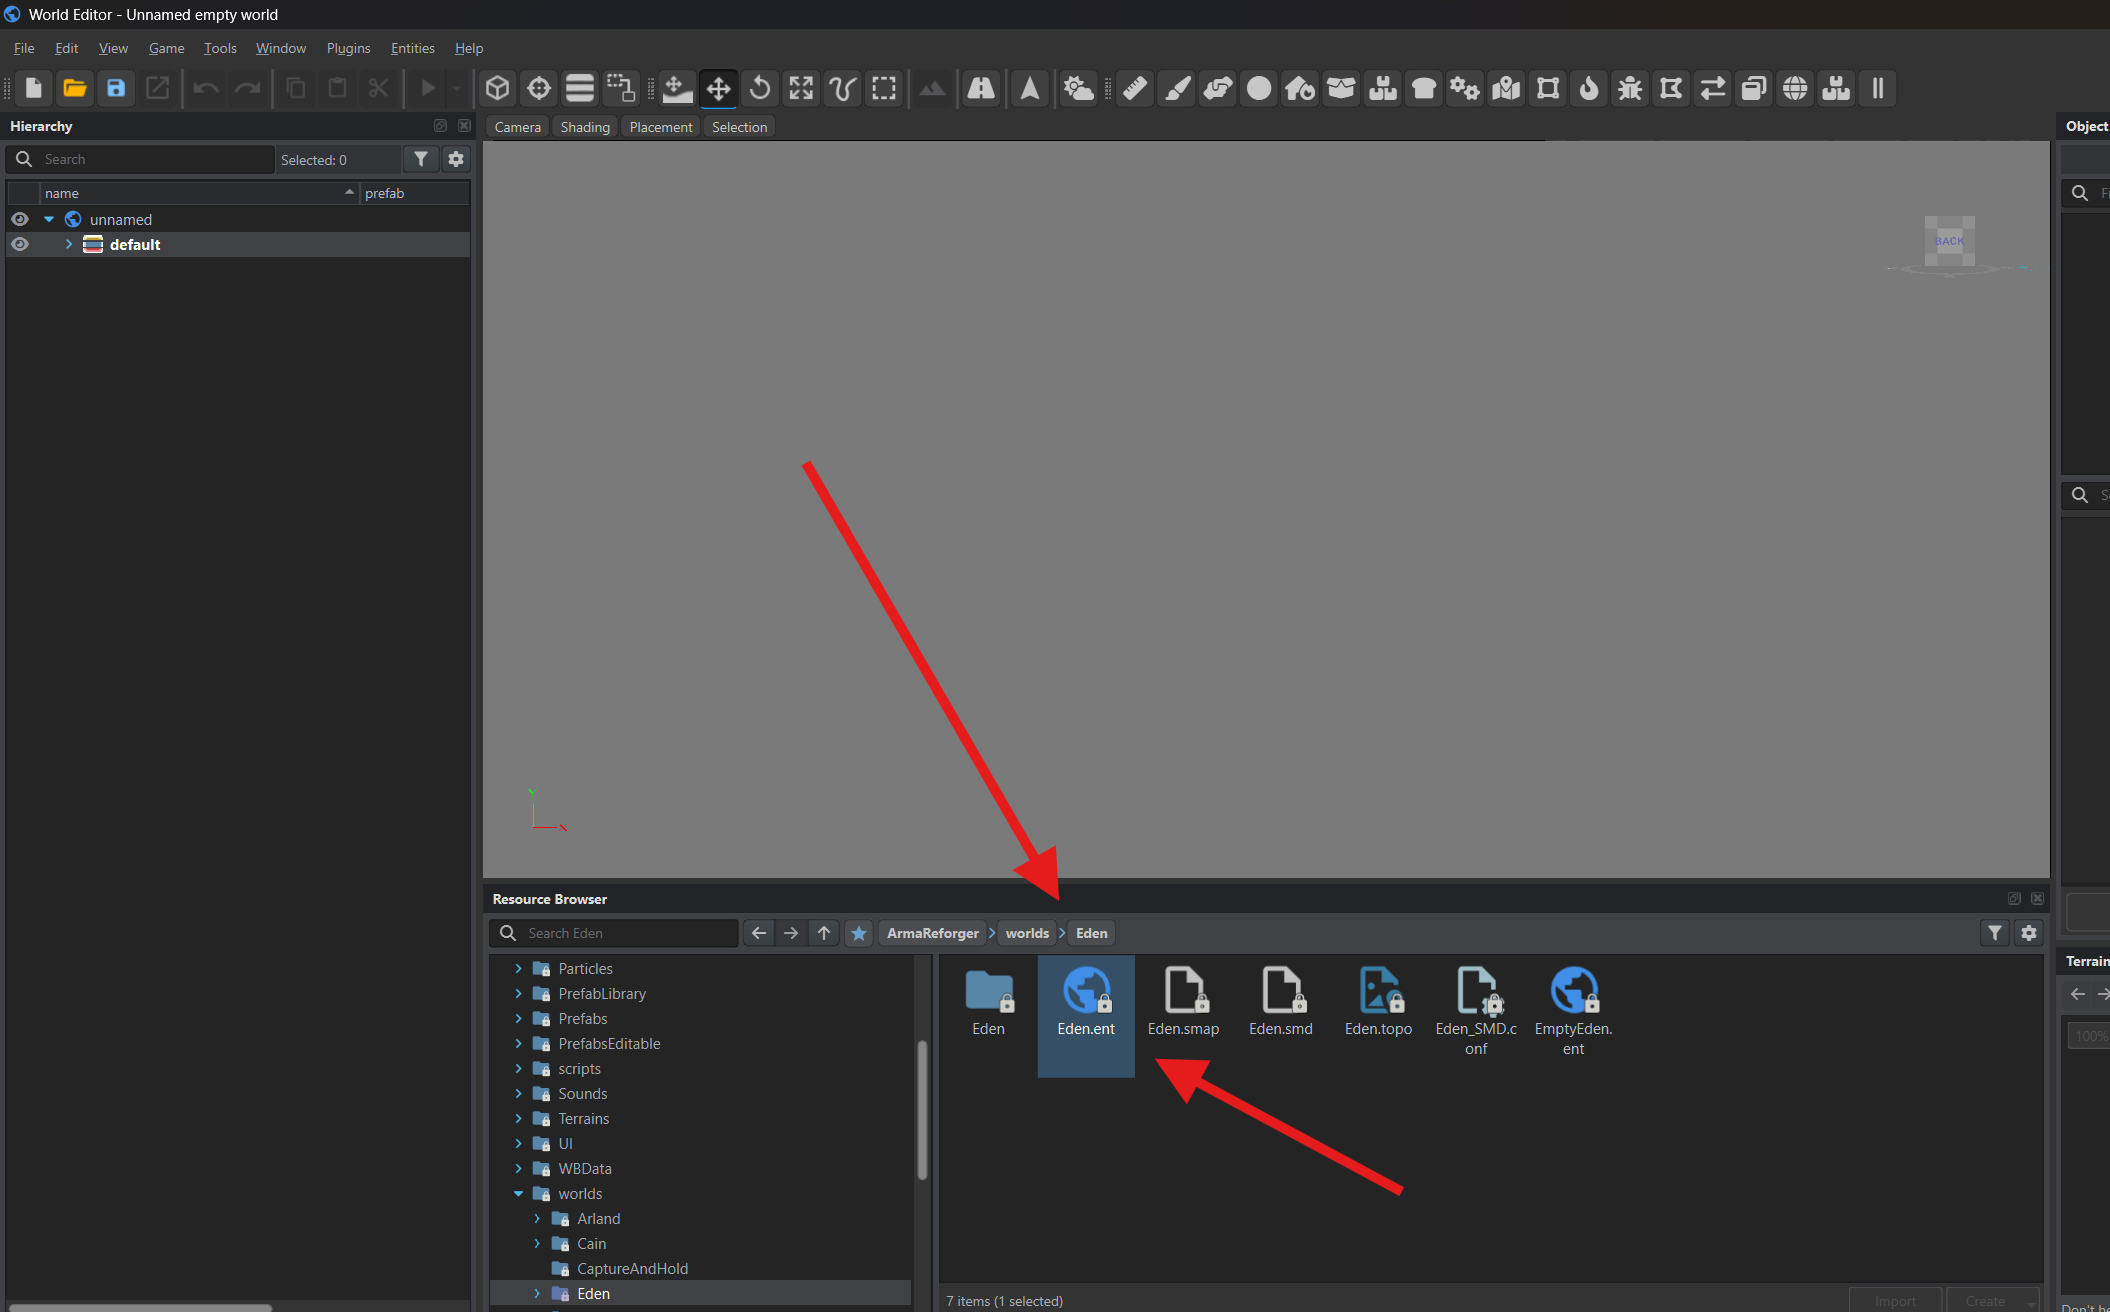
In Resource Browser, open ArmaReforger/worlds/Eden and double-click Eden.ent. Wait for the map to load.
Create a separate scene
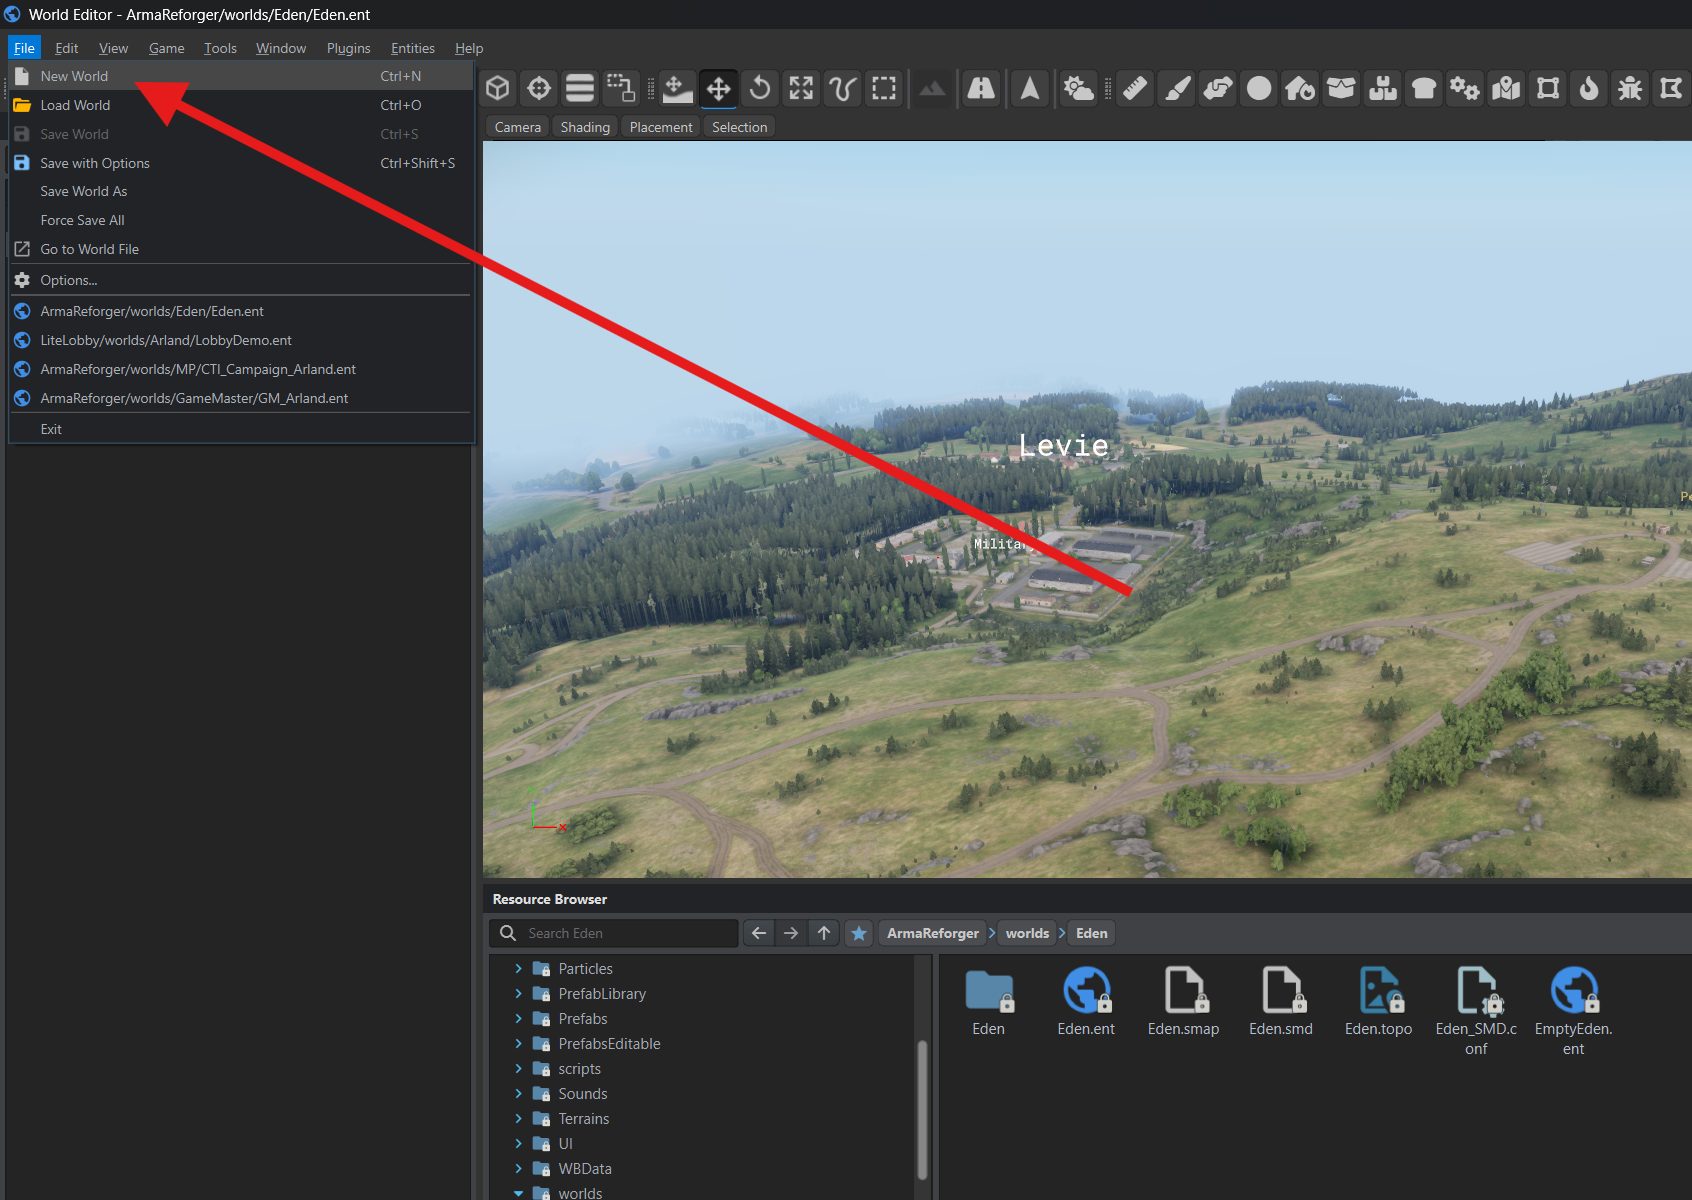
Section titled “Create a separate scene”Choose File → New World.
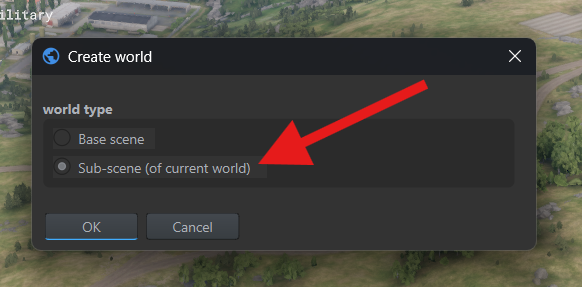
In Create world, select Sub-scene (of current world) and click OK. This scene uses the open map and stores the objects we add separately.
Save the world
Section titled “Save the world”Press Ctrl+S.
In the save dialog, open your project. Use New Folder to create a Worlds folder and an Eden folder inside it. Open Eden, enter ShootingStar_Ep1 in File name, and click OK.
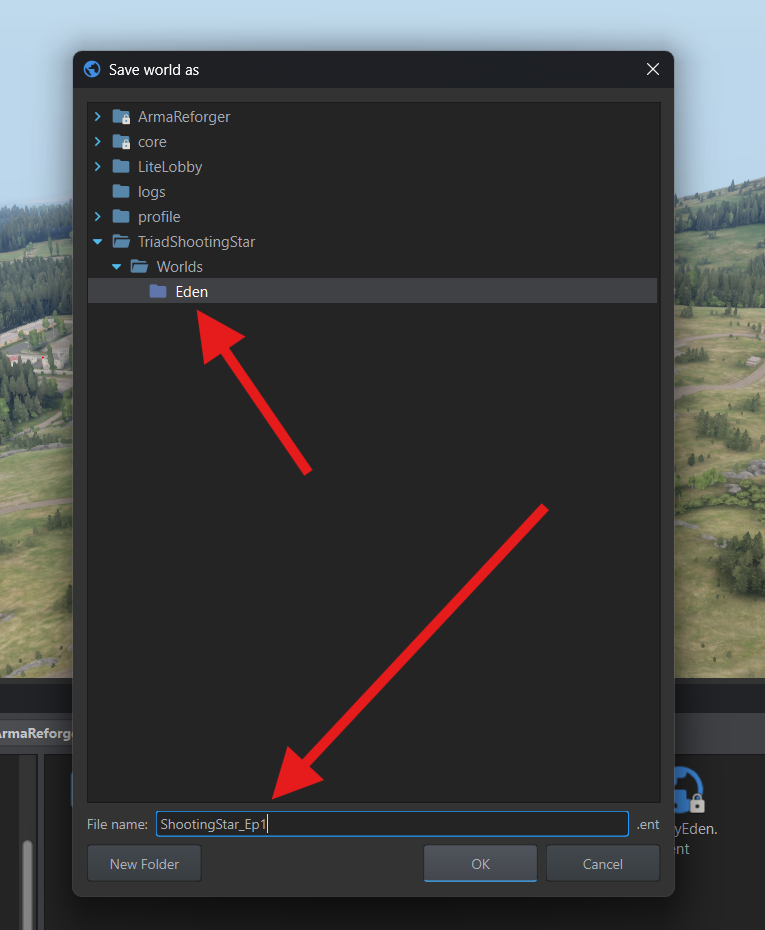
The world file will be at Worlds/Eden/ShootingStar_Ep1.ent inside your addon folder. Hierarchy will show our ShootingStar_Ep1 scene alongside the base world, Eden.
Mission systems layer
Section titled “Mission systems layer”Layers organize scene objects into groups. Prepare a_systems for the mission’s system objects.
In Hierarchy, find the default layer under your ShootingStar_Ep1 scene. Right-click it and choose Rename. Enter a_systems and click OK.
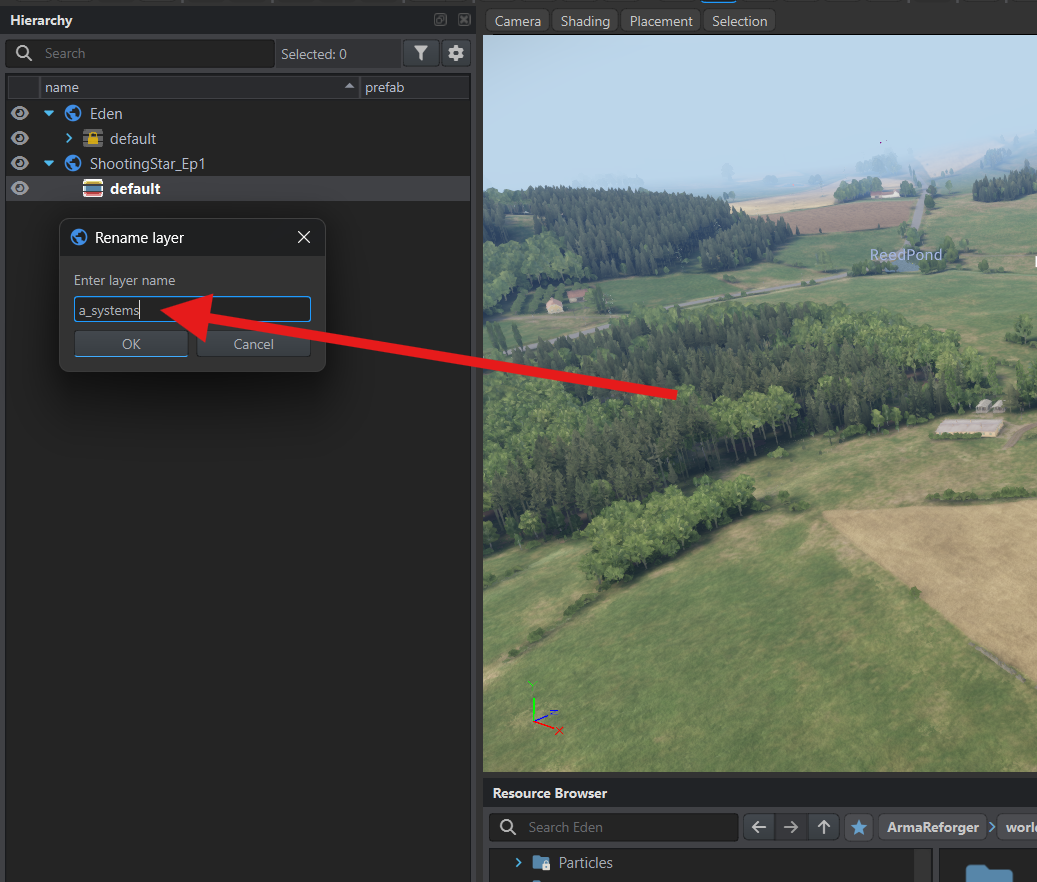
Press Ctrl+S to save the changes.
World setup wizard
Section titled “World setup wizard”A mission needs system objects to handle the game mode, factions, communications, and other functions. We will add them using the Game Mode Setup wizard.
Select a template
Section titled “Select a template”In Hierarchy, double-click a_systems to make it the active layer. New objects will be added to this layer.
Choose Plugins → Game Mode Setup.
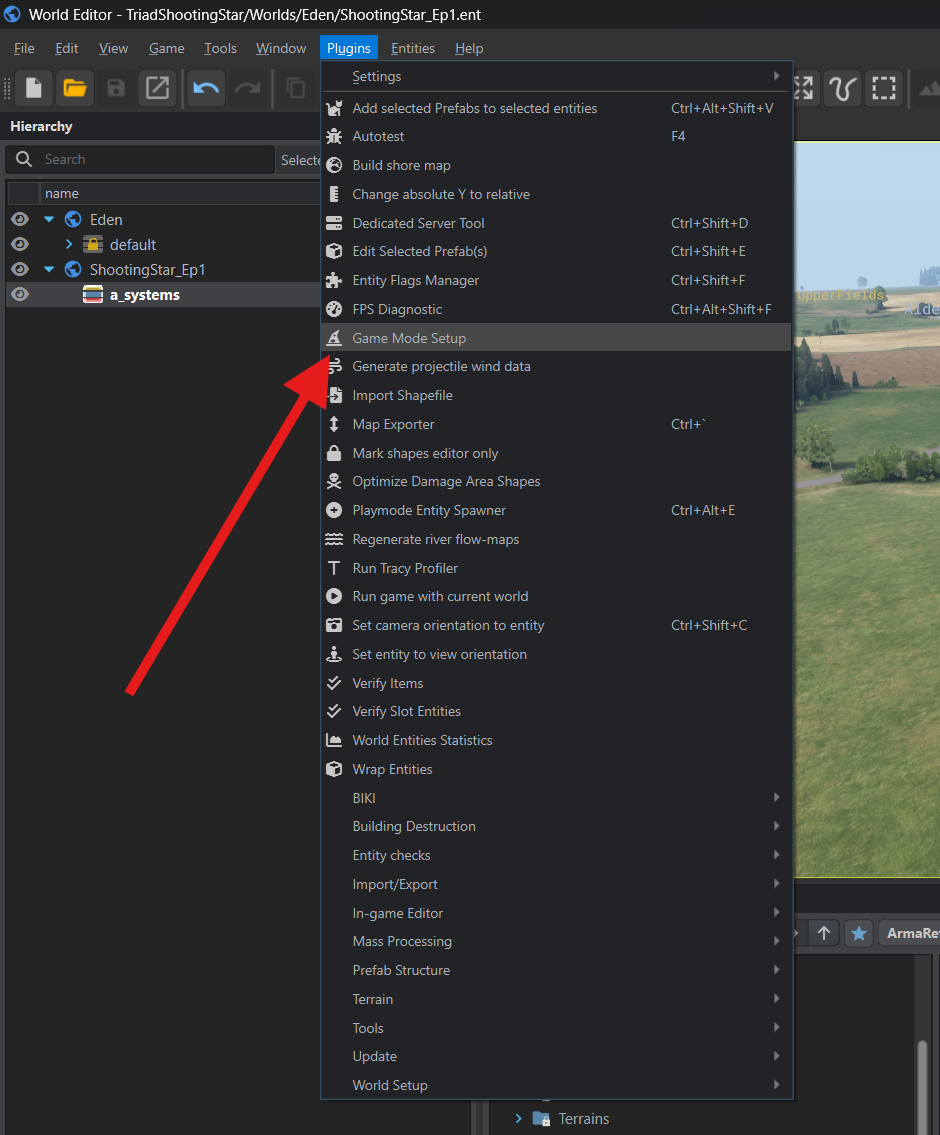
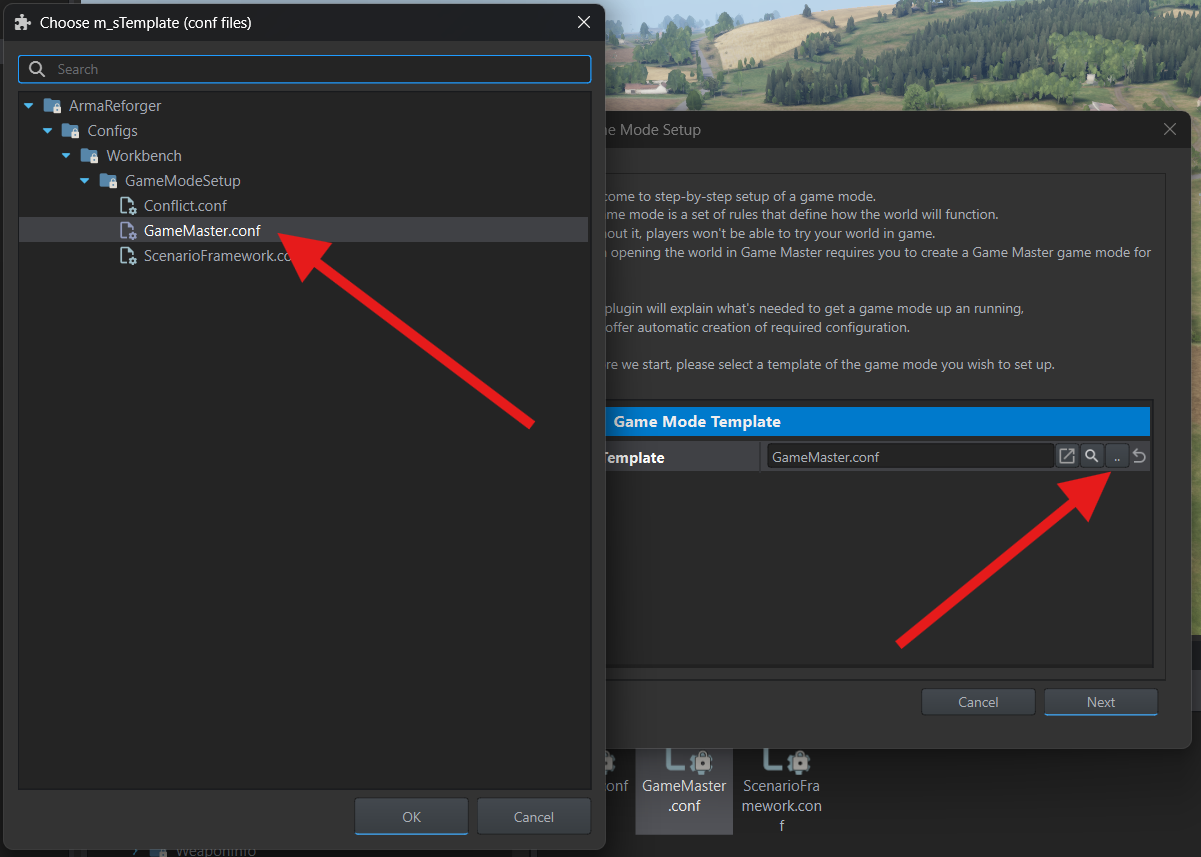
Click … in Template. Open ArmaReforger/Configs/Workbench/GameModeSetup, select GameMaster.conf, and click OK, then Next.
Create system objects
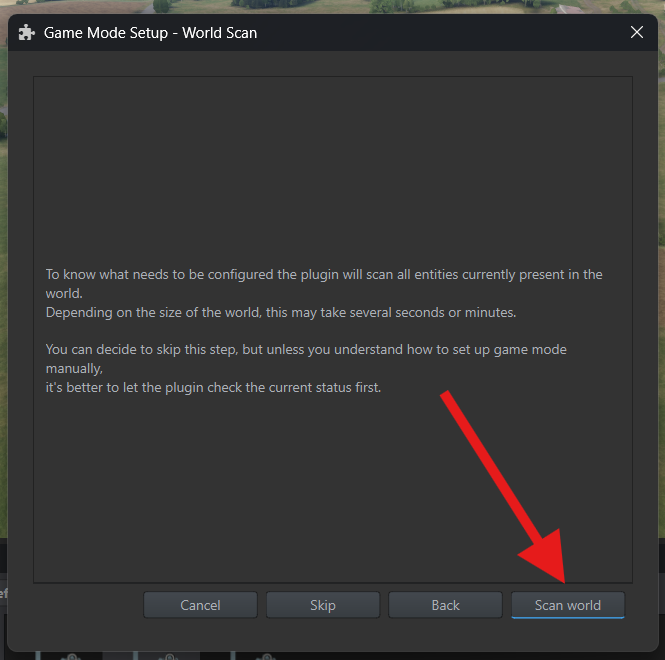
Section titled “Create system objects”In World Scan, click Scan world. The wizard checks which system objects are already in the world.
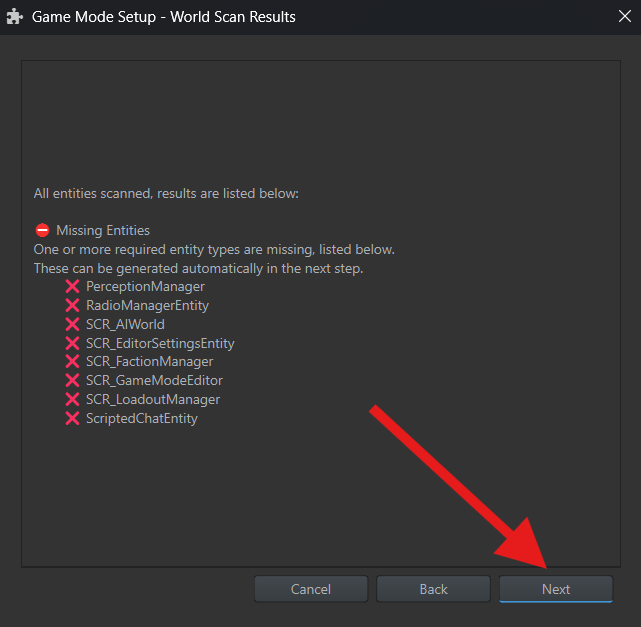
Missing Entities lists the objects that need to be added. Click Next.
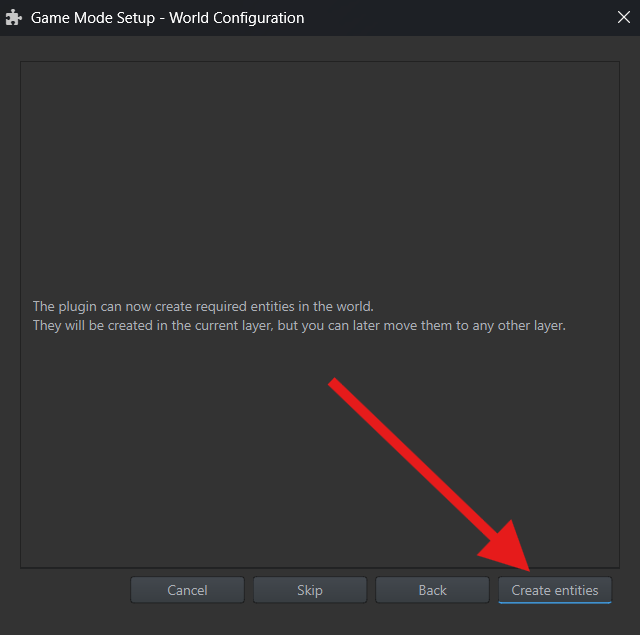
In World Configuration, click Create entities to create these objects in a_systems.
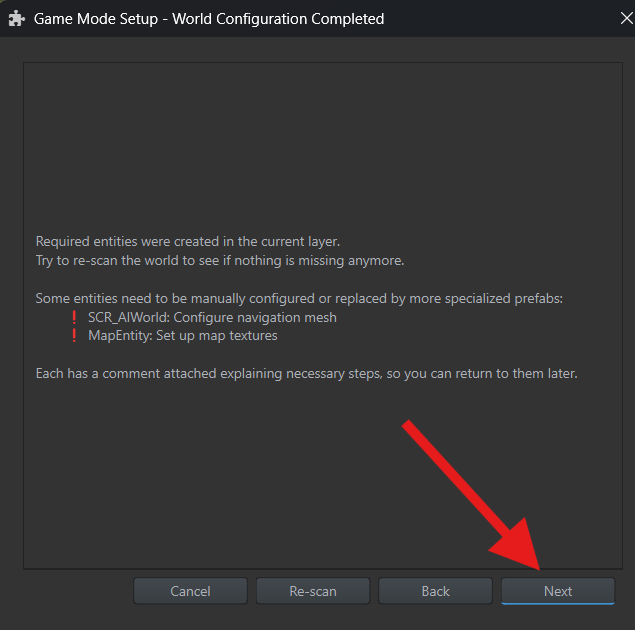
The wizard confirms the objects were created. We will assign the map files for MapEntity later in map setup. For now, click Next.
Create the scenario file
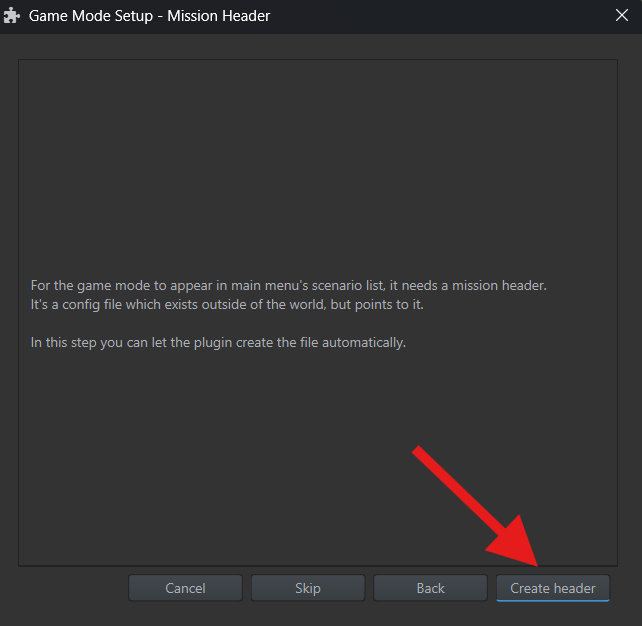
Section titled “Create the scenario file”For the mission to appear in the game’s scenario list, it needs a separate file called a Mission Header. This file contains the world reference, mission name, and description.
In Mission Header, click Create header.
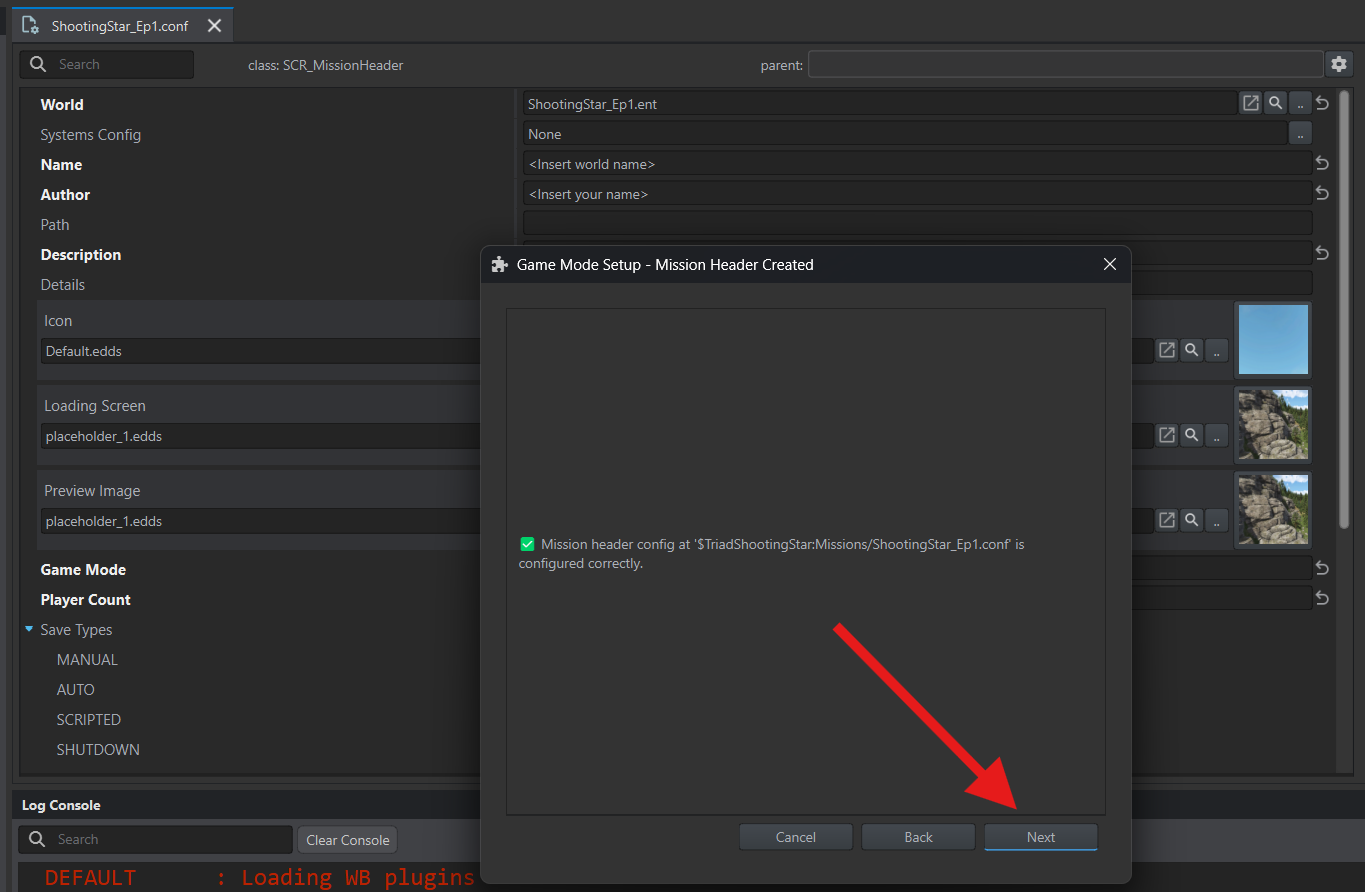
The wizard creates and opens Missions/ShootingStar_Ep1.conf in your addon. The filename matches the world’s name. Click Next.
Add the Lite Lobby game mode
Section titled “Add the Lite Lobby game mode”The wizard added the Game Master game mode. Replace it with the Lite Lobby game mode.
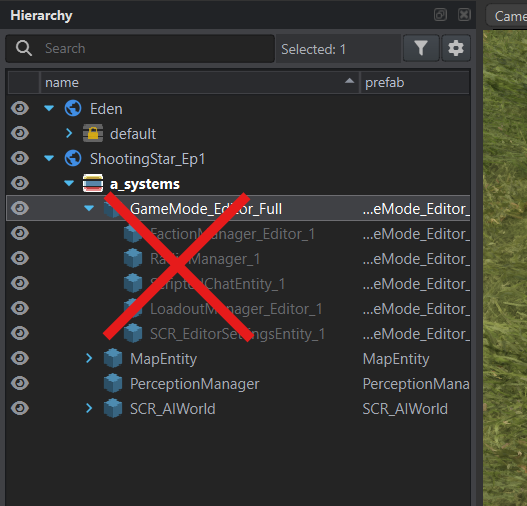
In Hierarchy, expand a_systems, select GameMode_Editor_Full, and press Delete. This also removes its child objects, crossed out in the screenshot. The separate MapEntity, PerceptionManager, and SCR_AIWorld objects remain in the layer.
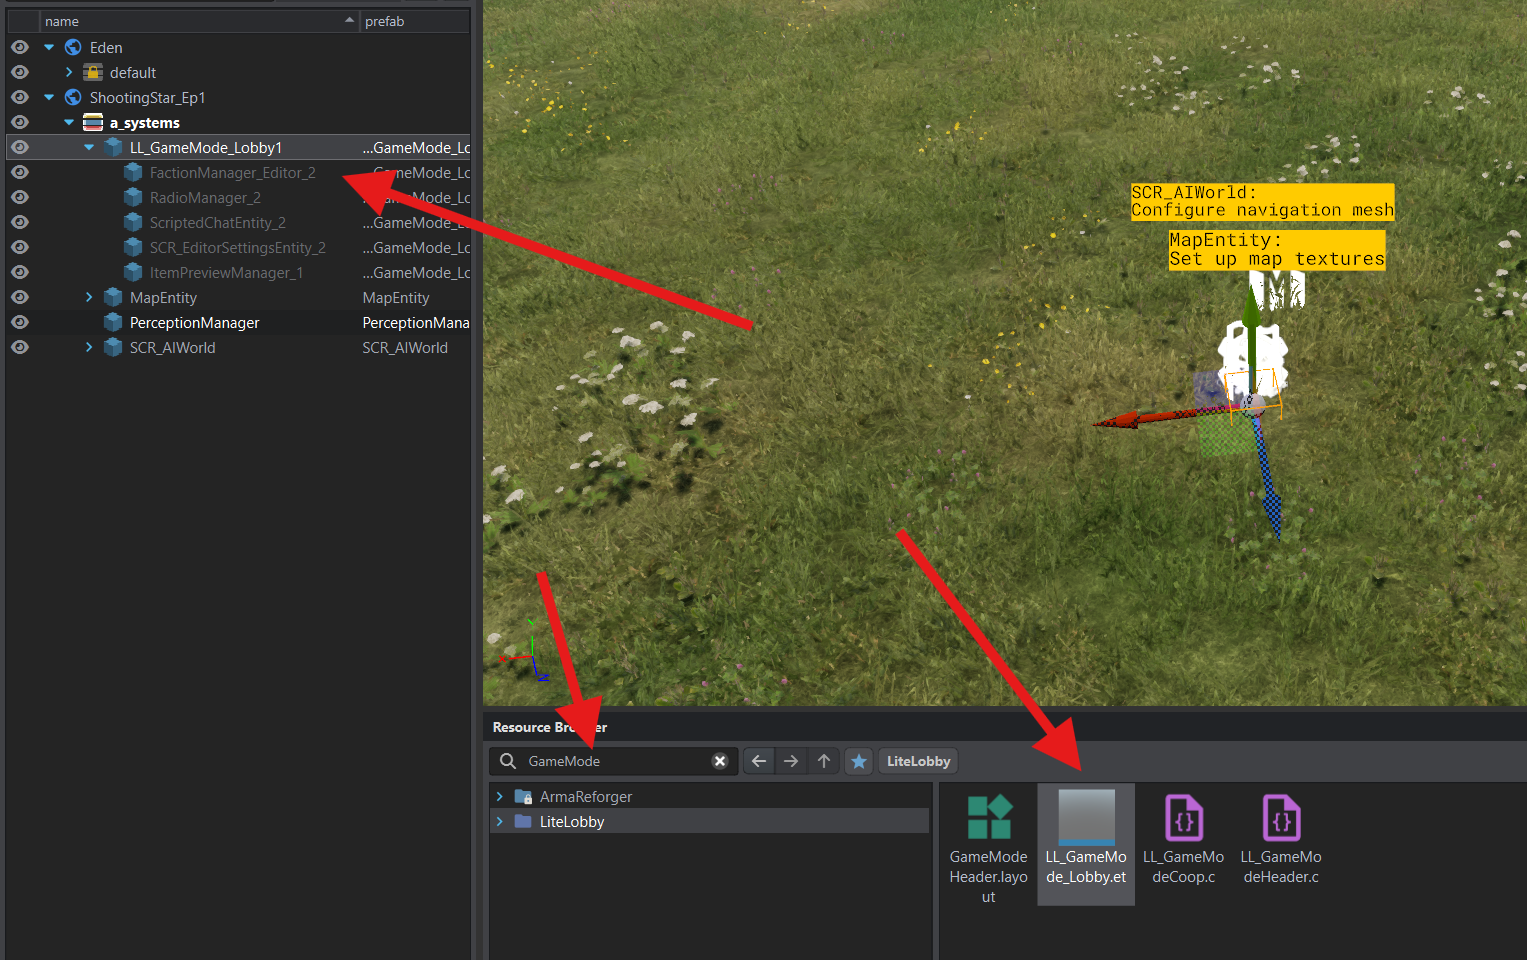
Double-click a_systems to make it the active layer. In Resource Browser, select the LiteLobby project and enter GameMode in the search box. Find LL_GameMode_Lobby.et.
An .et file is a prefab, a ready-made object template with its settings. Drag LL_GameMode_Lobby.et from Resource Browser onto the map in the editor viewport. The Lite Lobby game mode and its child system objects will appear in a_systems.
Press Ctrl+S to save the world.
Mission name and description
Section titled “Mission name and description”In your addon’s Resource Browser, open Missions/ShootingStar_Ep1.conf, created by the setup wizard, and enter your mission’s details:
| Field | What to enter |
|---|---|
| World | Your mission’s world file. The wizard has already set this to ShootingStar_Ep1.ent. |
| Name | The mission name players will see in the scenario list. |
| Author | Your name or nickname. |
| Description | A short description of who takes part in the mission and where it takes place. |
| Player Count | How many players the mission is designed for. The example uses 128. |
Under Save Types, clear all four checkboxes: MANUAL, AUTO, SCRIPTED, and SHUTDOWN. These control progress saves during gameplay.
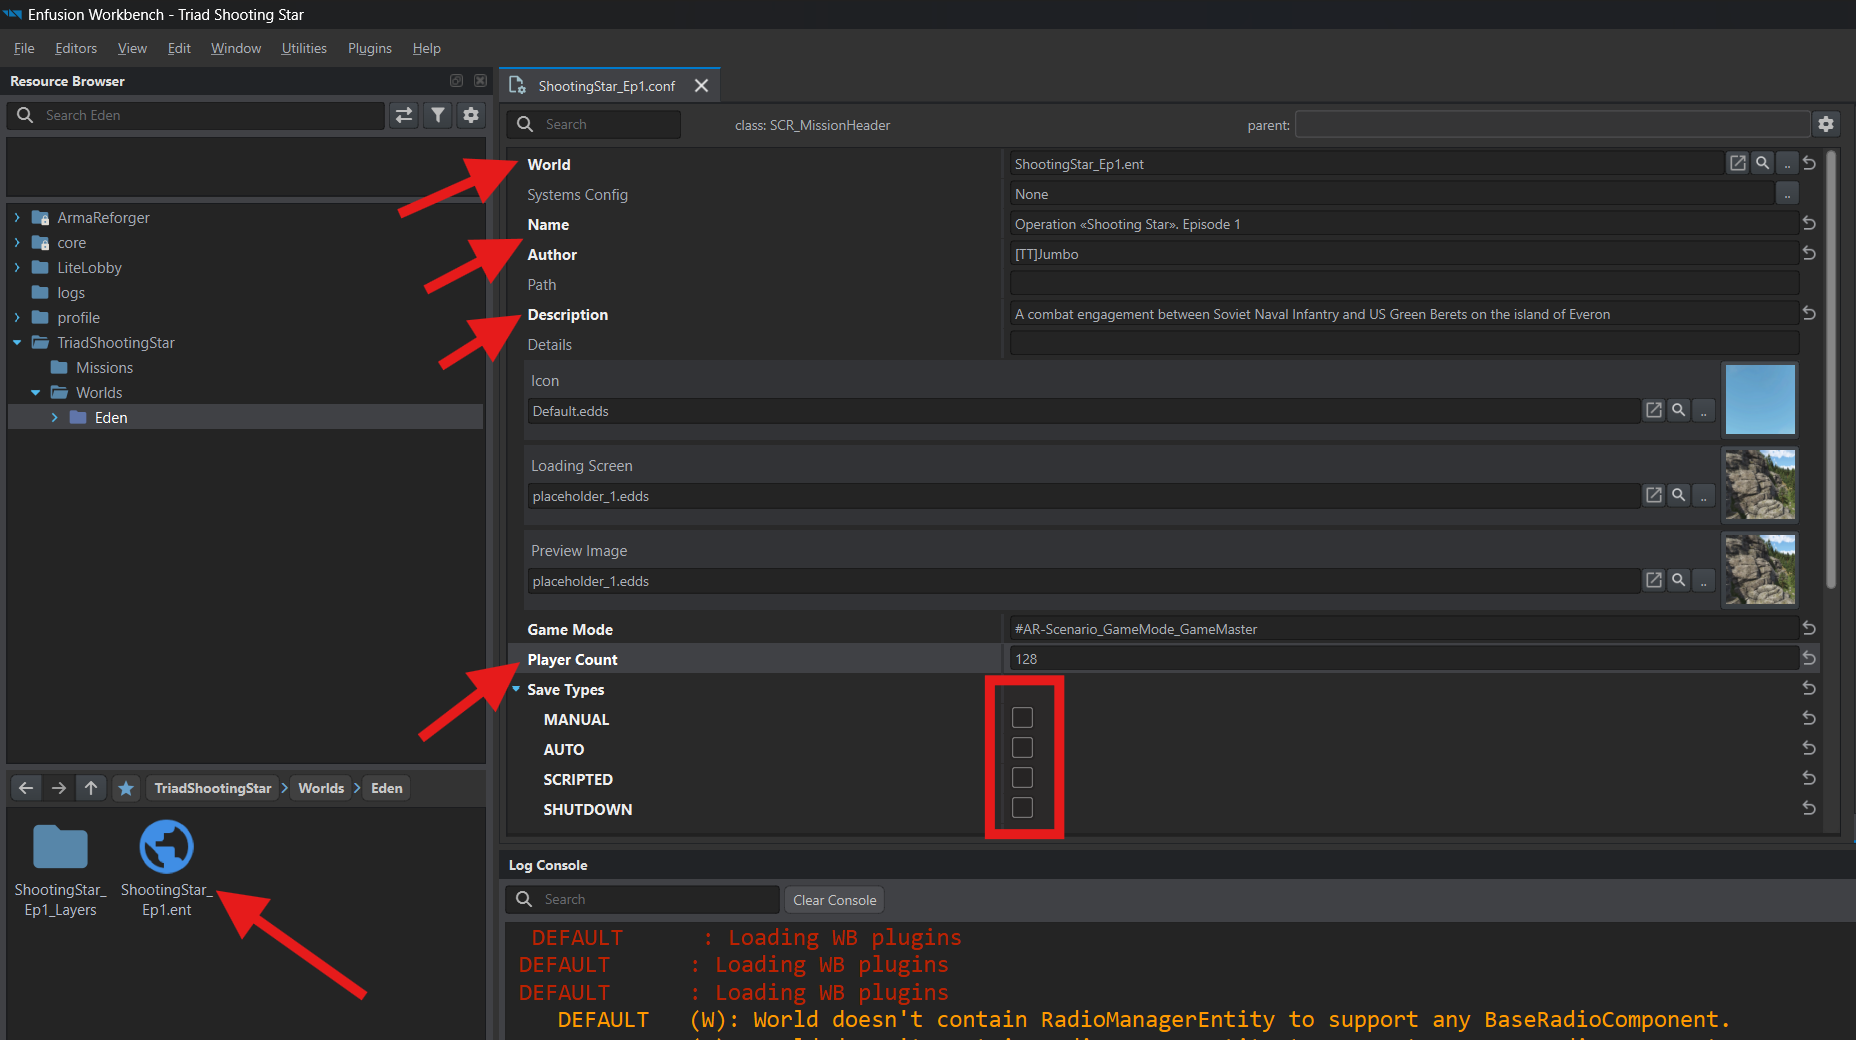
Press Ctrl+S to save the scenario file.
Configure the map
Section titled “Configure the map”MapEntity controls the map players open during the mission. We will assign Everon’s existing map files.
Return to World Editor. In Hierarchy, select MapEntity in a_systems. Object Properties on the right should list SCR_CompassComponent and SCR_WristwatchComponent — the compass and watch. These are usually already present. If either is missing, click Add Component at the bottom of the panel, search for its name, and select it from the list.
Click the top SCR_MapEntity row in Object Properties and expand Unsorted. Click … beside each of the two fields and select the file from the ArmaReforger project:
- Map Geometry Data —
worlds/Eden/Eden.topo. This contains roads, buildings, and other objects displayed on the map. - Satellite background image —
UI/Textures/Map/worlds/EveronRasterized.edds. This provides the map background with terrain relief and forests.
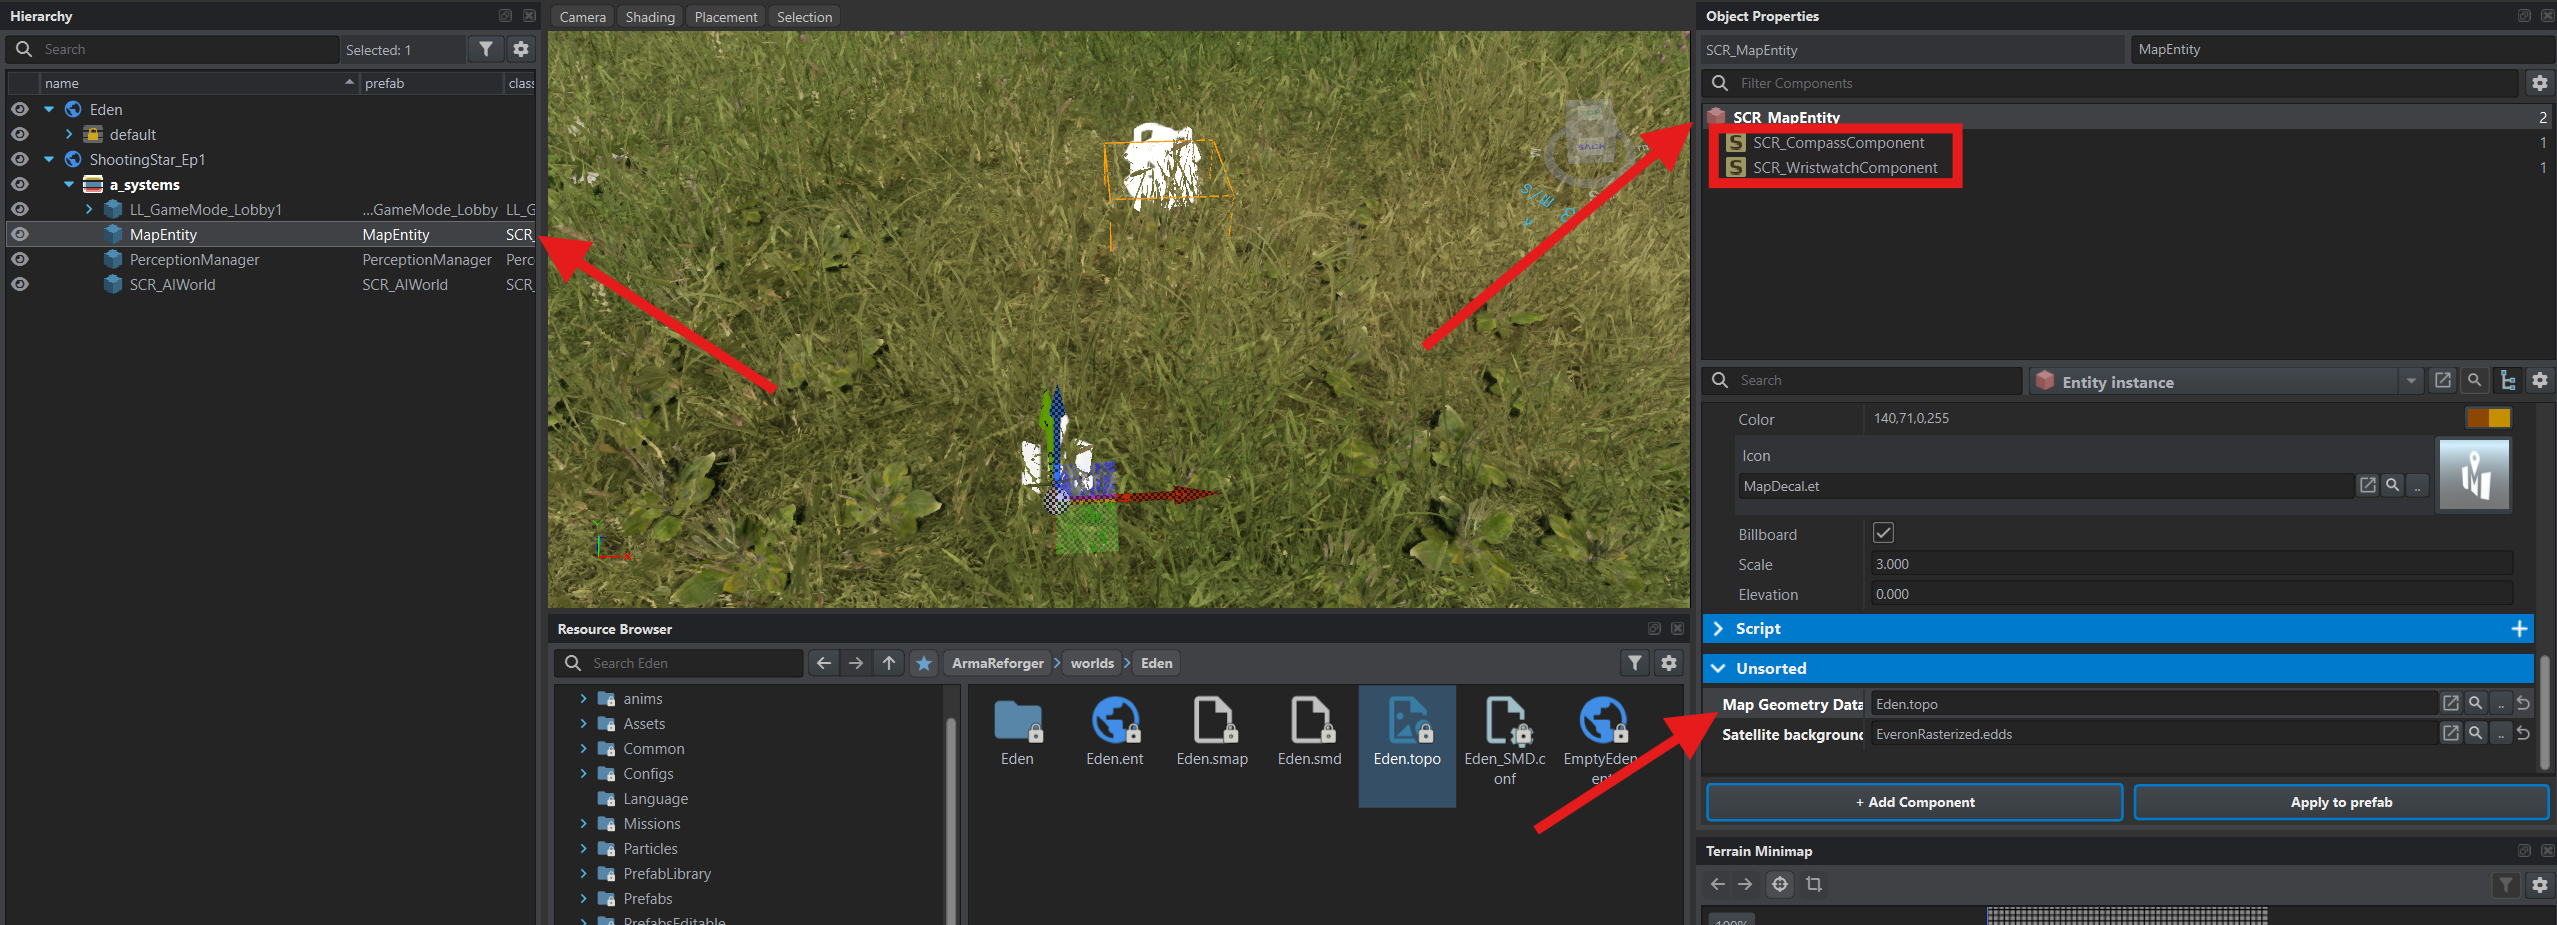
Press Ctrl+S to save the settings.
The mission world is prepared. Next, create the base character for the soldiers in the unit.