1. Prepare the project
Create an addon for UF Shooting Star — an addition to the game that stores the mission world, characters and settings.
Preparation
Section titled “Preparation”To create a mission, you will need:
- Arma Reforger.
- Arma Reforger Tools — the Workbench editor.
- Lite Lobby, installed from Workshop.
Official Bohemia Interactive instructions for setting up Workbench.
Create the project in Workbench
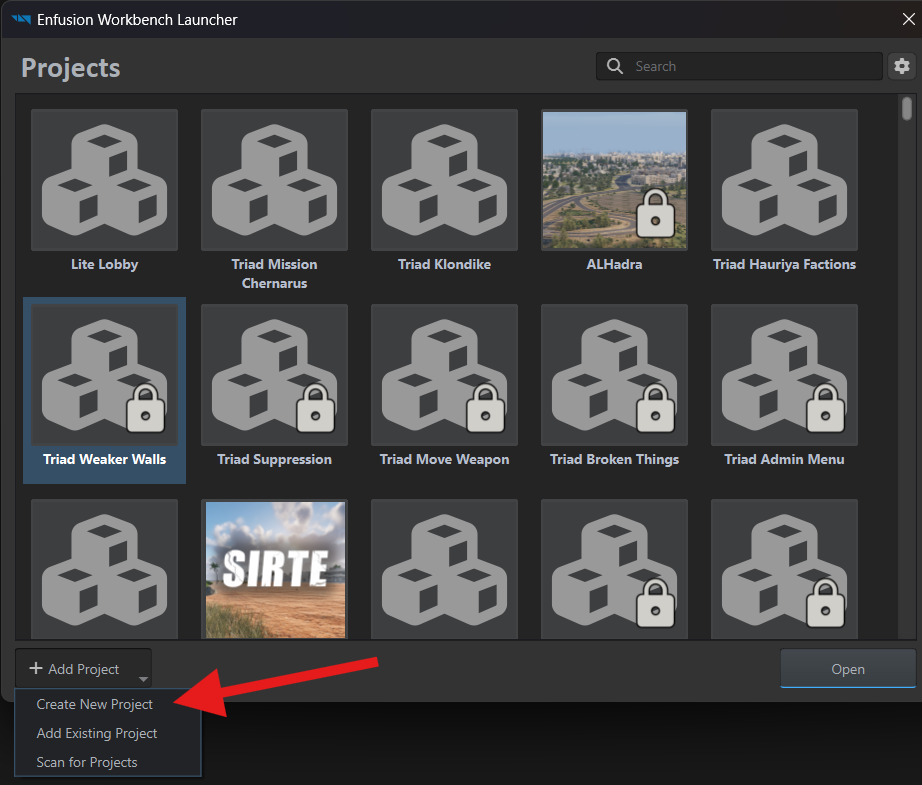
Section titled “Create the project in Workbench”Launch Arma Reforger Tools. In Enfusion Workbench Launcher, open Add Project and select Create New Project.
In the New Project window, enter your project’s name in Project Name. Our example uses UF Shooting Star.
In Location, choose the parent folder where Workbench will create the new addon folder.
If you use Git, select the repository folder — the folder that holds your project and its change history. We recommend keeping the repository under Documents\My Games\ArmaReforgerWorkbench\addons. In our example, it is named uf-shooting-star-ar. If repositories are new to you, start with Git and Arma Reforger.
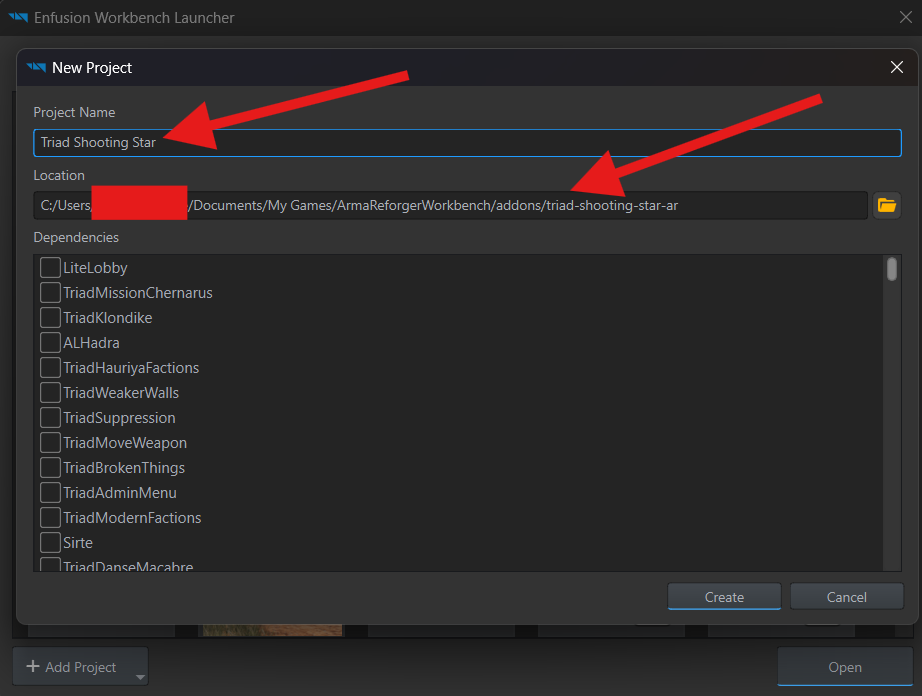
Click Create. Workbench automatically creates a UF Shooting Star folder inside the selected folder, using the Project Name value.
Project folder
Section titled “Project folder”The addon folder contains the project file, addon.gproj:
uf-shooting-star-ar/└── UF Shooting Star/ └── addon.gproj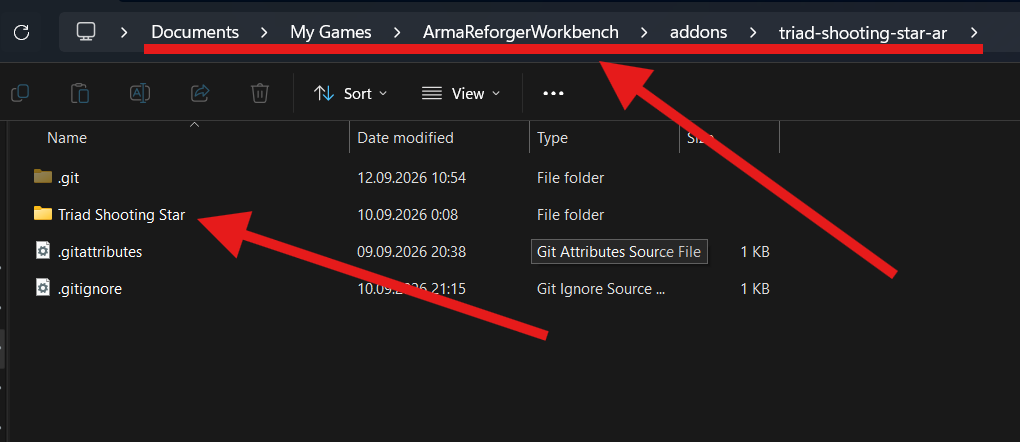
The .git folder stores the repository’s change history and sits alongside the addon folder.
Add Lite Lobby
Section titled “Add Lite Lobby”Add Lite Lobby to the project’s dependencies — the addons our mission needs.
In Workbench, open File → Project Settings.
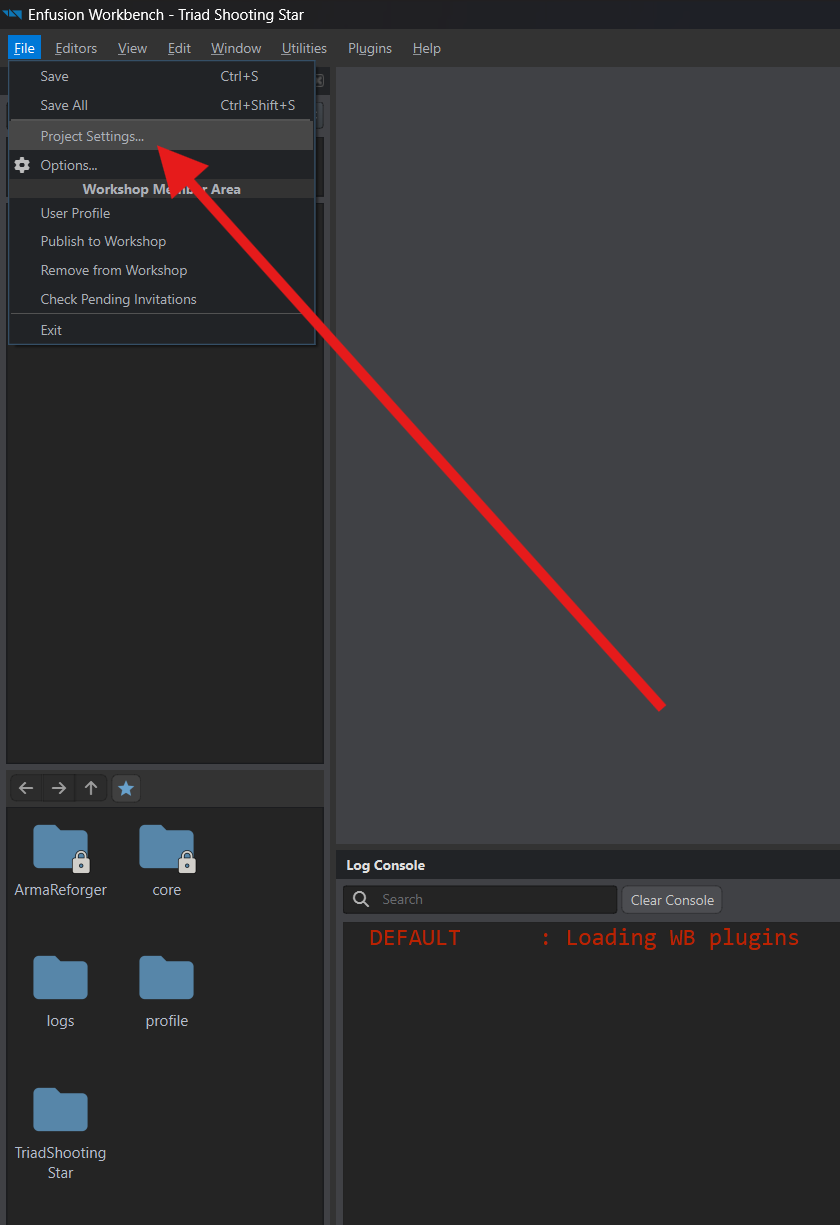
- In Dependencies, click
+. - Click the
…button in the new row. - Open the Workshop-installed mod’s folder:
Documents\My Games\ArmaReforger\addons\LiteLobby_699319AAA5BFC57F. - Select the project file with the
.gprojextension inside it and click Open.
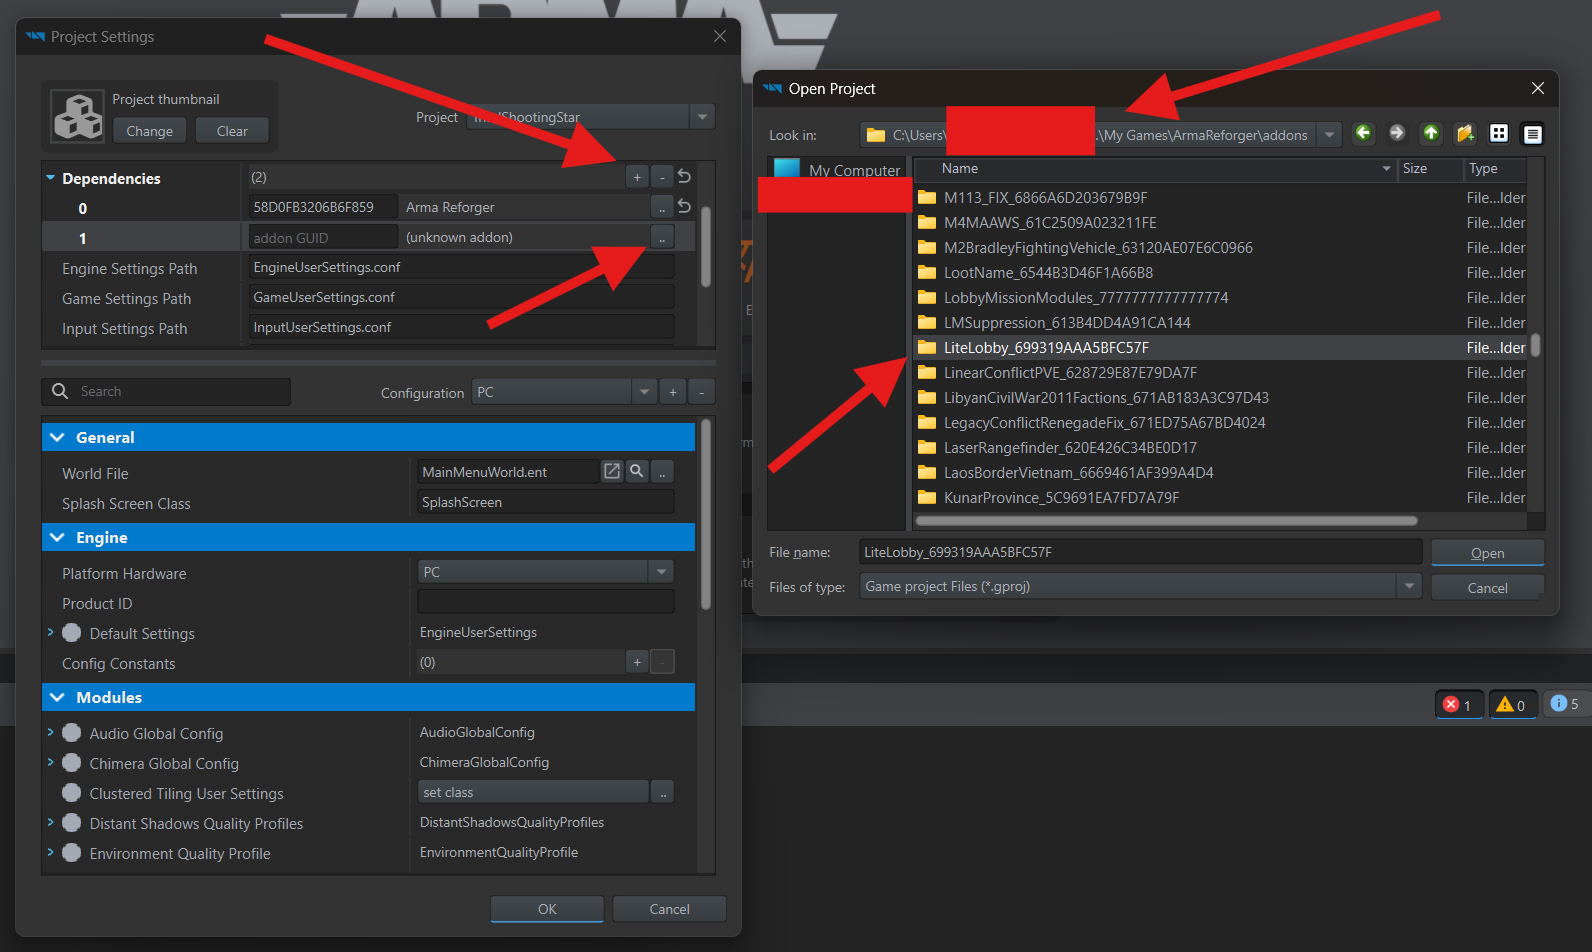
Click OK to save the settings, then close Workbench.
Reopen your mission project. The Resource Browser should now show a LiteLobby folder with its files available for use.
If Workbench cannot find an addon
Section titled “If Workbench cannot find an addon”After restarting, you may see Missing Addon Dependencies. This means Lite Lobby or another required addon is not installed, or the Launcher has not found it on your computer yet.
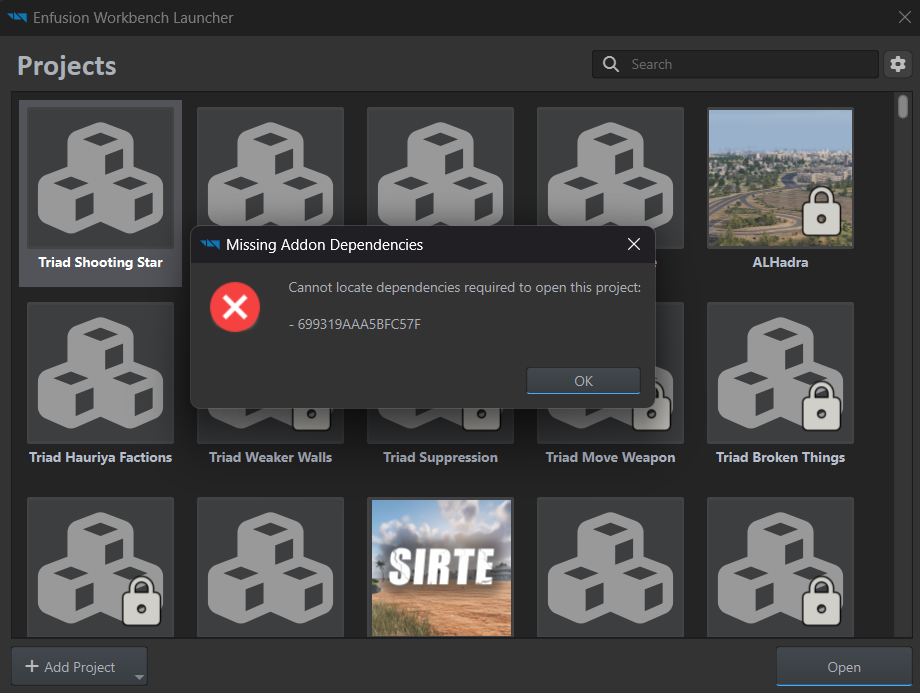
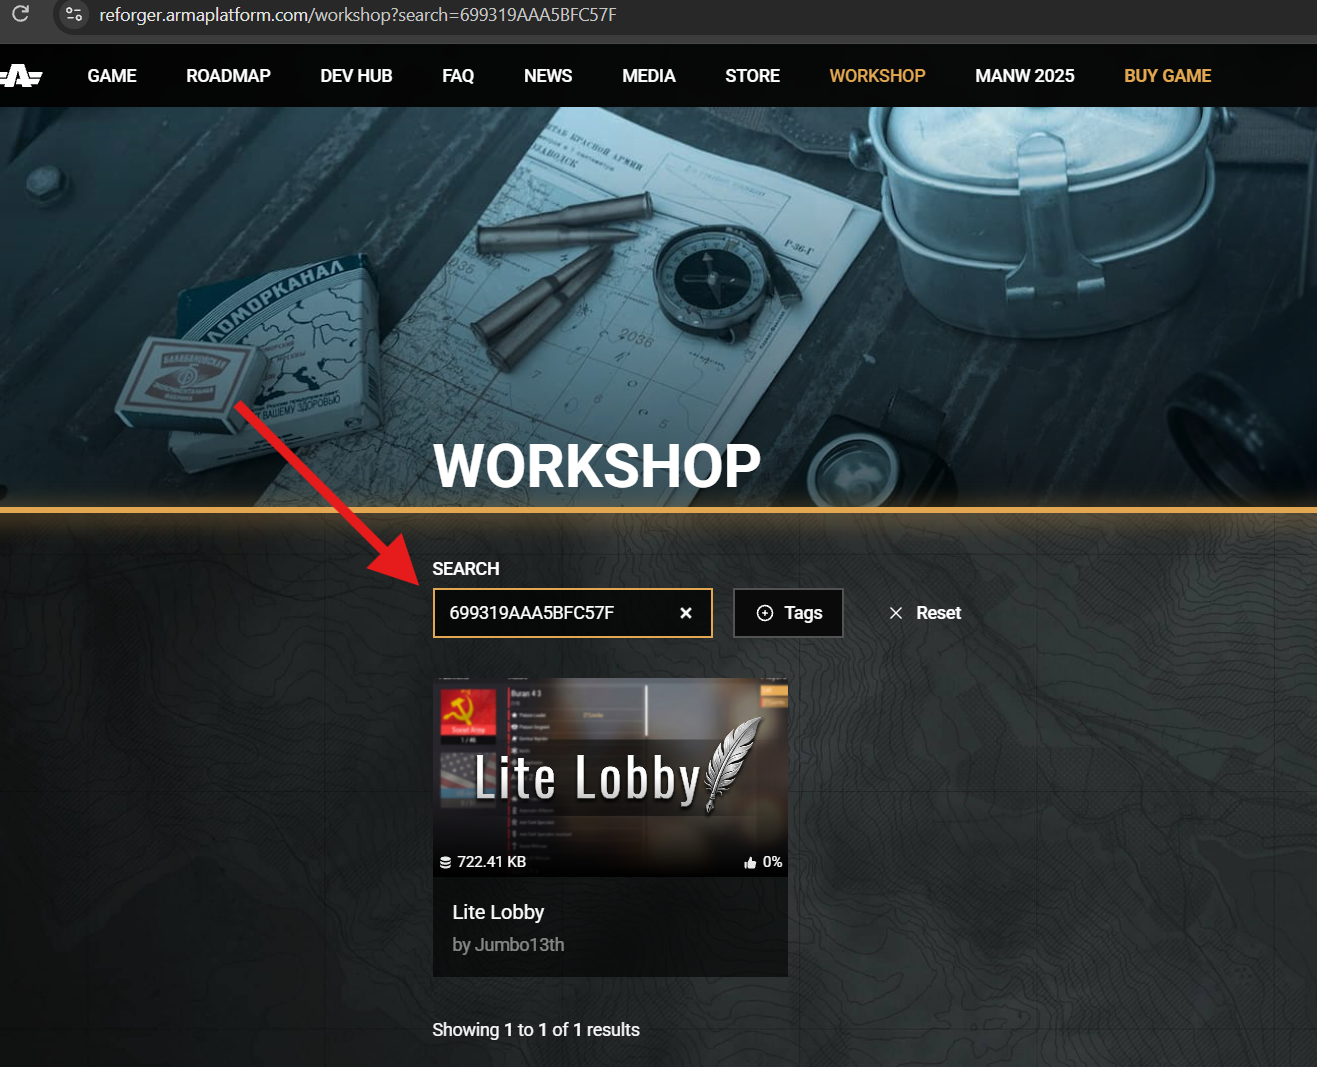
The code in the message is the addon’s GUID, its identifier. If you do not recognize it, enter it in the search on the Workshop website. In this example, 699319AAA5BFC57F identifies Lite Lobby.
If the addon is not installed, launch Arma Reforger and download it through the in-game Workshop. Then choose Add Project → Scan for Projects in the Launcher. If it is already installed, start with the scan.
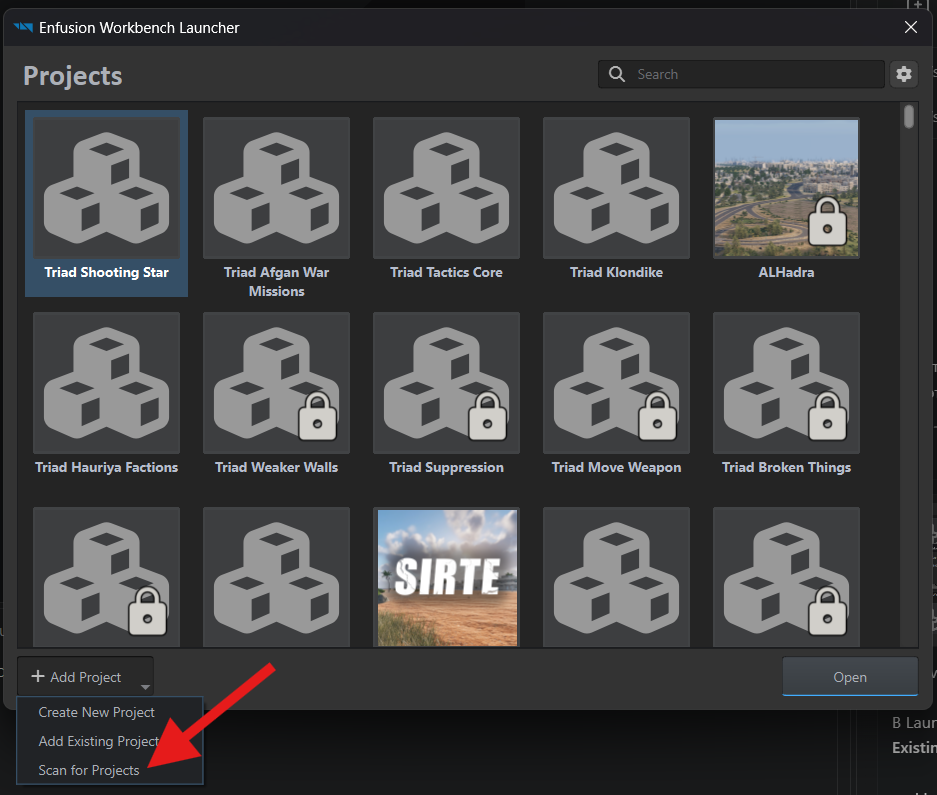
Select your installed addons folder — usually Documents\My Games\ArmaReforger\addons — and click Select Folder.
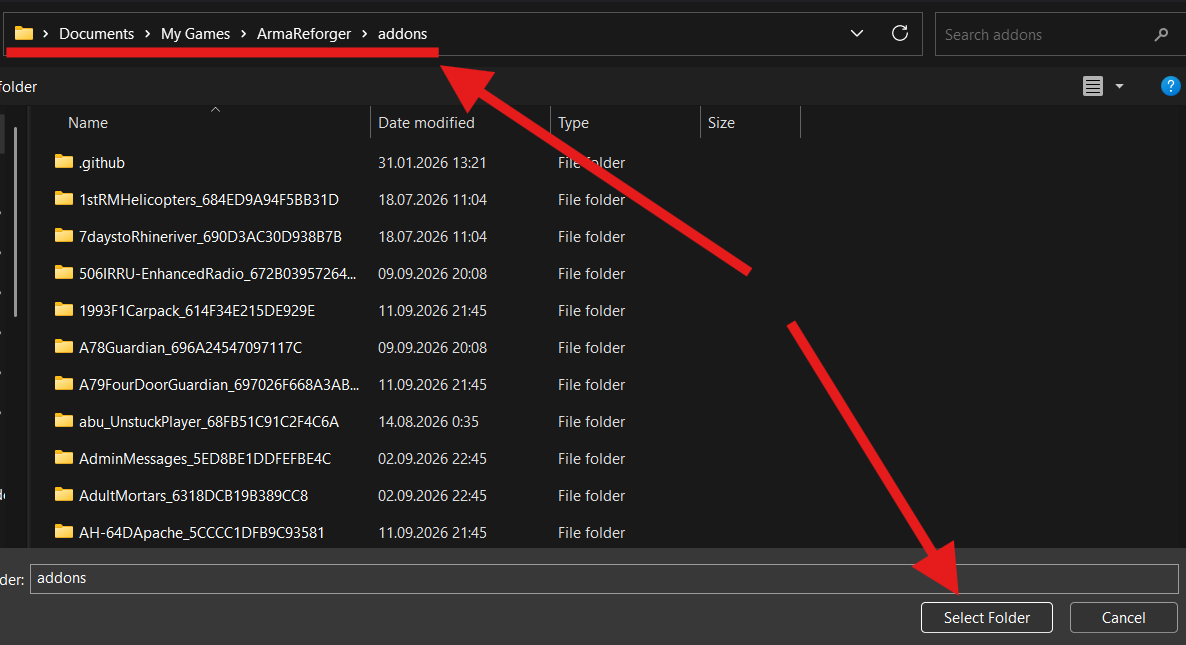
After scanning, reopen your mission project.
The project is created and Lite Lobby is connected. Next, create the mission world.