3. The base character
The mission world is ready. Next, create characters for the Green Beret unit in the UF Shooting Star addon, using the US faction already included in the game. See the optional reference for choosing a unit and its equipment.
A character prefab is a soldier template containing appearance, equipment, and other settings. It is stored in an .et file. First, prepare the shared BaseLoadout prefab with a uniform and personal items. Characters with different weapons will later inherit from it.
Names and folders
Section titled “Names and folders”Add an addon prefix to your prefab names — a short identifier at the start of the filename. The mission addon we are creating characters for in this guide is called UF Shooting Star. Its initials give us TSS_. Choose an abbreviation for your own addon: for example, Desert Storm → DS_. This makes it clear which addon a file belongs to.
Follow the game’s names: for example, Character_US_Rifleman.et → TSS_Character_US_Rifleman.et. Preserve capitalization, underscores, and the order of the name’s parts. Use your chosen prefix for all your prefabs.
Follow the game’s folder structure inside your addon. For example, US Army prefabs are in Prefabs/Characters/Factions/BLUFOR/US_Army. Place your variants in the same folder structure so they are easy to find and compare with the originals.
Create a base prefab
Section titled “Create a base prefab”Create a child of the game’s Character_US_Base.et: a new prefab that inherits its settings. We will change the uniform and equipment in this child.
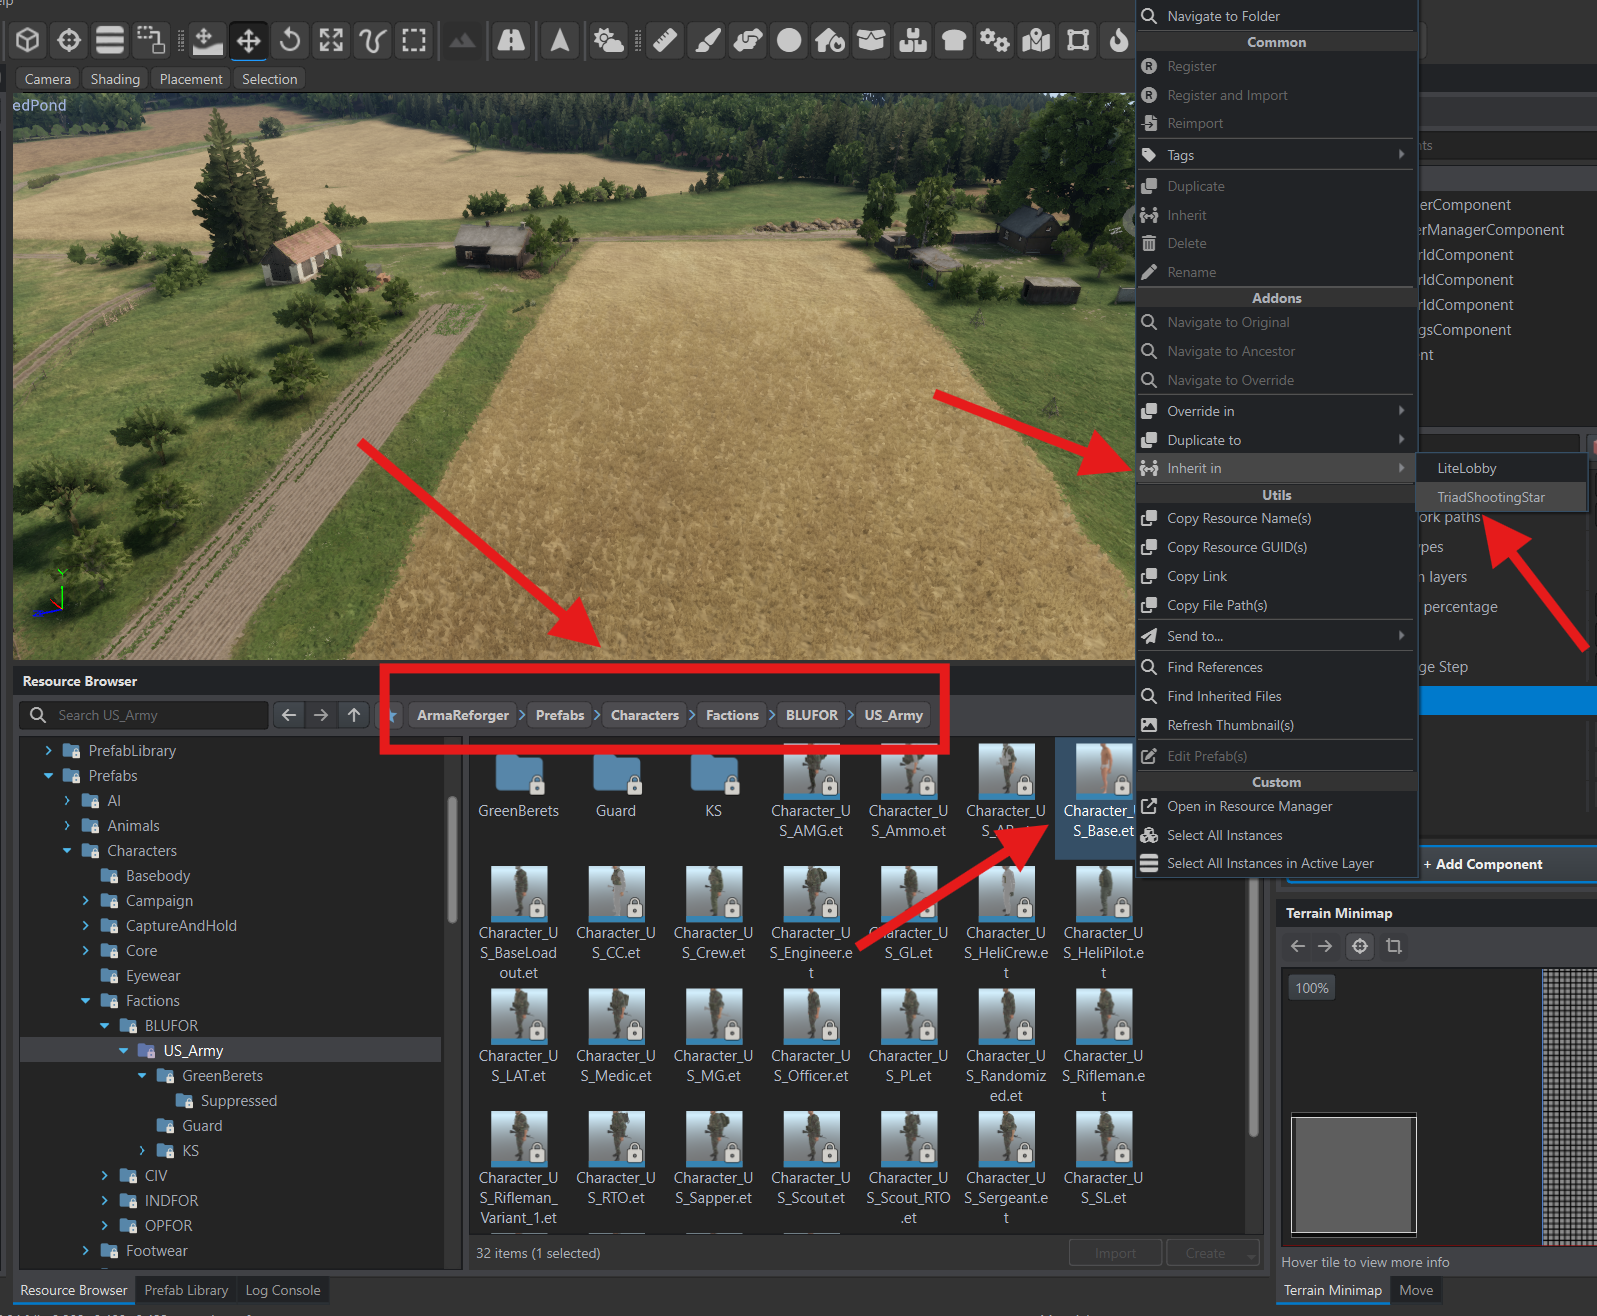
In World Editor, use the Resource Browser panel to open the ArmaReforger project and navigate to Prefabs/Characters/Factions/BLUFOR/US_Army. Right-click Character_US_Base.et and select Inherit in → your addon. The screenshot uses UFShootingStar.
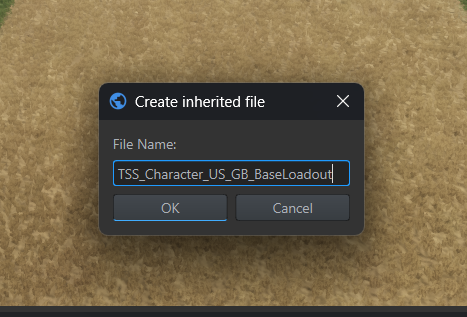
In Create inherited file, enter TSS_Character_US_GB_BaseLoadout in File Name and click OK. Replace TSS_ with your chosen addon prefix. Here, GB means Green Berets and BaseLoadout means the base equipment setup.
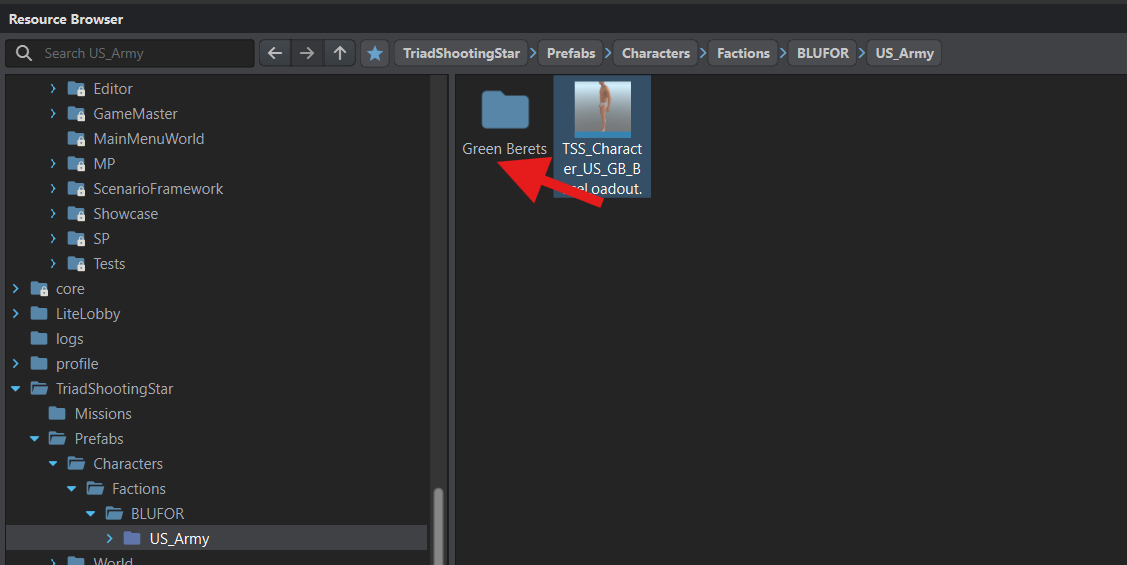
Workbench will create TSS_Character_US_GB_BaseLoadout.et in your addon under Prefabs/Characters/Factions/BLUFOR/US_Army. It recreates the folder structure automatically.
Unit folder
Section titled “Unit folder”In Resource Browser, open Prefabs/Characters/Factions/BLUFOR/US_Army in your addon. Right-click an empty area in the file list, choose the option to create a folder, and name it Green Berets. We will keep this unit’s prefabs here.
Drag TSS_Character_US_GB_BaseLoadout.et into Green Berets, then open the folder.
The character’s uniform
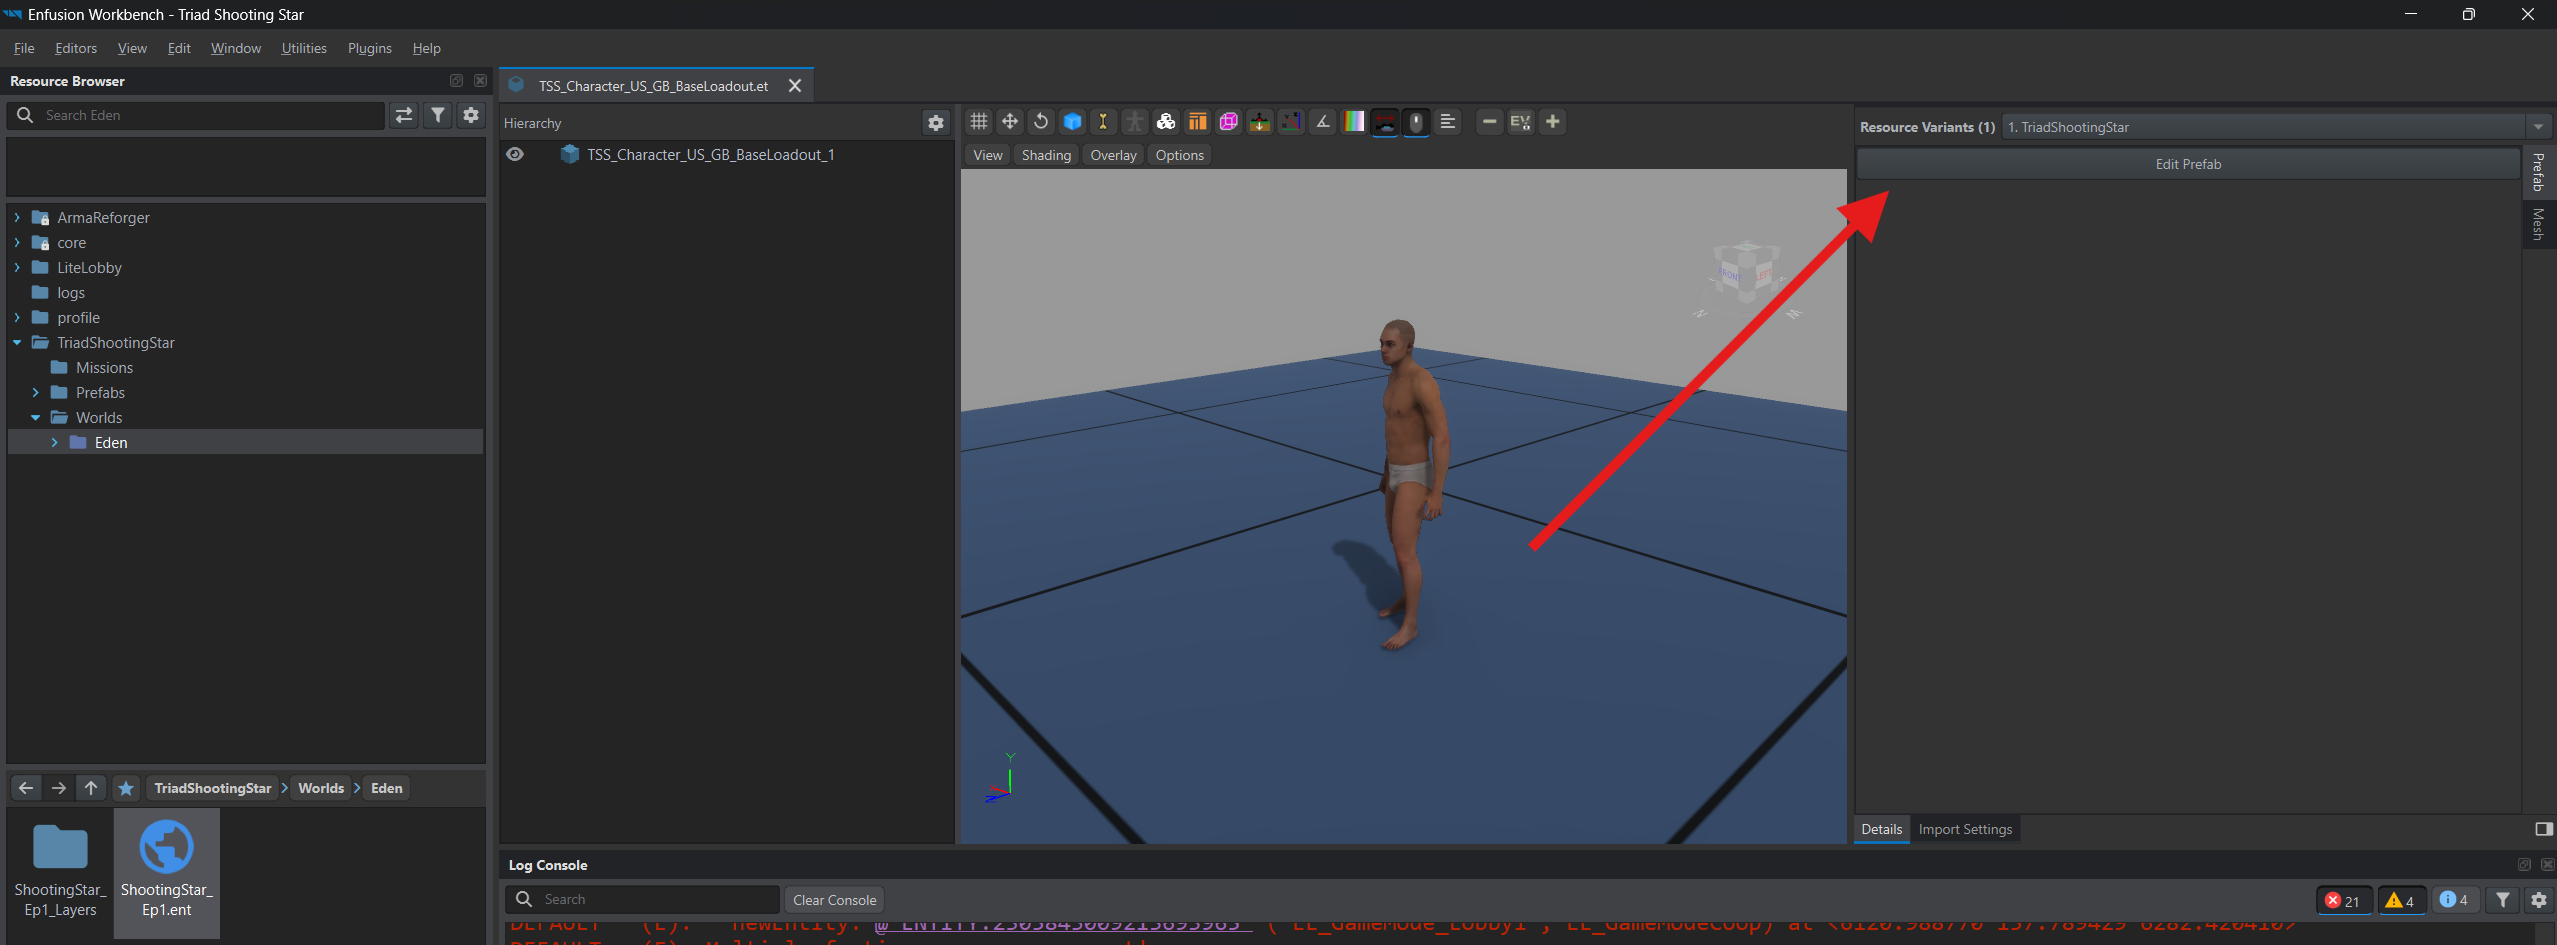
Section titled “The character’s uniform”Double-click TSS_Character_US_GB_BaseLoadout.et in Resource Browser. In the window that opens, click Edit Prefab on the right. This opens World Editor in prefab edit mode.
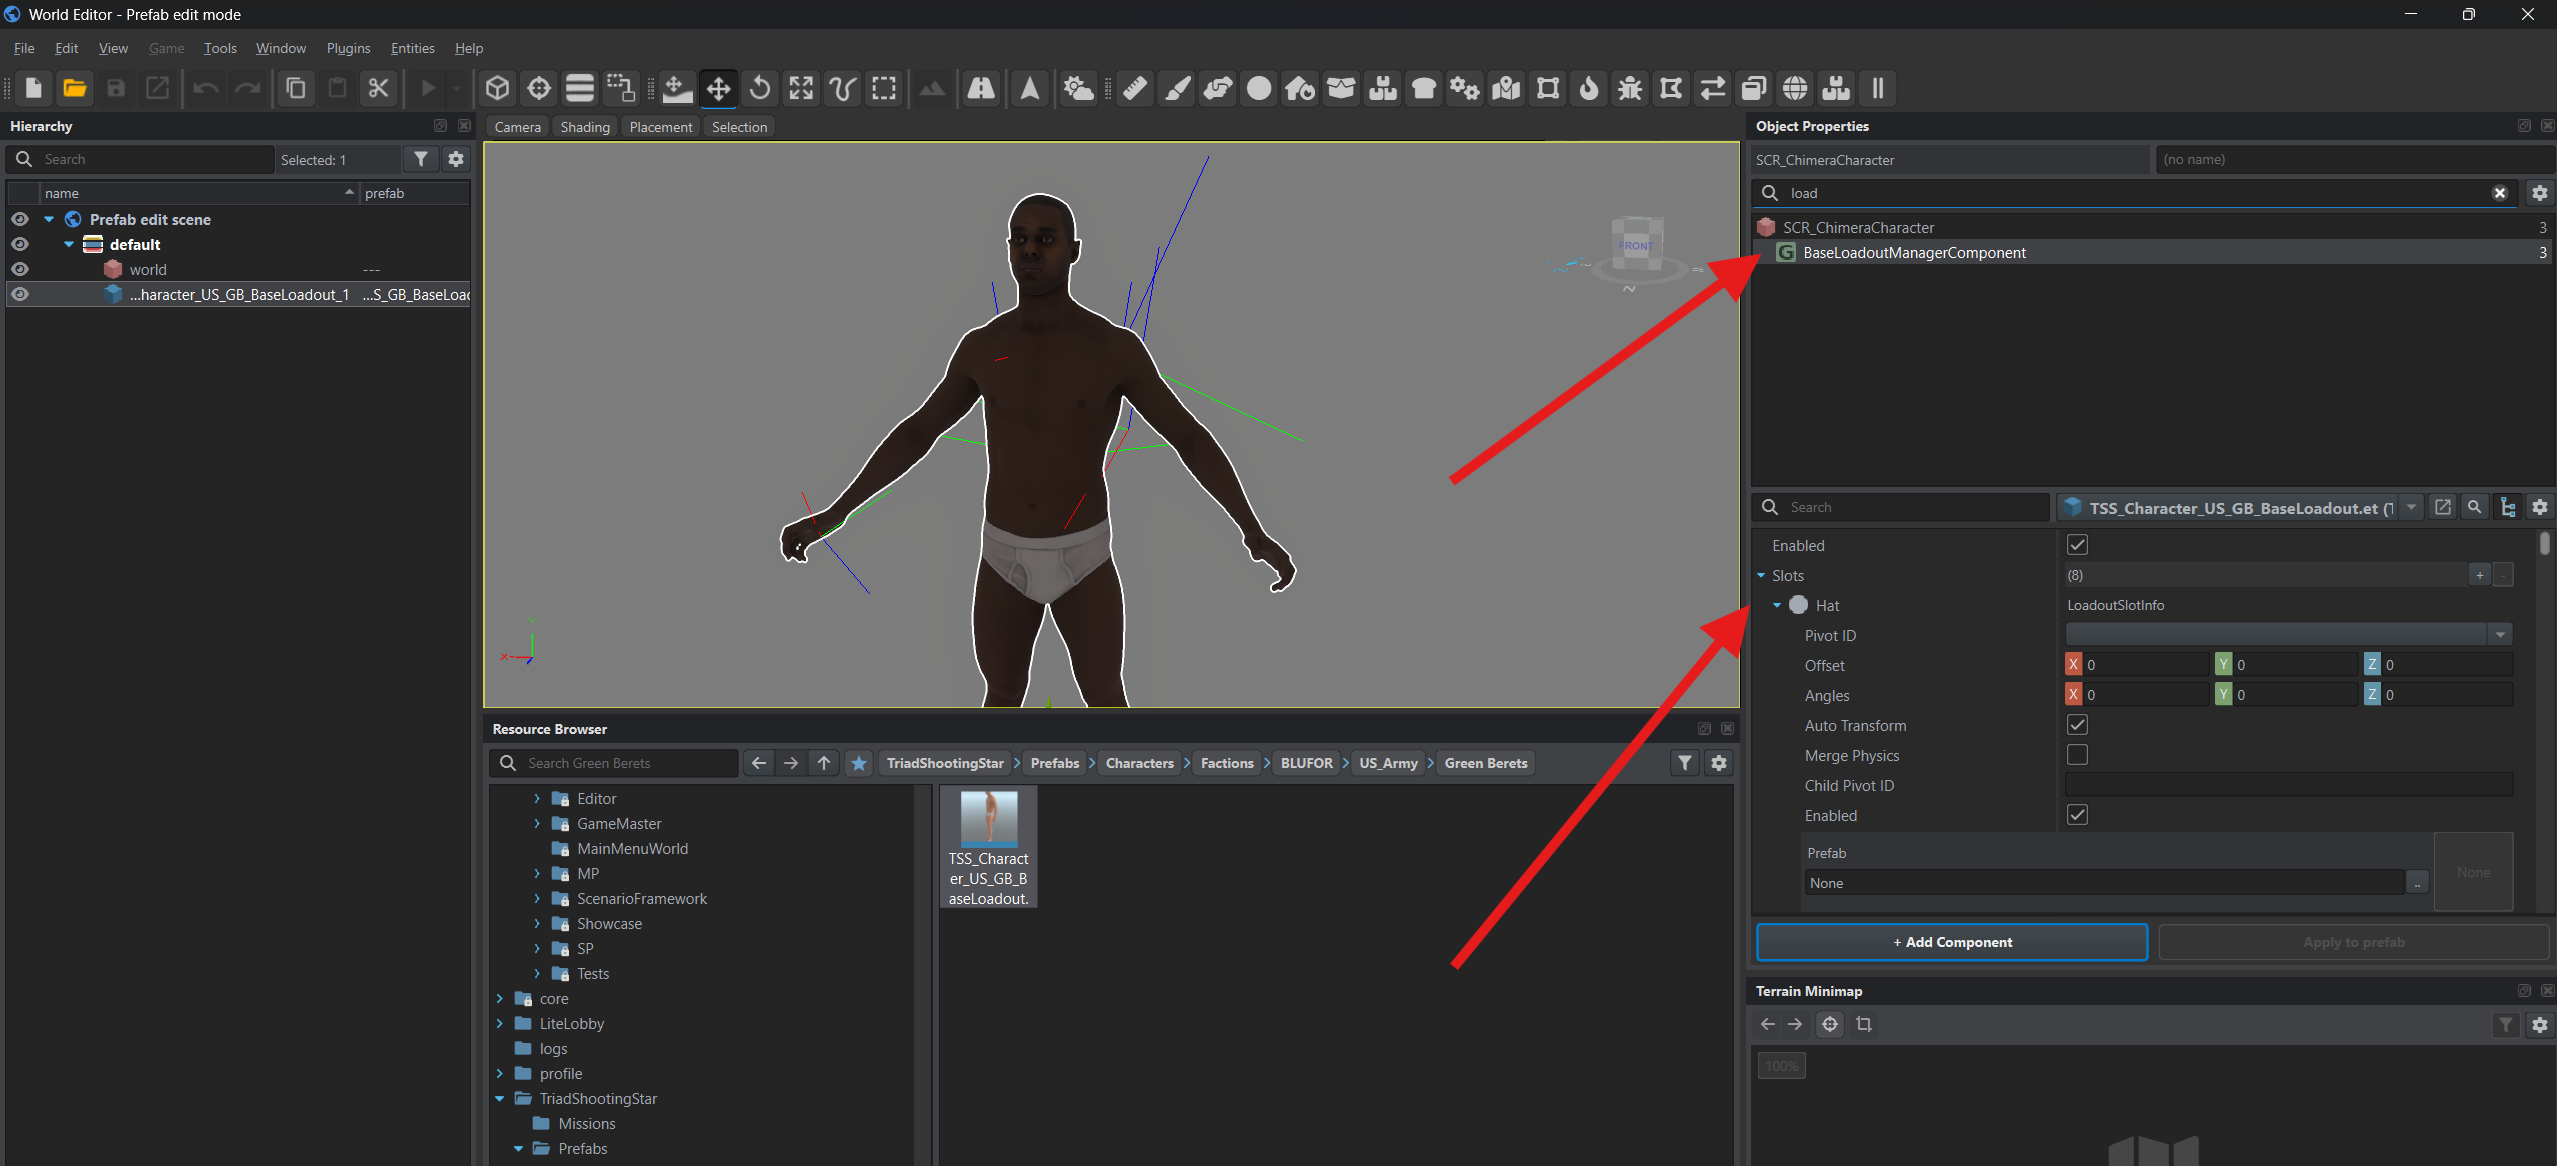
Select the character in Hierarchy. Type load in the component search field in Object Properties, then select BaseLoadoutManagerComponent. This component controls what the character wears.
Expand Slots — the places for individual pieces of equipment. Start with Hat, the headgear slot.
Headgear and jacket
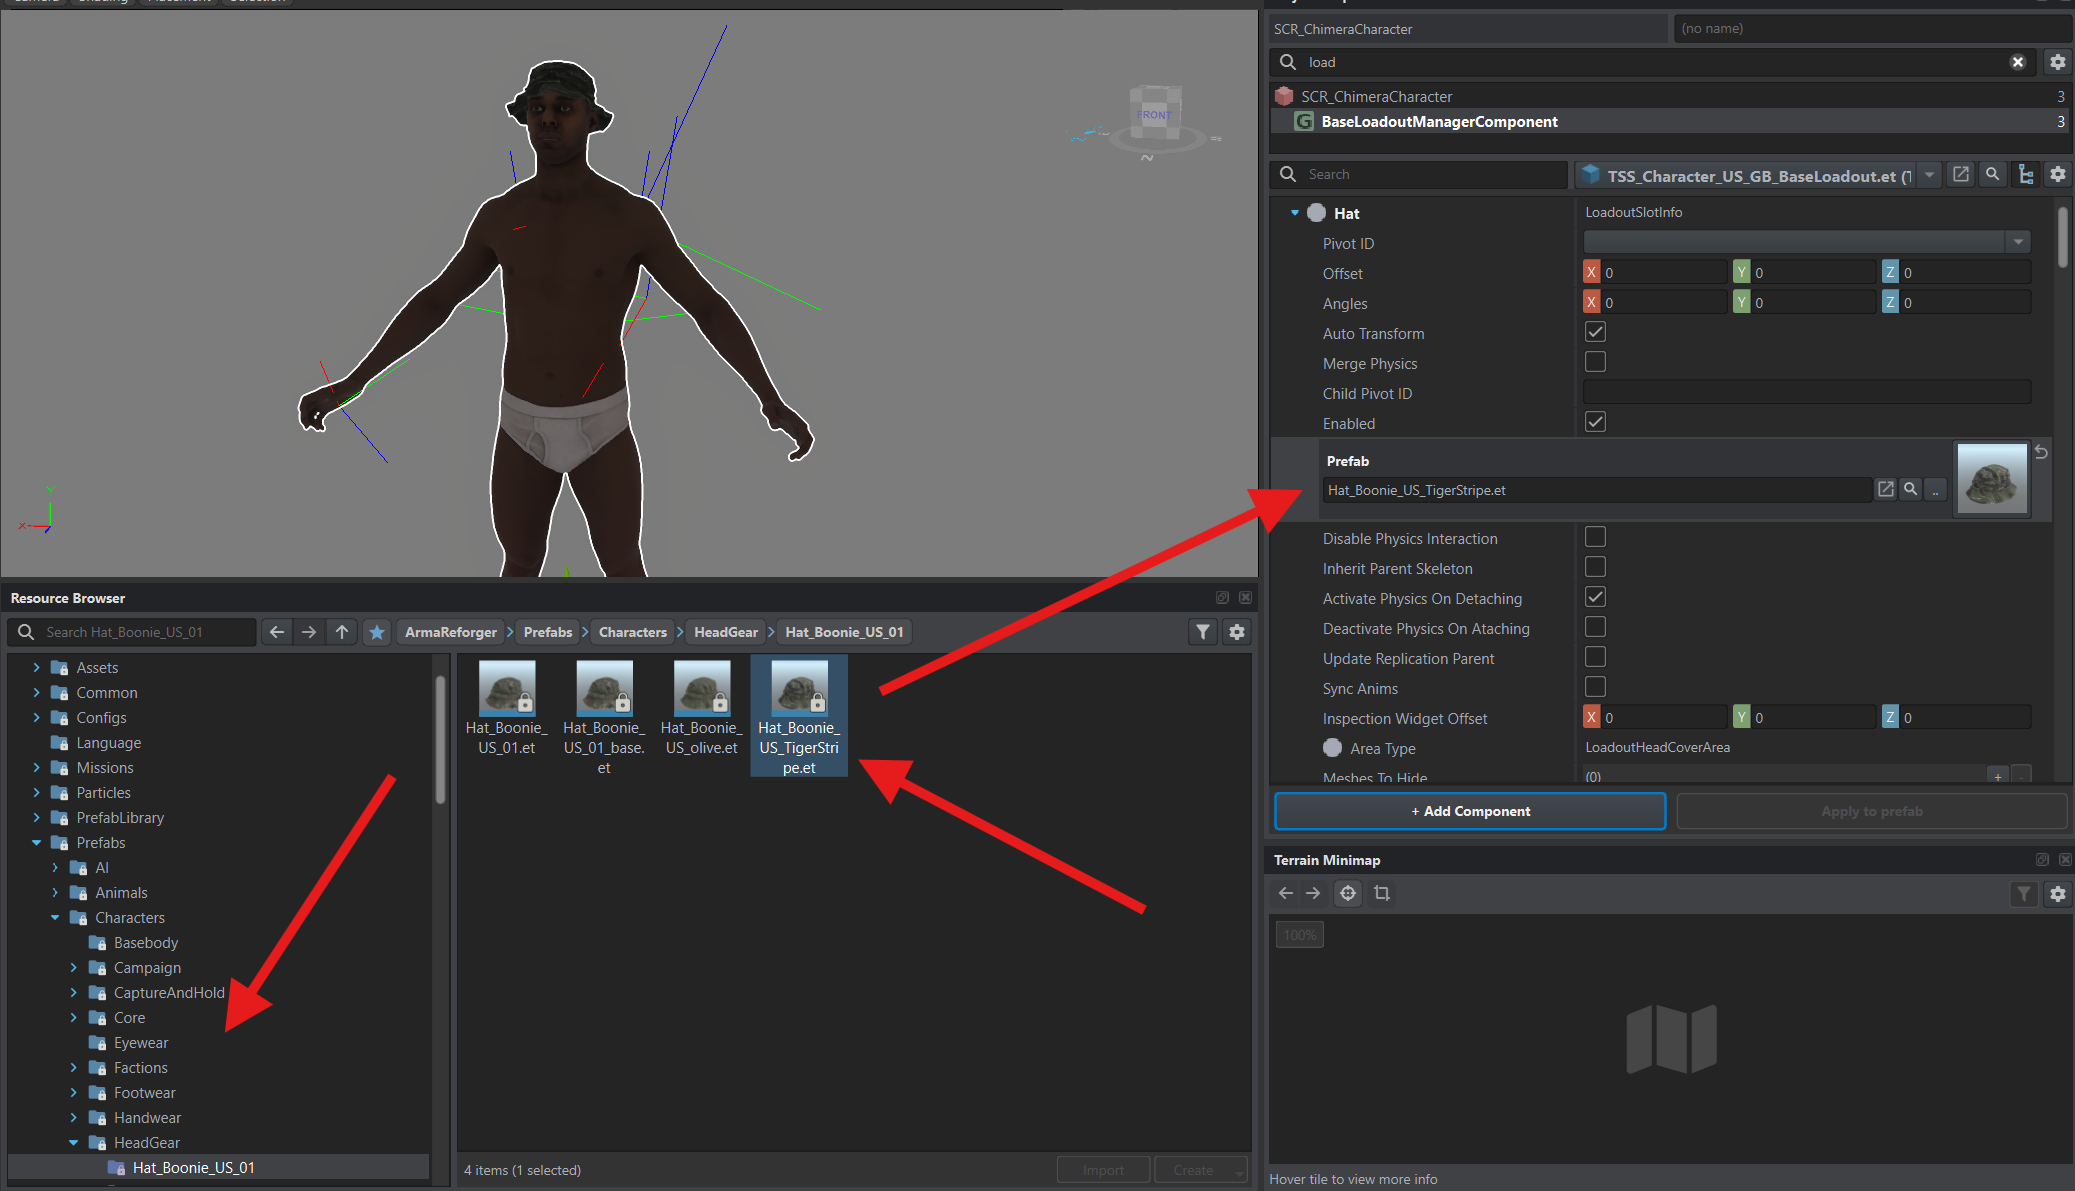
Section titled “Headgear and jacket”In Resource Browser, open Prefabs/Characters/HeadGear/Hat_Boonie_US_01 in the ArmaReforger project. Drag Hat_Boonie_US_TigerStripe.et into the Prefab field of the Hat slot. The boonie hat will appear on the character.
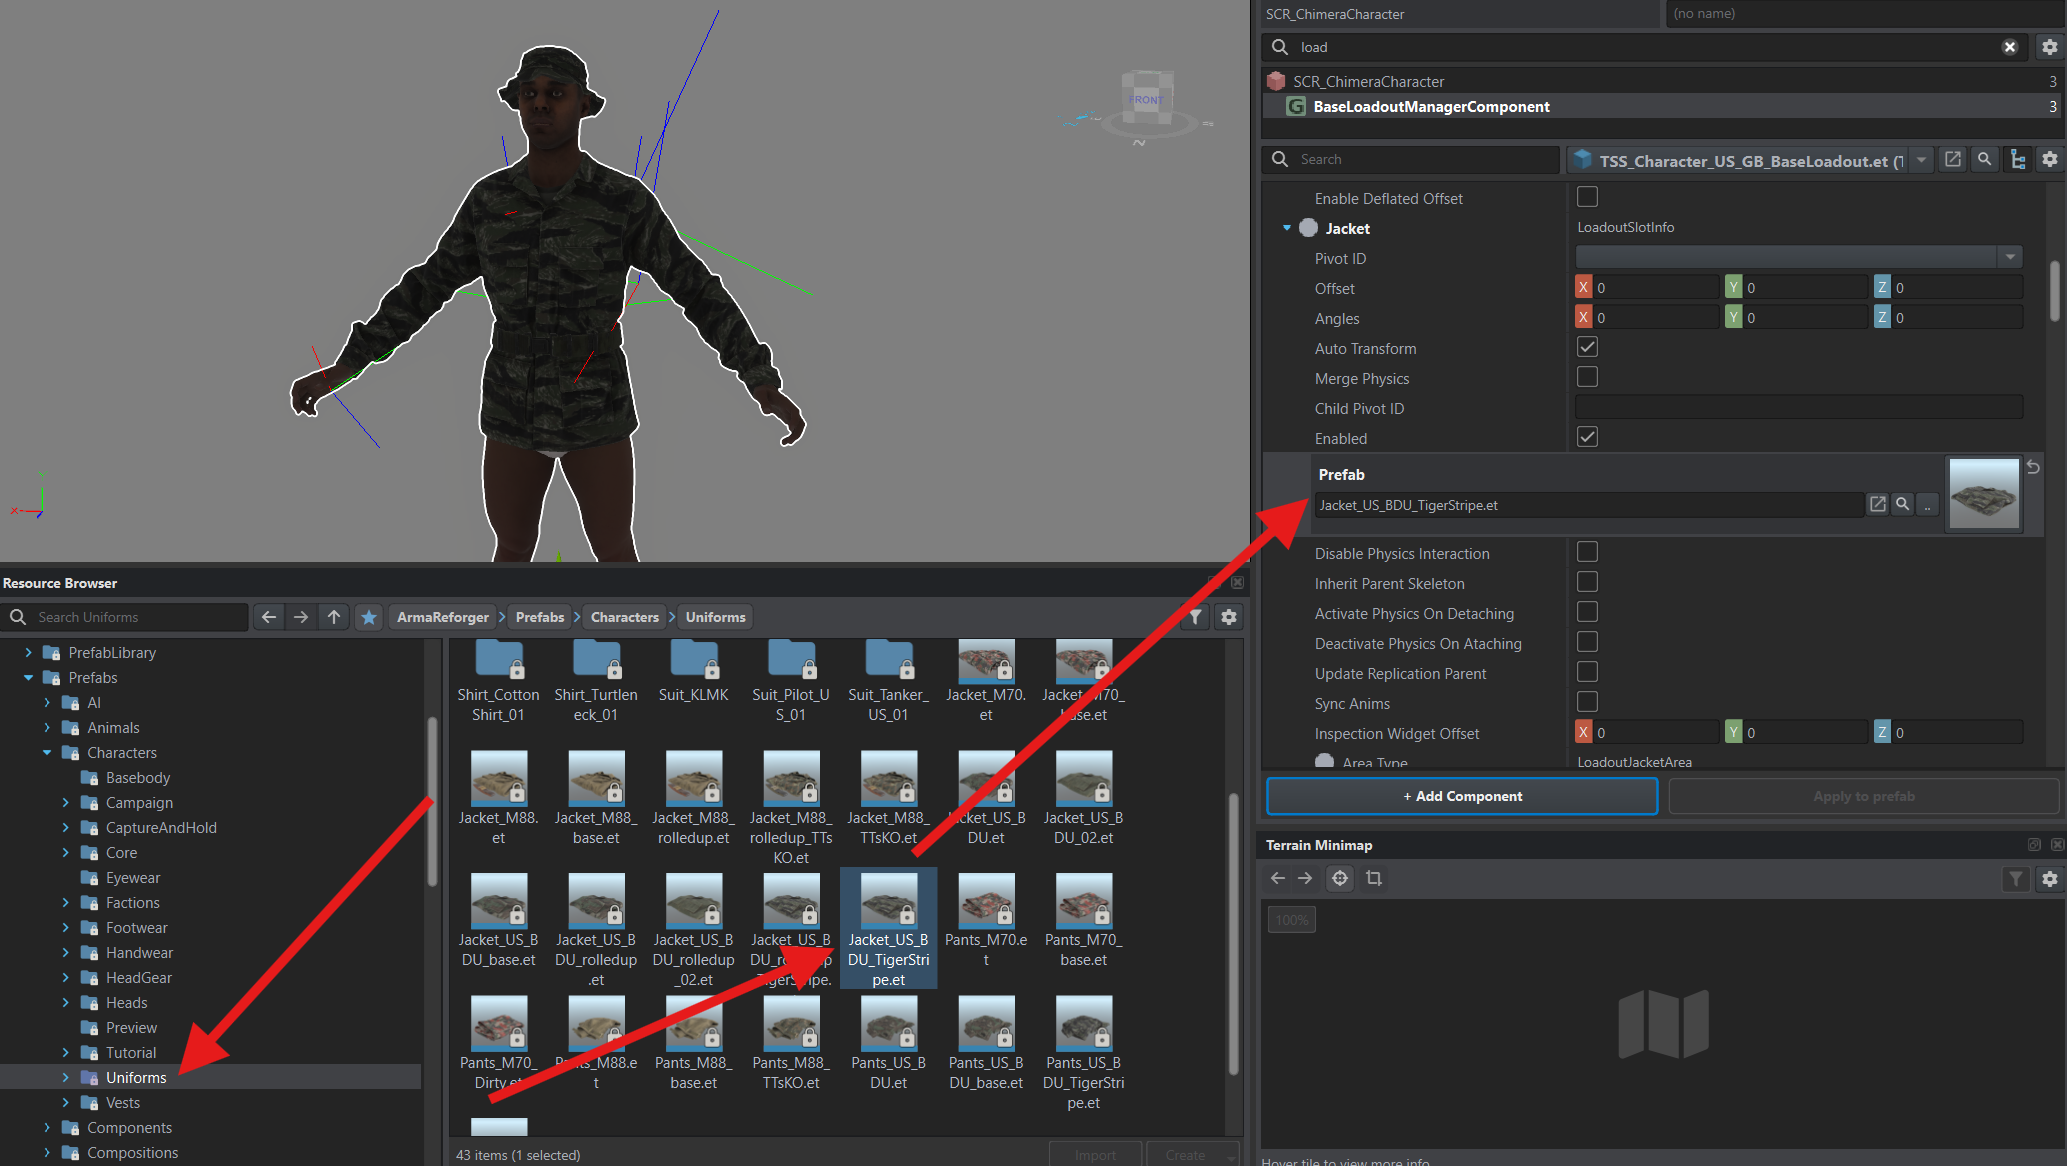
Expand the Jacket slot. Find Jacket_US_BDU_TigerStripe.et in Prefabs/Characters/Uniforms and drag it into this slot’s Prefab field.
Trousers, boots, and backpack
Section titled “Trousers, boots, and backpack”Fill the Prefab field in three more slots the same way. All files are in the ArmaReforger project:
| Slot | Folder | File |
|---|---|---|
| Pants — trousers | Prefabs/Characters/Uniforms | Pants_US_BDU.et |
| Boots | Prefabs/Characters/Footwear | CombatBoots_US_01.et |
| Back — backpack | Prefabs/Items/Equipment/Backpacks | Backpack_ALICE_Medium_assembled.et |
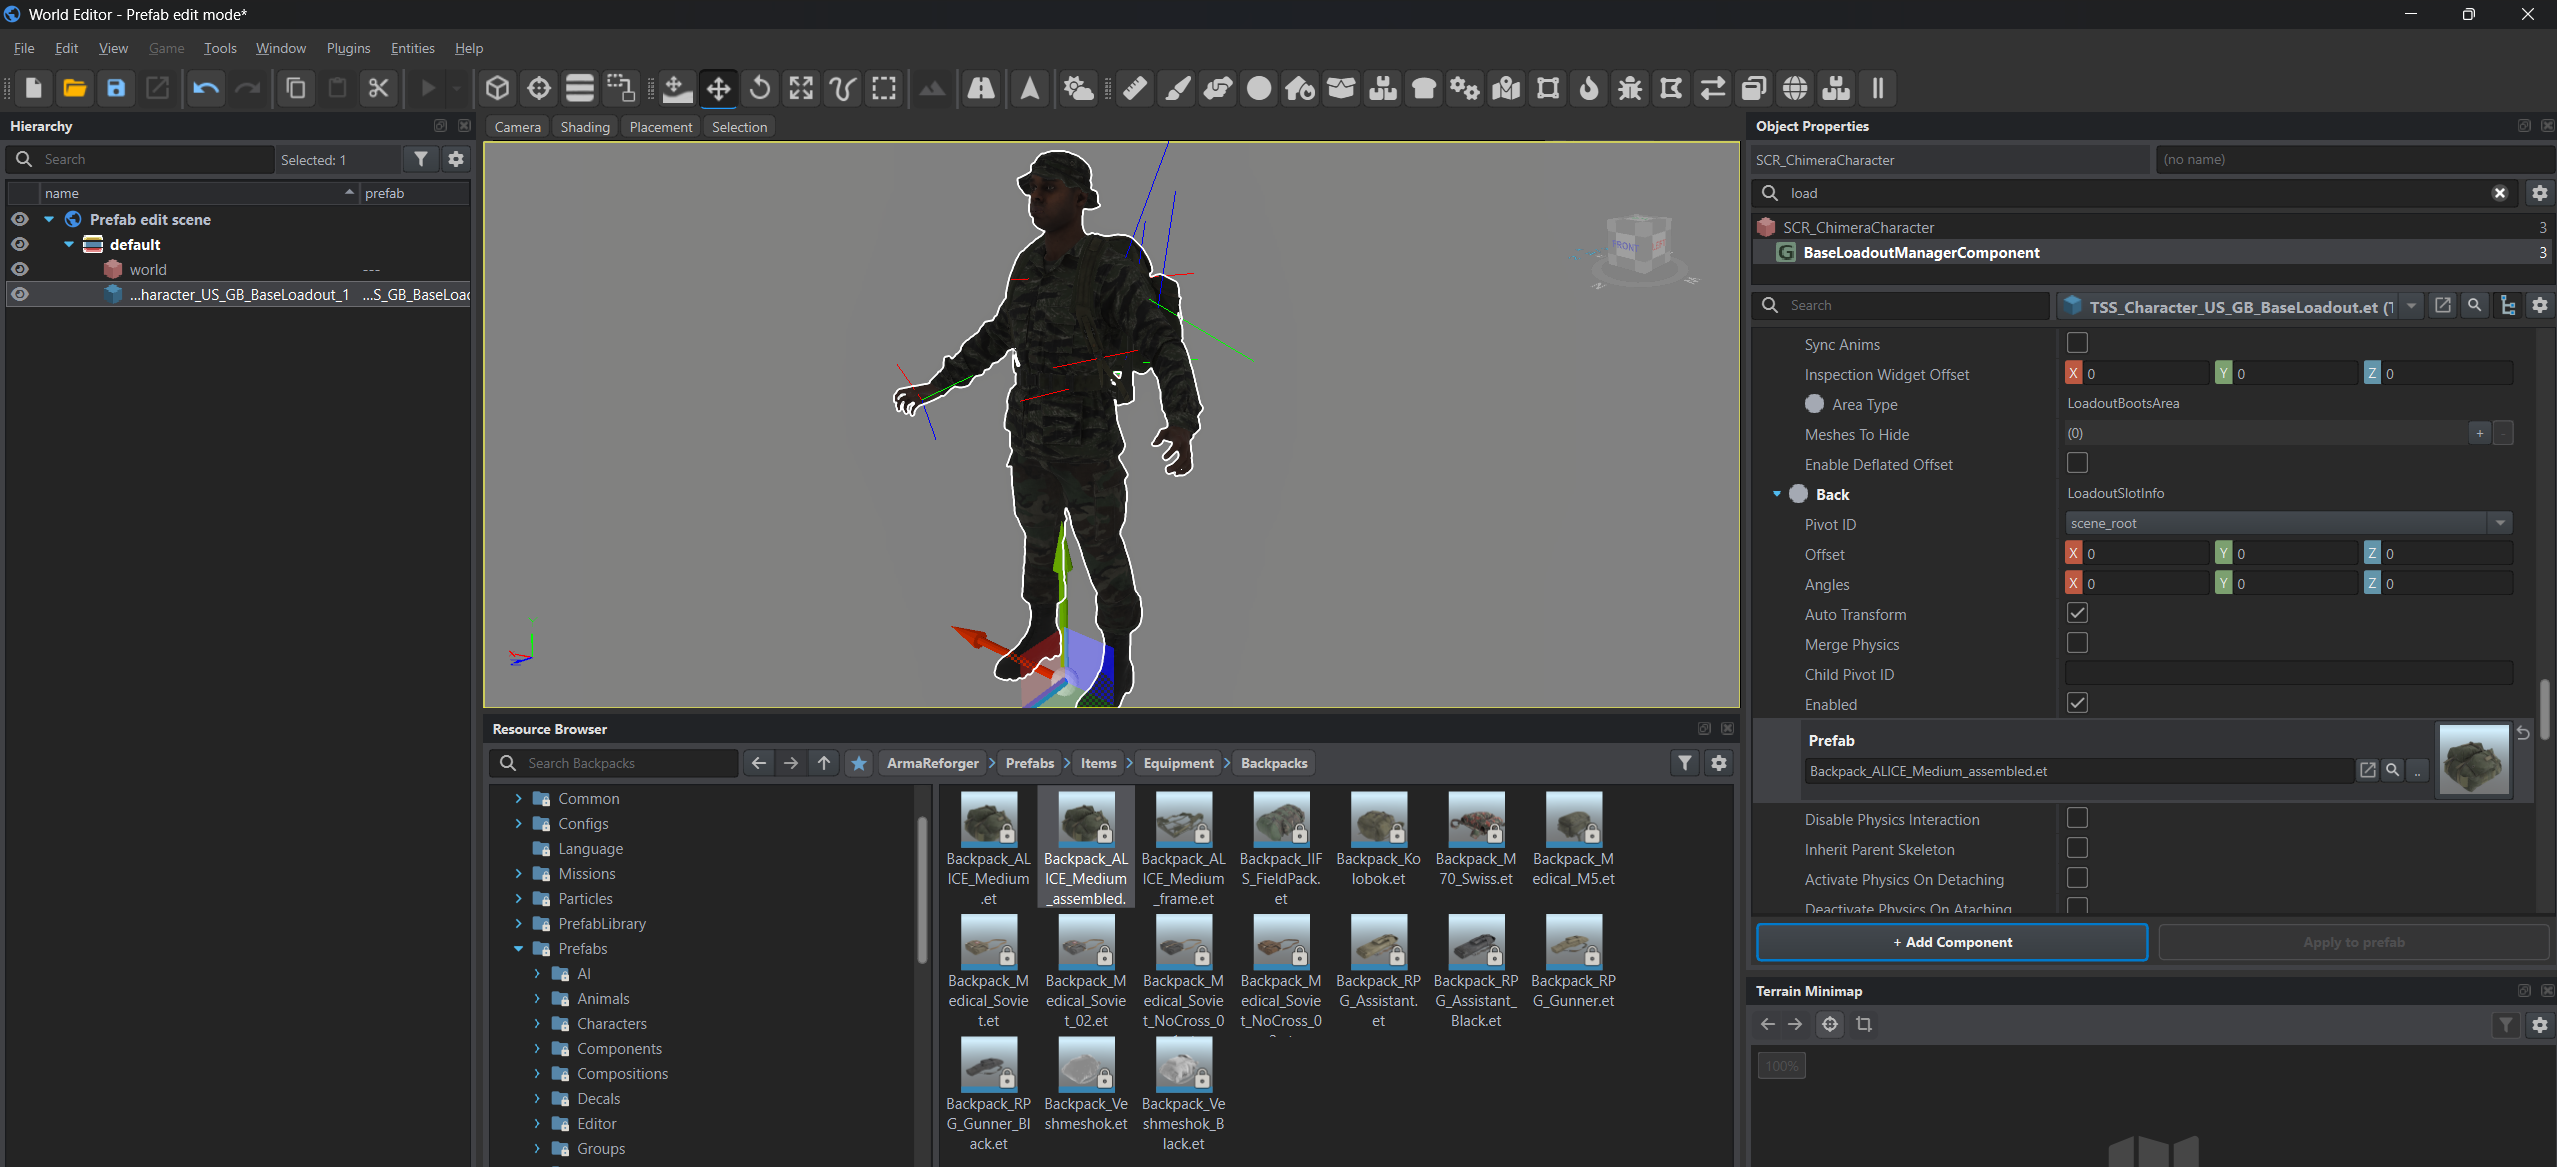
Press Ctrl+S to save the prefab.
We will prepare a radio variant with one channel for this mission. Two channels let every soldier stay in contact with their own unit and the whole side at the same time. We do not want that in this mission, so we will remove the second channel to simplify gameplay.
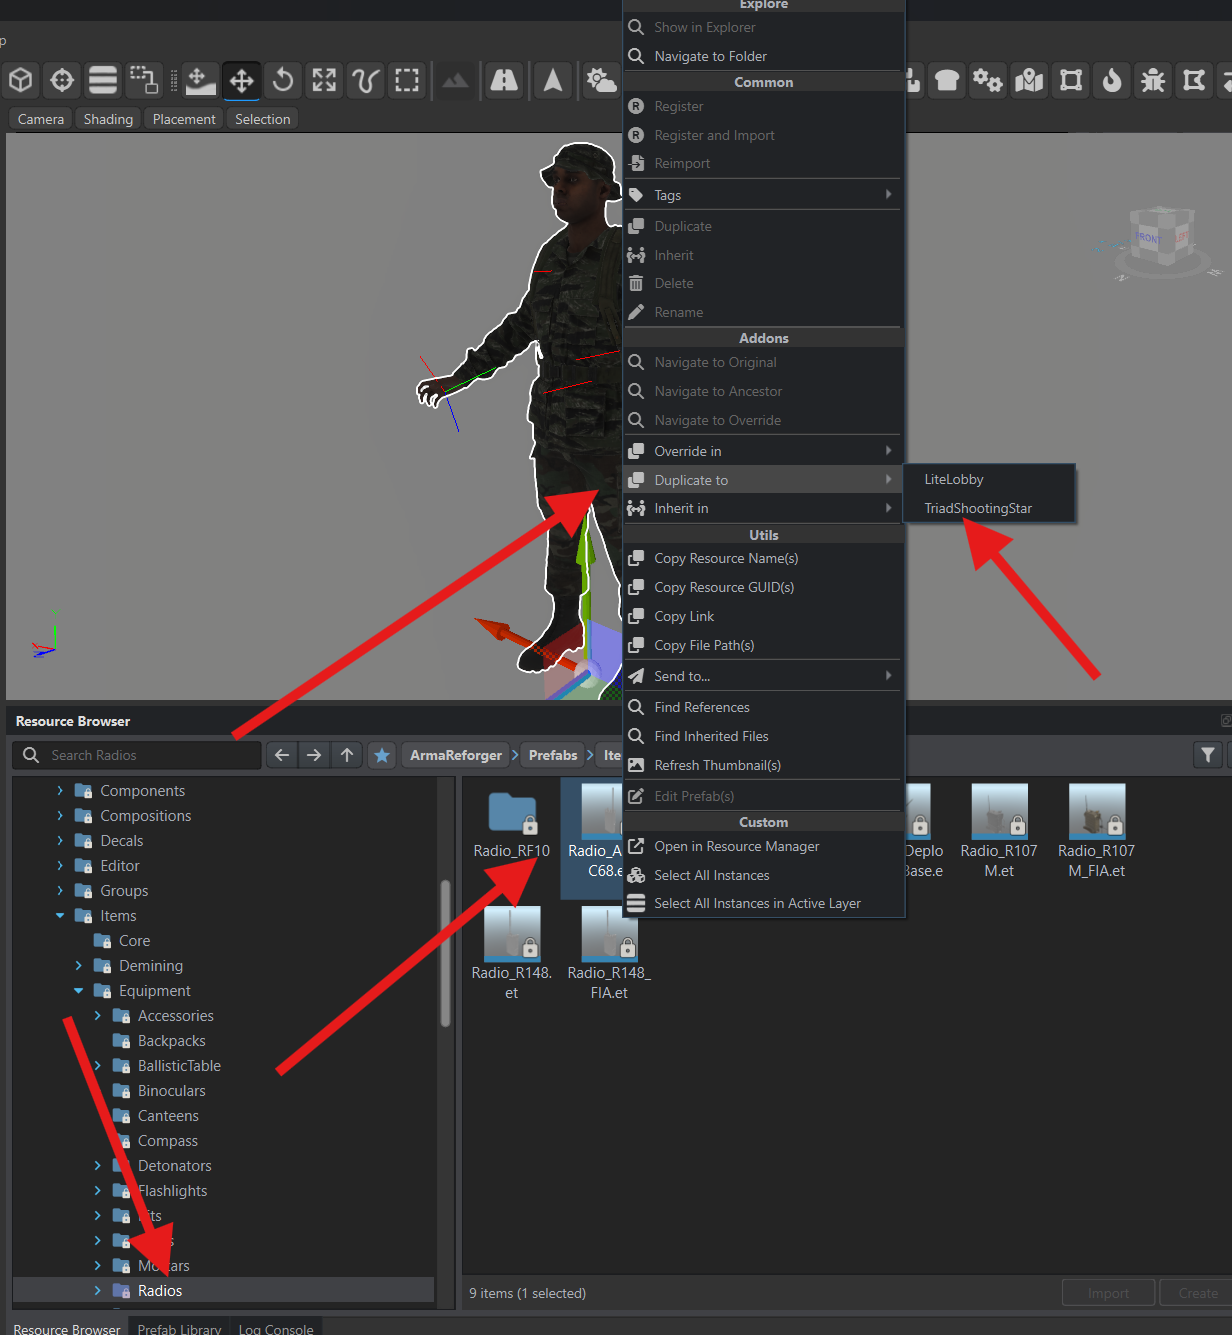
In Resource Browser, open the ArmaReforger project and Prefabs/Items/Equipment/Radios. Right-click Radio_ANPRC68.et and select Duplicate to → your addon. This command creates a copy of the prefab in your addon.
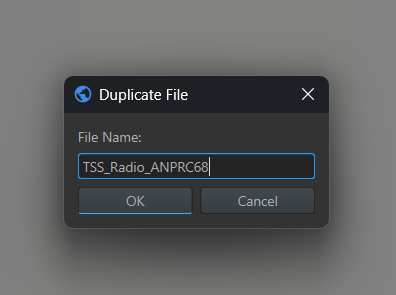
In Duplicate File, enter TSS_Radio_ANPRC68 and click OK. Use your own prefix for your addon.
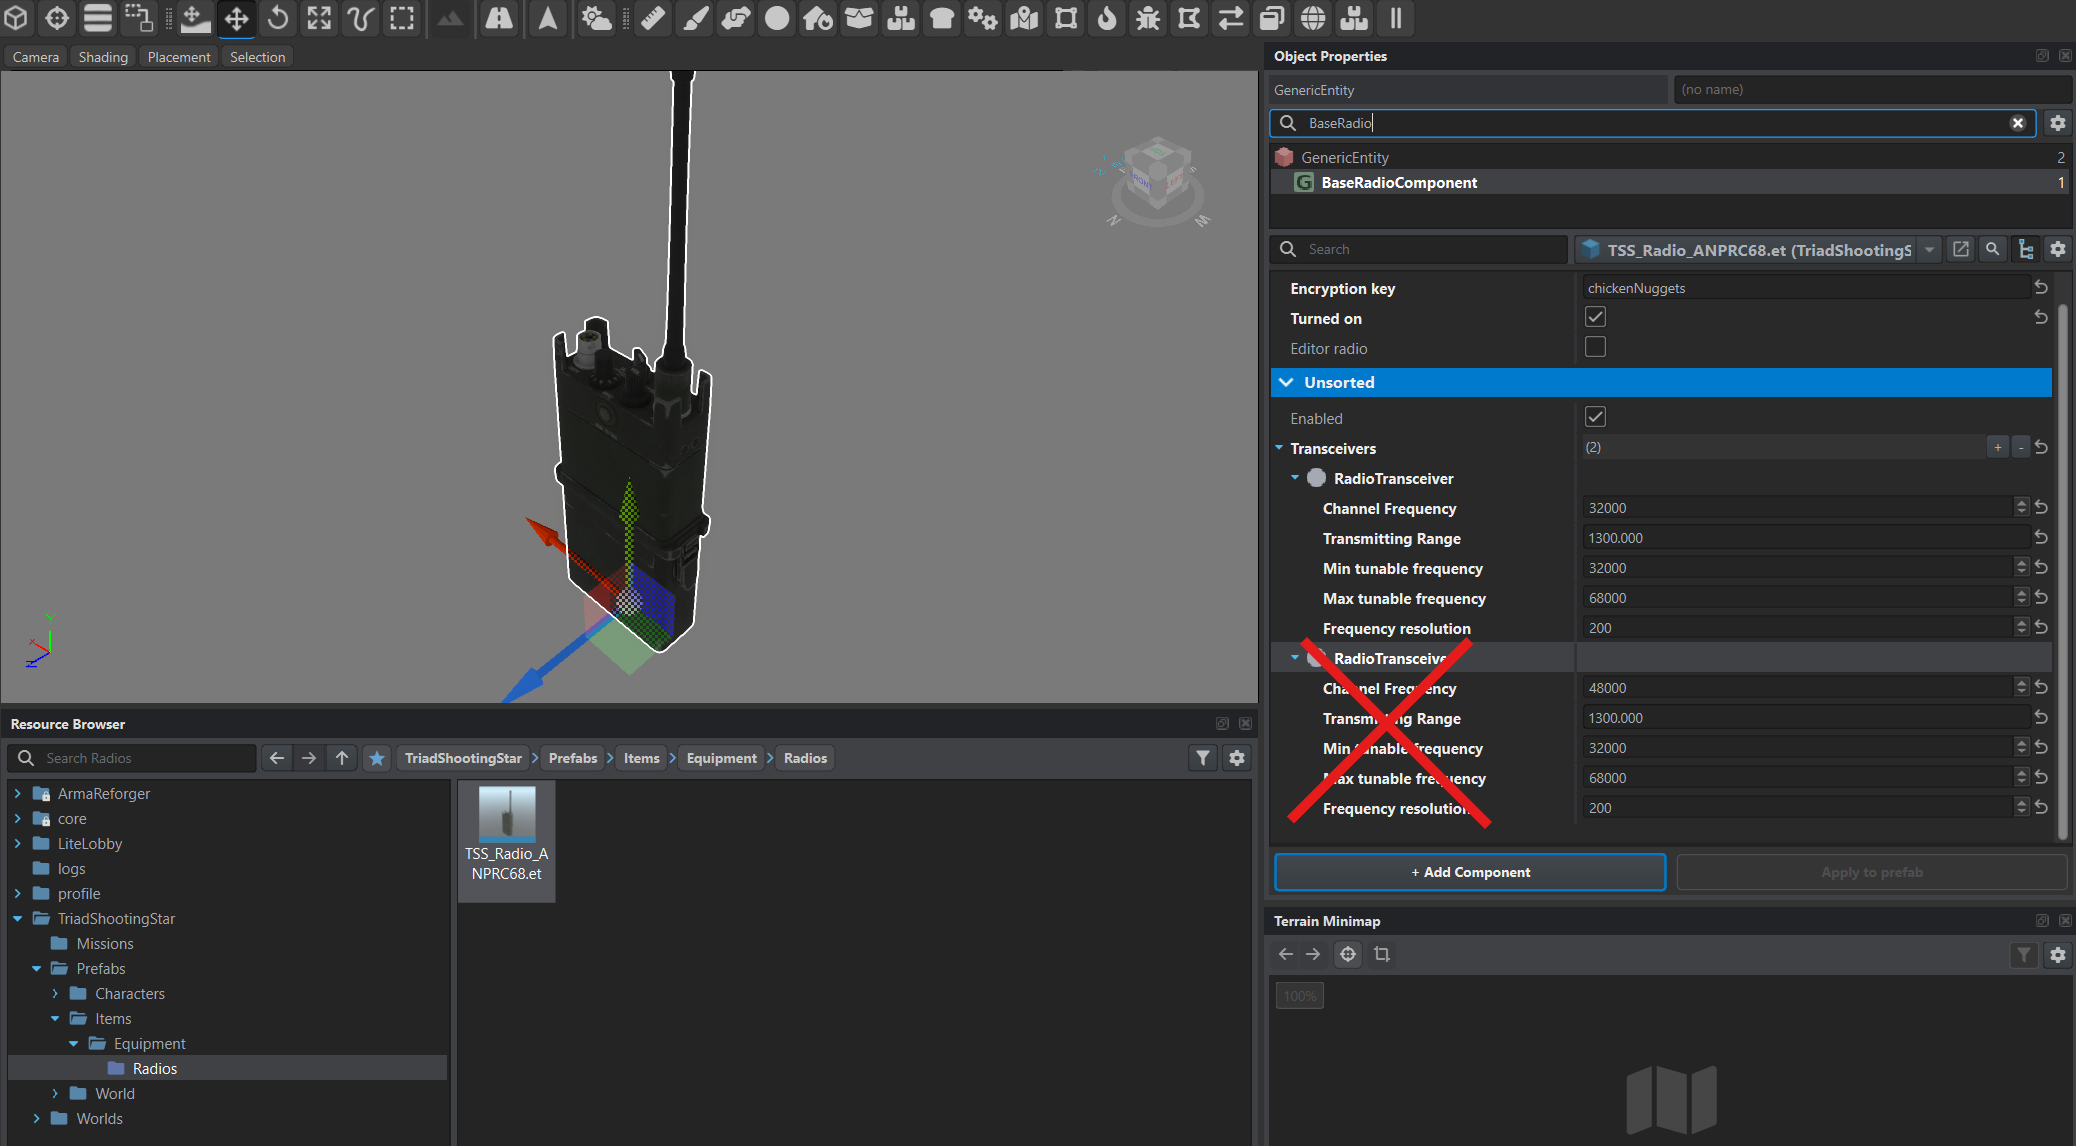
Open the new TSS_Radio_ANPRC68.et through Edit Prefab. Select the radio in Hierarchy, type BaseRadio in the component search, and select BaseRadioComponent.
Expand Unsorted → Transceivers. Hover over the second RadioTransceiver, crossed out in the screenshot, and press Delete on the keyboard.
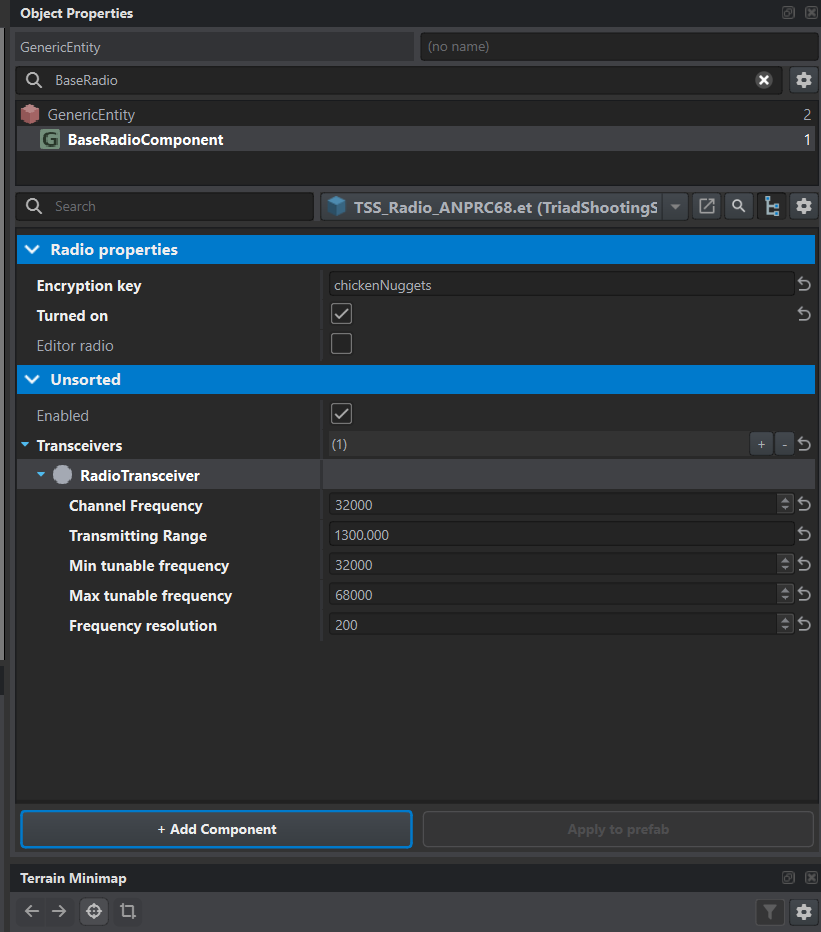
One RadioTransceiver will remain. Press Ctrl+S.
Inventory contents
Section titled “Inventory contents”Return to TSS_Character_US_GB_BaseLoadout.et and open it through Edit Prefab. Select the character, type InventoryStora in the component search, and select SCR_InventoryStorageManagerComponent. This sets the items the character starts with in the mission.
- Click
+beside Initial Inventory Items and expand the new ItemsInitConfigurationItem. - Set Target Storage to
Pants/Pants_US_BDU.et— the trouser pockets that will hold the items. - Add entries to Prefabs To Spawn with
+. Each entry represents one item; our loadout needs 12 entries.
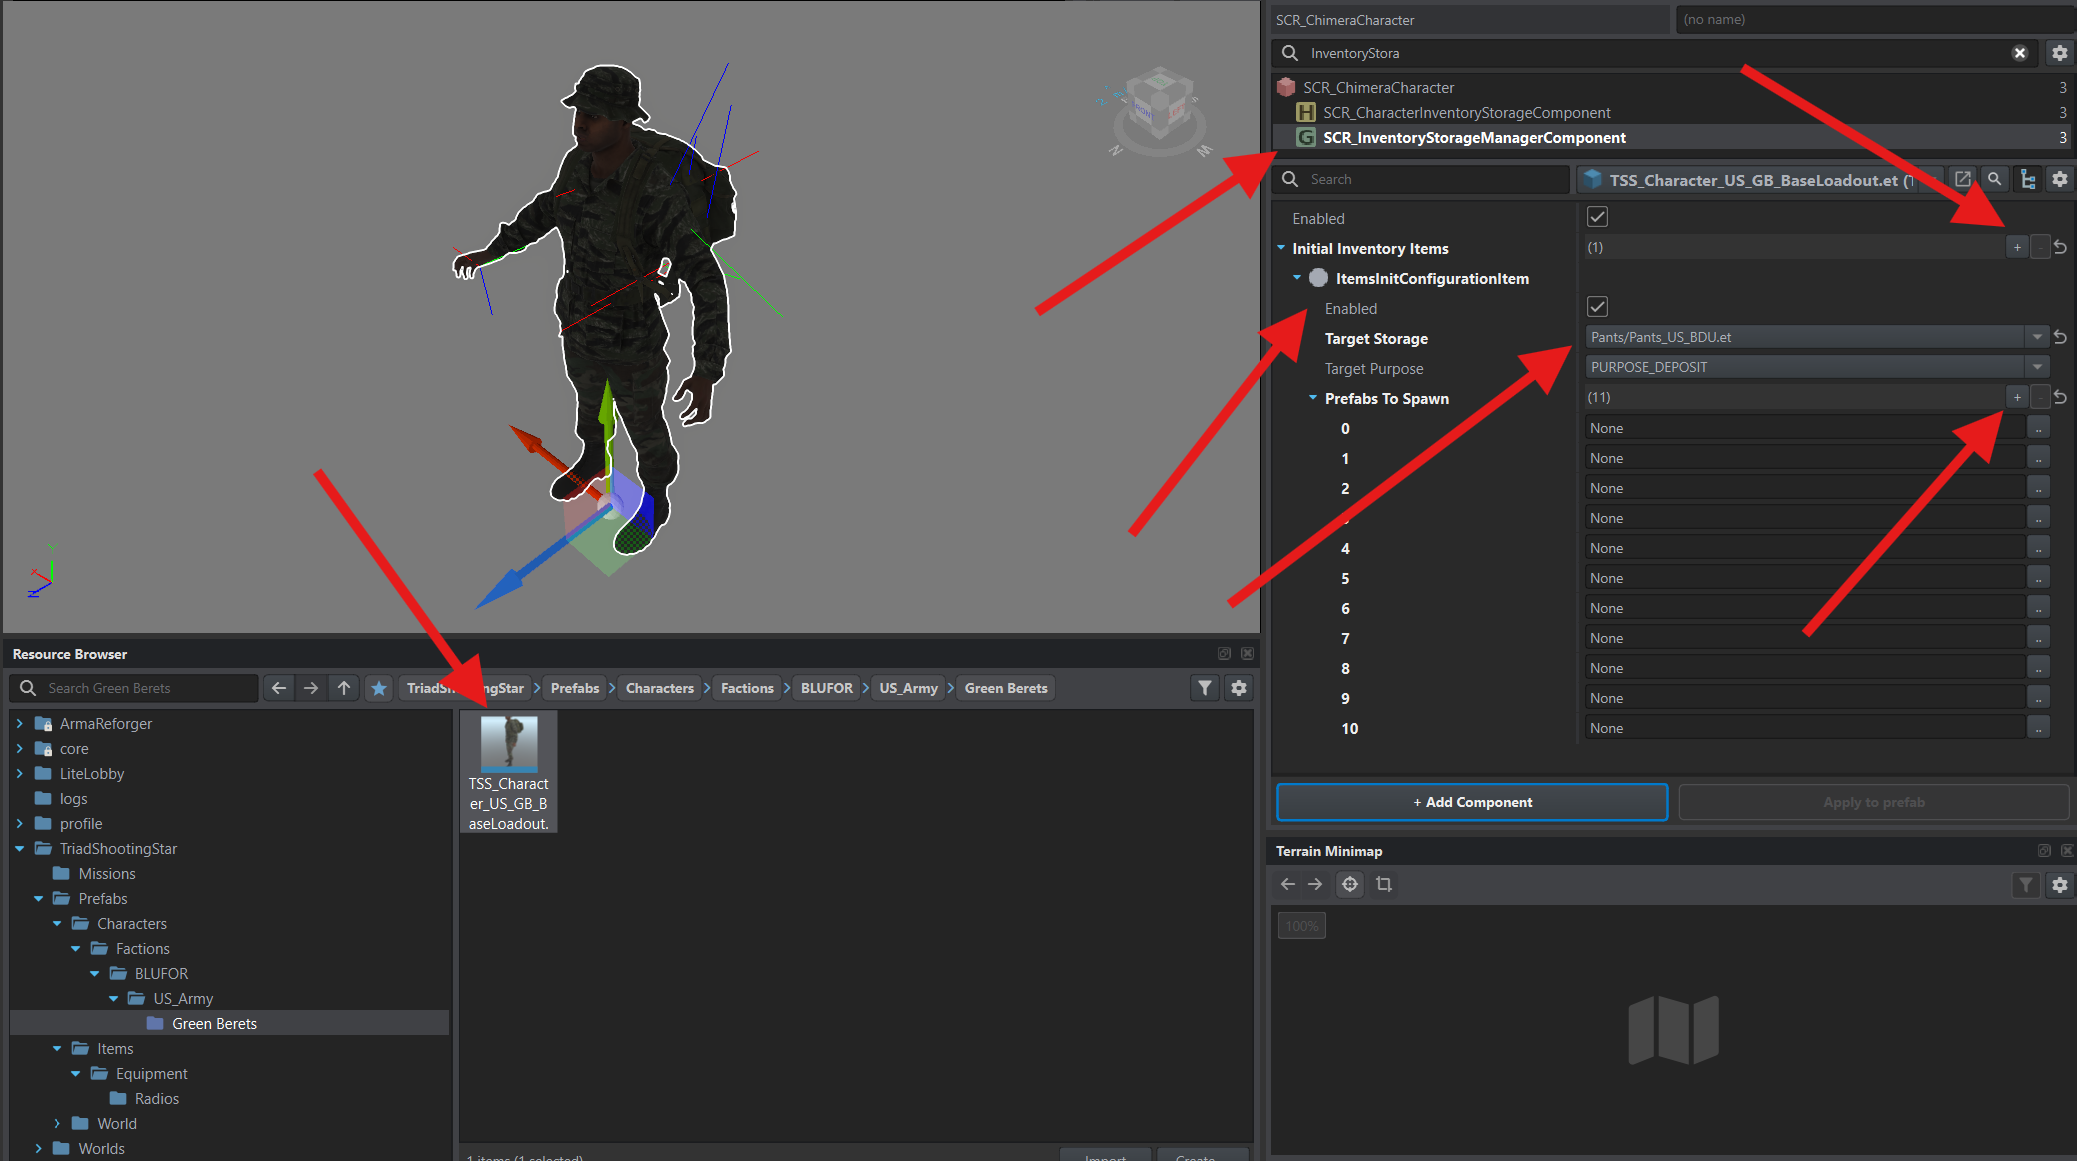
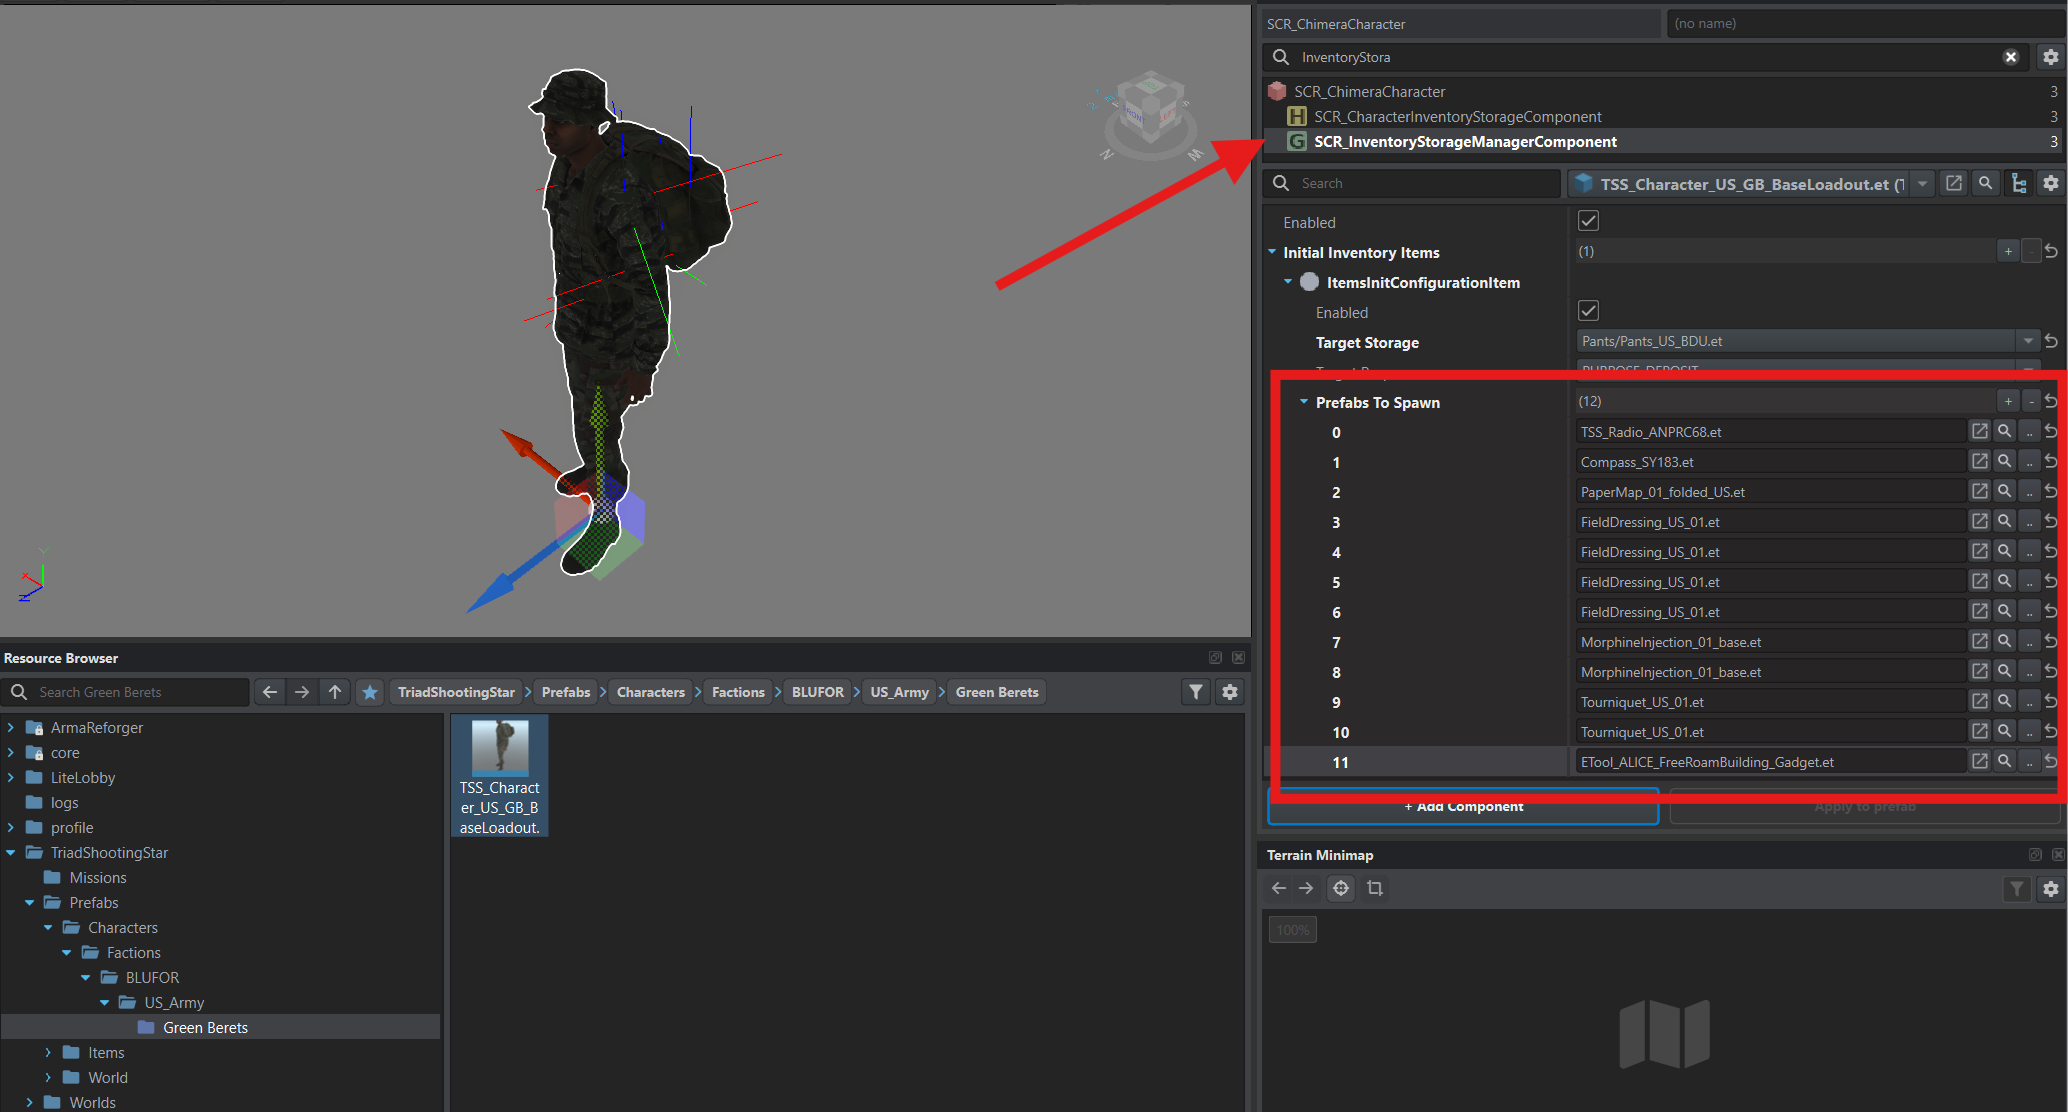
Drag the required prefabs from Resource Browser into Prefabs To Spawn entries. To find a file, select its project and search for its filename. Take the radio from your addon and the other items from ArmaReforger.
| Item | Prefab | Quantity |
|---|---|---|
| Radio | TSS_Radio_ANPRC68.et | 1 |
| Compass | Compass_SY183.et | 1 |
| Map | PaperMap_01_folded_US.et | 1 |
| Field dressing | FieldDressing_US_01.et | 4 |
| Morphine | MorphineInjection_01_base.et | 2 |
| Tourniquet | Tourniquet_US_01.et | 2 |
| Entrenching tool | ETool_ALICE_FreeRoamBuilding_Gadget.et | 1 |
For several identical items, assign the same prefab to several entries: four entries for field dressings, for example.
Wristwatch
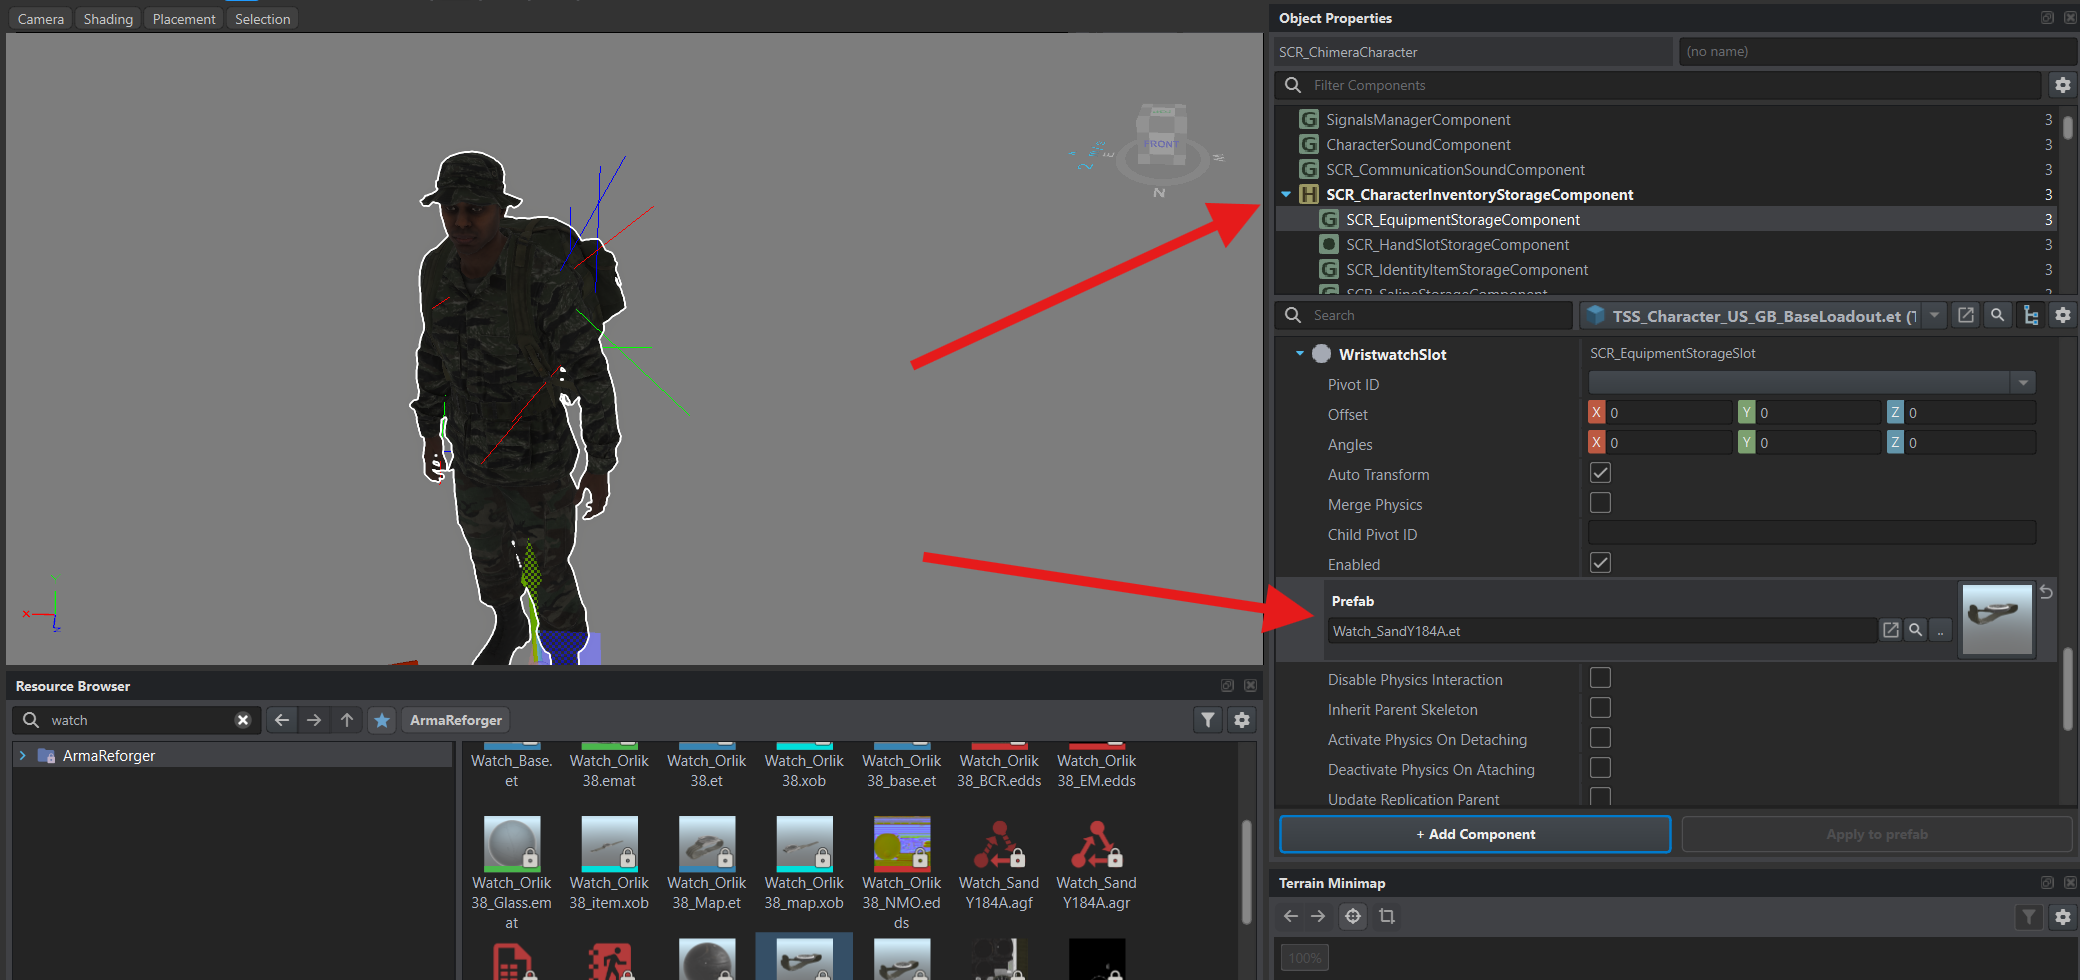
Section titled “Wristwatch”In the component list, expand SCR_CharacterInventoryStorageComponent and select its child SCR_EquipmentStorageComponent. In its properties, expand Initial Storage Slots → WristwatchSlot, the wristwatch slot.
In Resource Browser, select ArmaReforger and find Watch_SandY184A.et. Drag it into the Prefab field of WristwatchSlot.
Press Ctrl+S to save the character prefab.
The shared TSS_Character_US_GB_BaseLoadout.et is complete: uniform, backpack, personal radio, pocket items, and watch. In the next chapter, create its child with weapons and ammunition.