7. Mission objectives and triggers
The units and playable slots are already in place. Add map markings, define the port capture conditions and other objectives, then write the briefing for players. Continue in World Editor.
Map markings
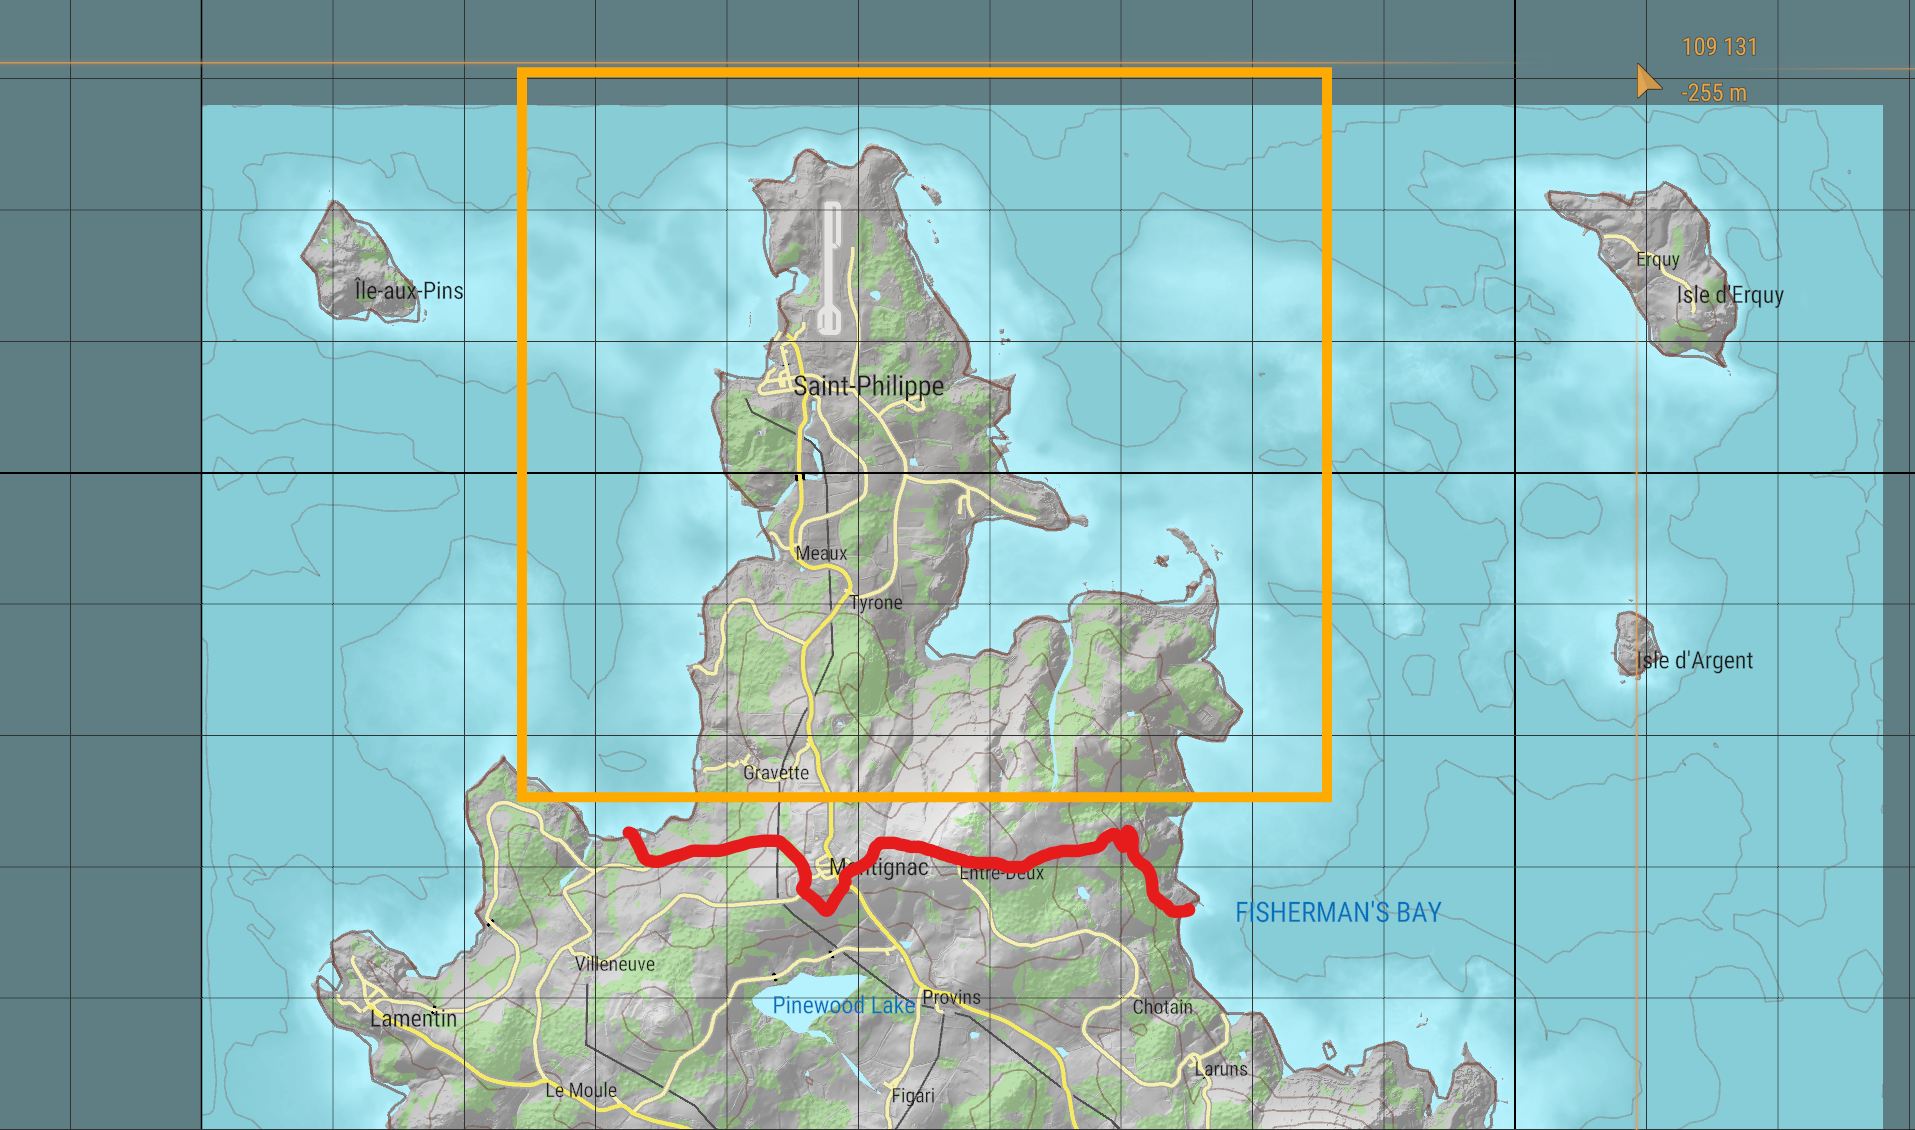
Section titled “Map markings”The screenshot shows the map markings we want to create. Play will take place in the area outlined in orange. Crossing the red line is prohibited by the mission rules.
Line settings
Section titled “Line settings”In Hierarchy, right-click your scene, ShootingStar_Ep1, and create a layer named markers. Double-click the layer to make it active: new map markings will go here.
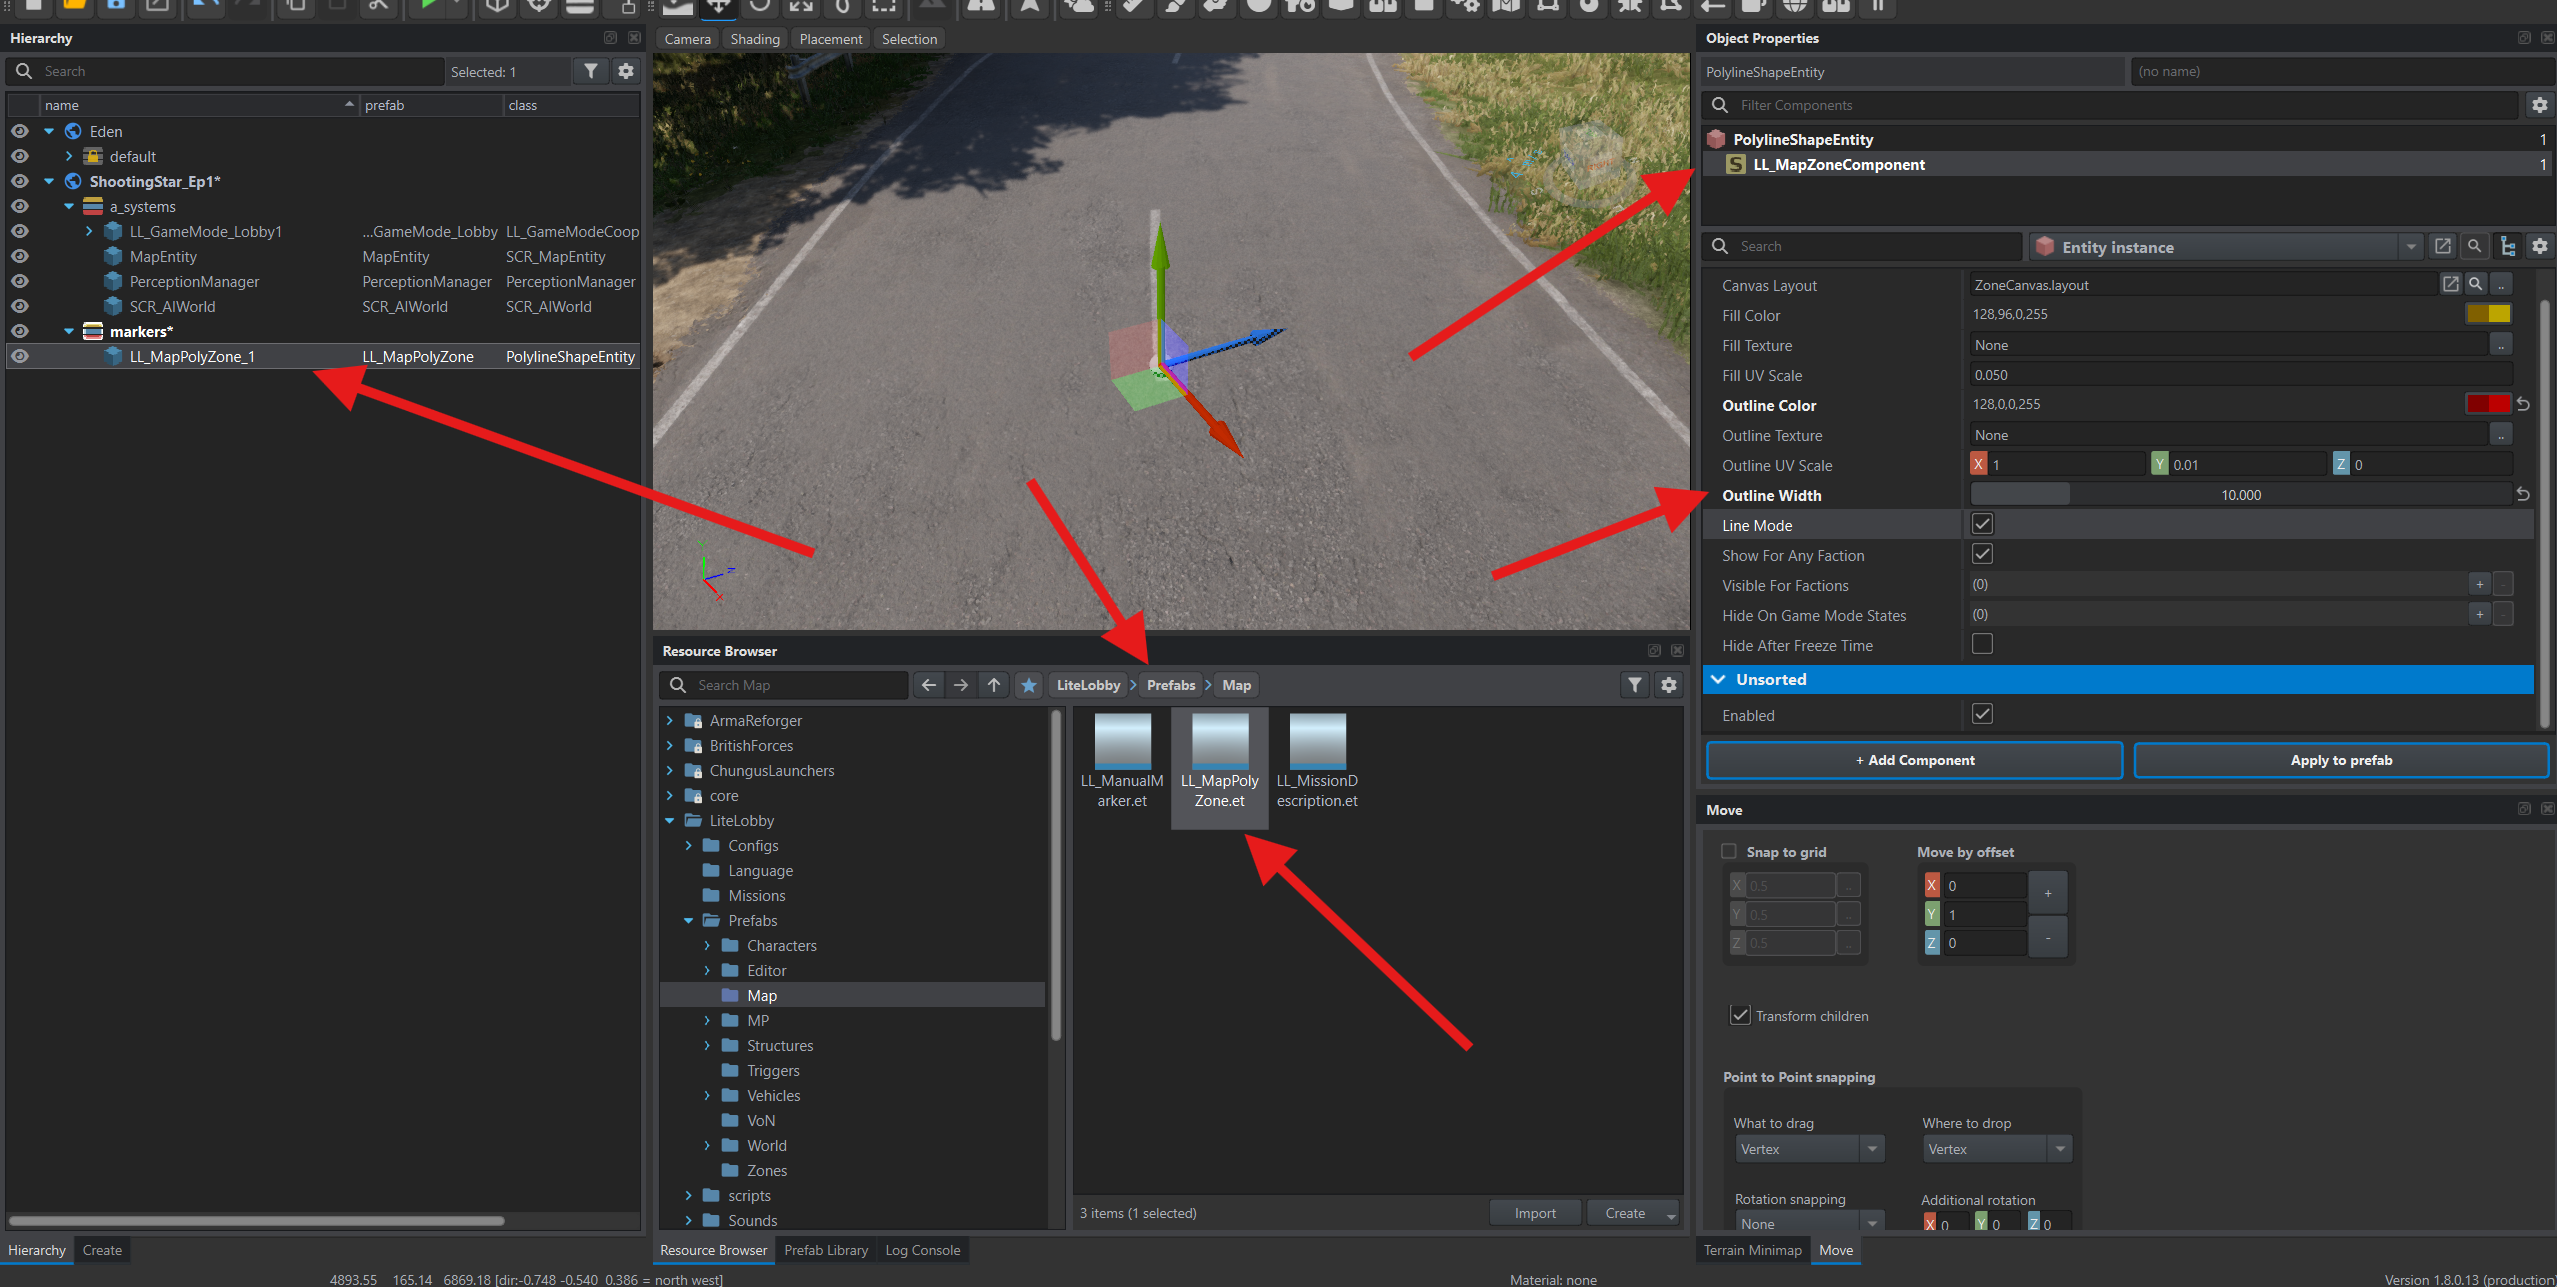
In Resource Browser, open LiteLobby → Prefabs → Map and drag LL_MapPolyZone.et onto the terrain. Select the added object in Hierarchy, then LL_MapZoneComponent in Object Properties.
Set these properties:
- Outline Color — red.
- Outline Width —
10, the line’s thickness. - Line Mode — enabled: draws a line without a fill or a connection between its ends.
- Show For Any Faction — enabled, so all sides can see the line.
Drawing the line
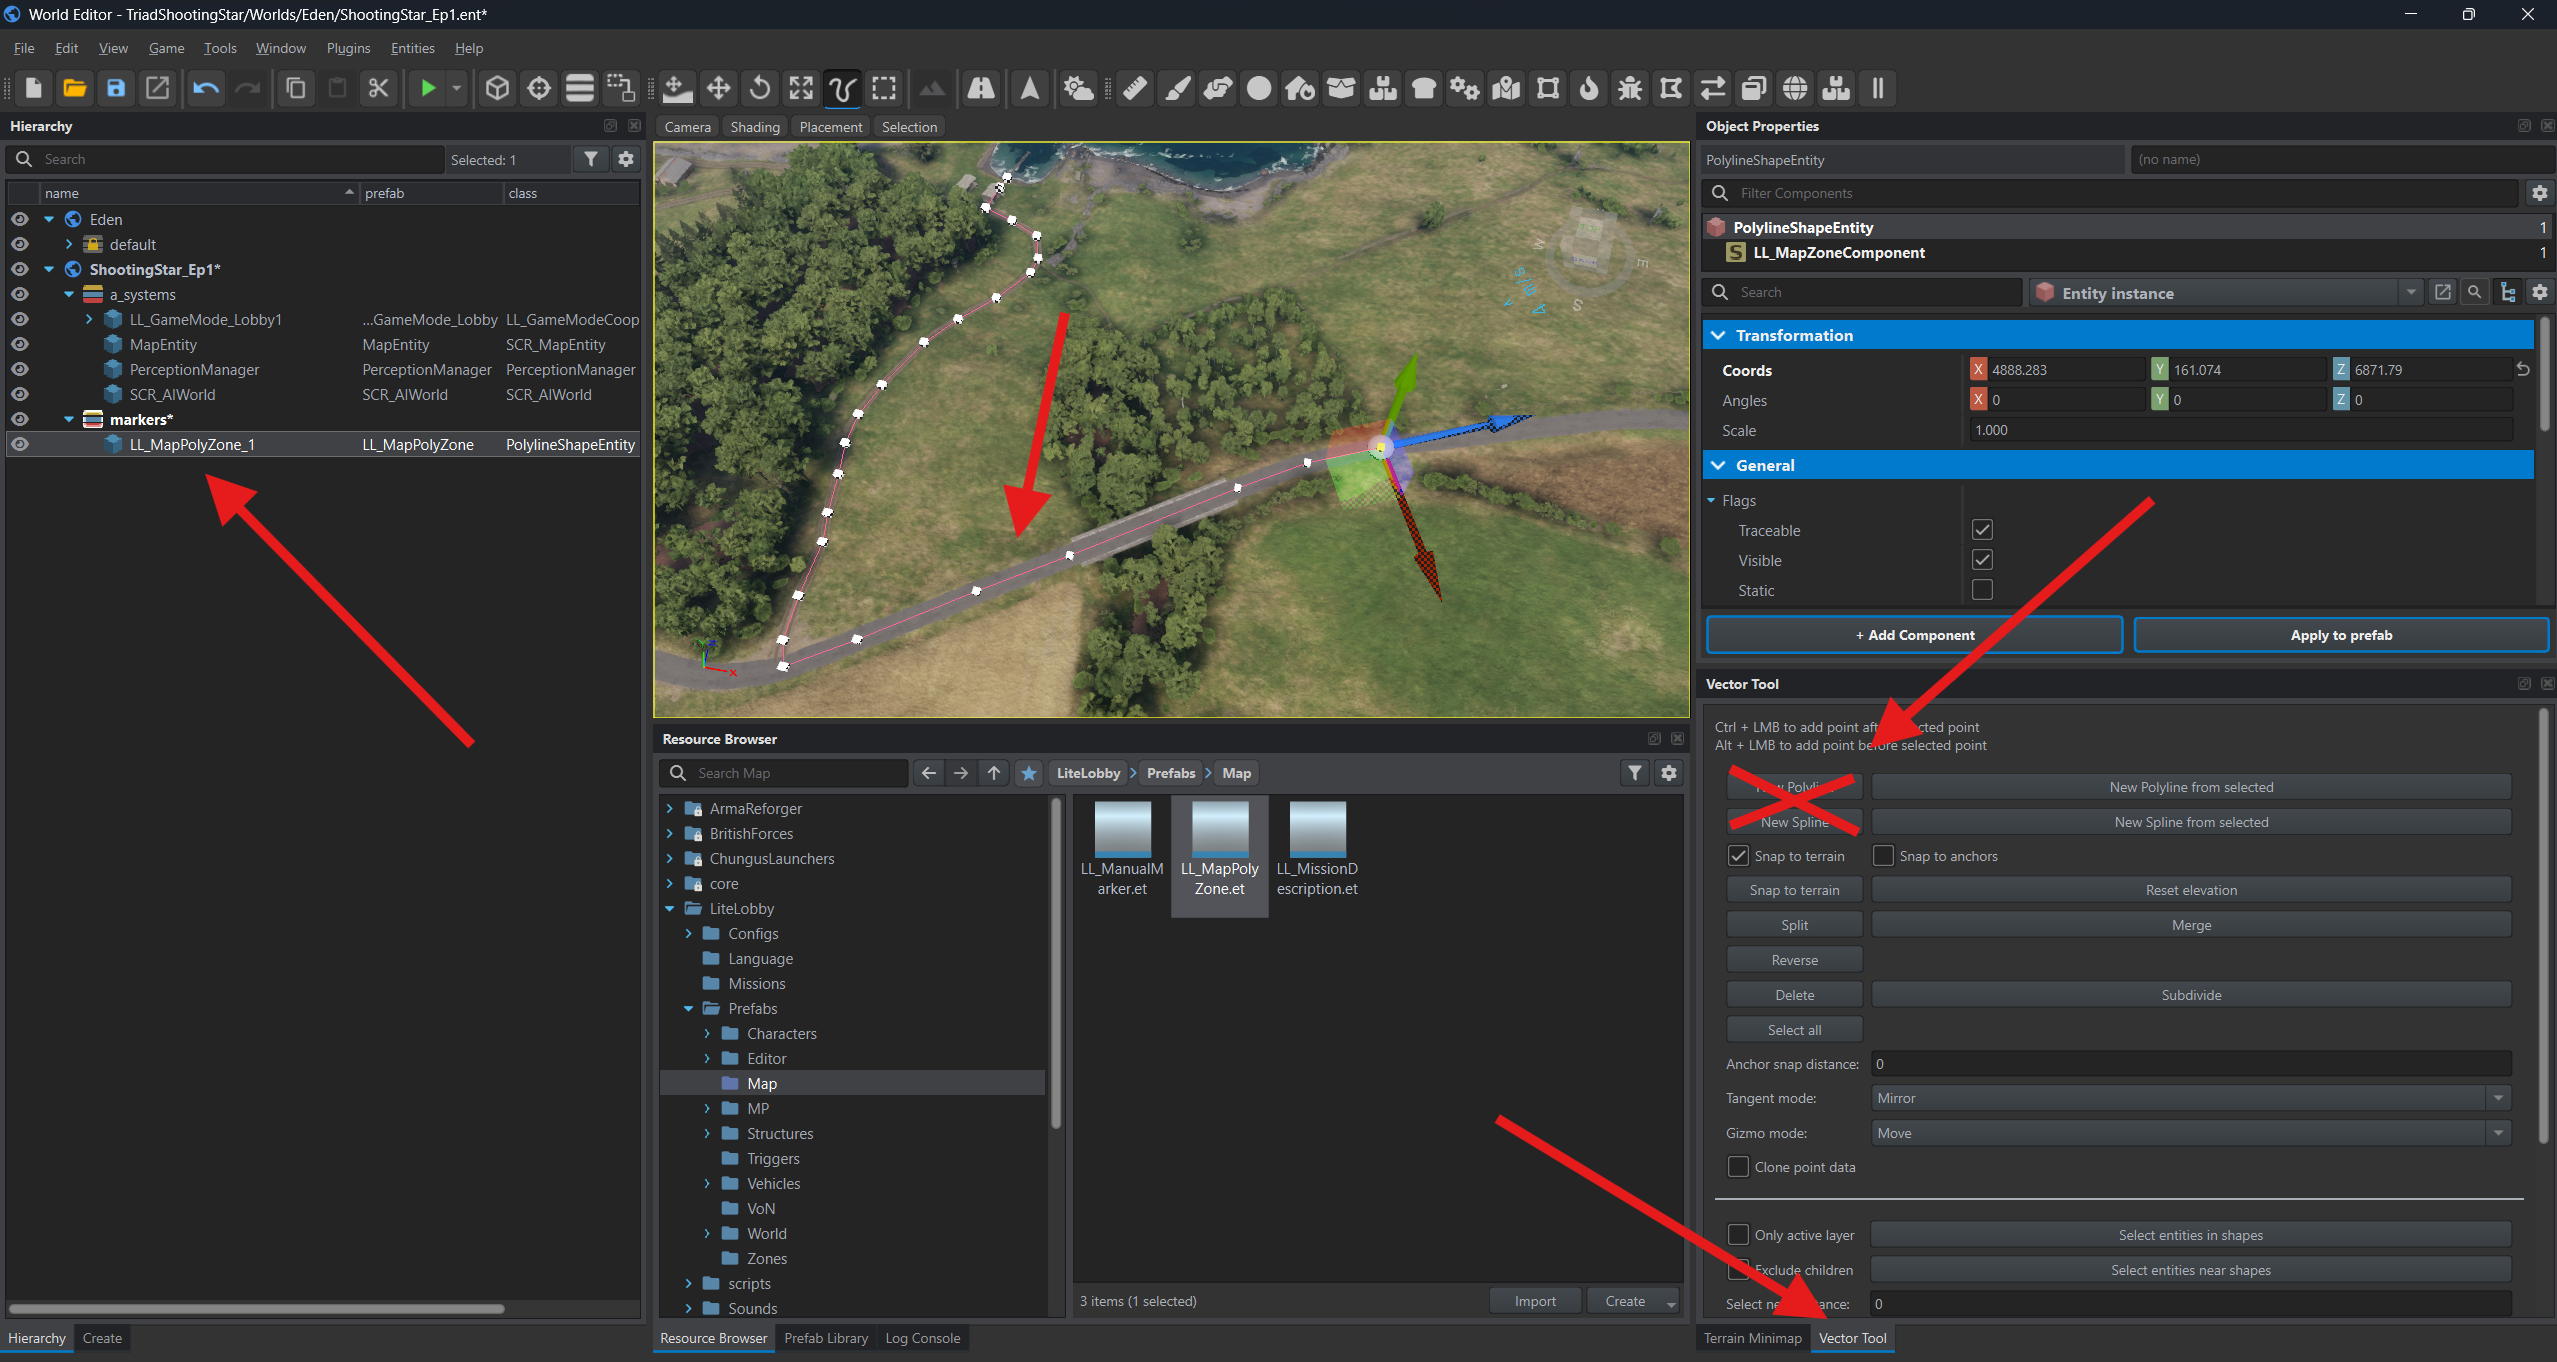
Section titled “Drawing the line”A line consists of points joined by straight segments. We will place these points along roads and landmarks.
Select the line object and activate Vector Tool, the curved-line button on the top toolbar. Its settings appear on the right. Enable Snap to terrain to place new points on the ground.
Hold Ctrl and left-click the terrain to add points in order. To extend an existing line, select its last point first.
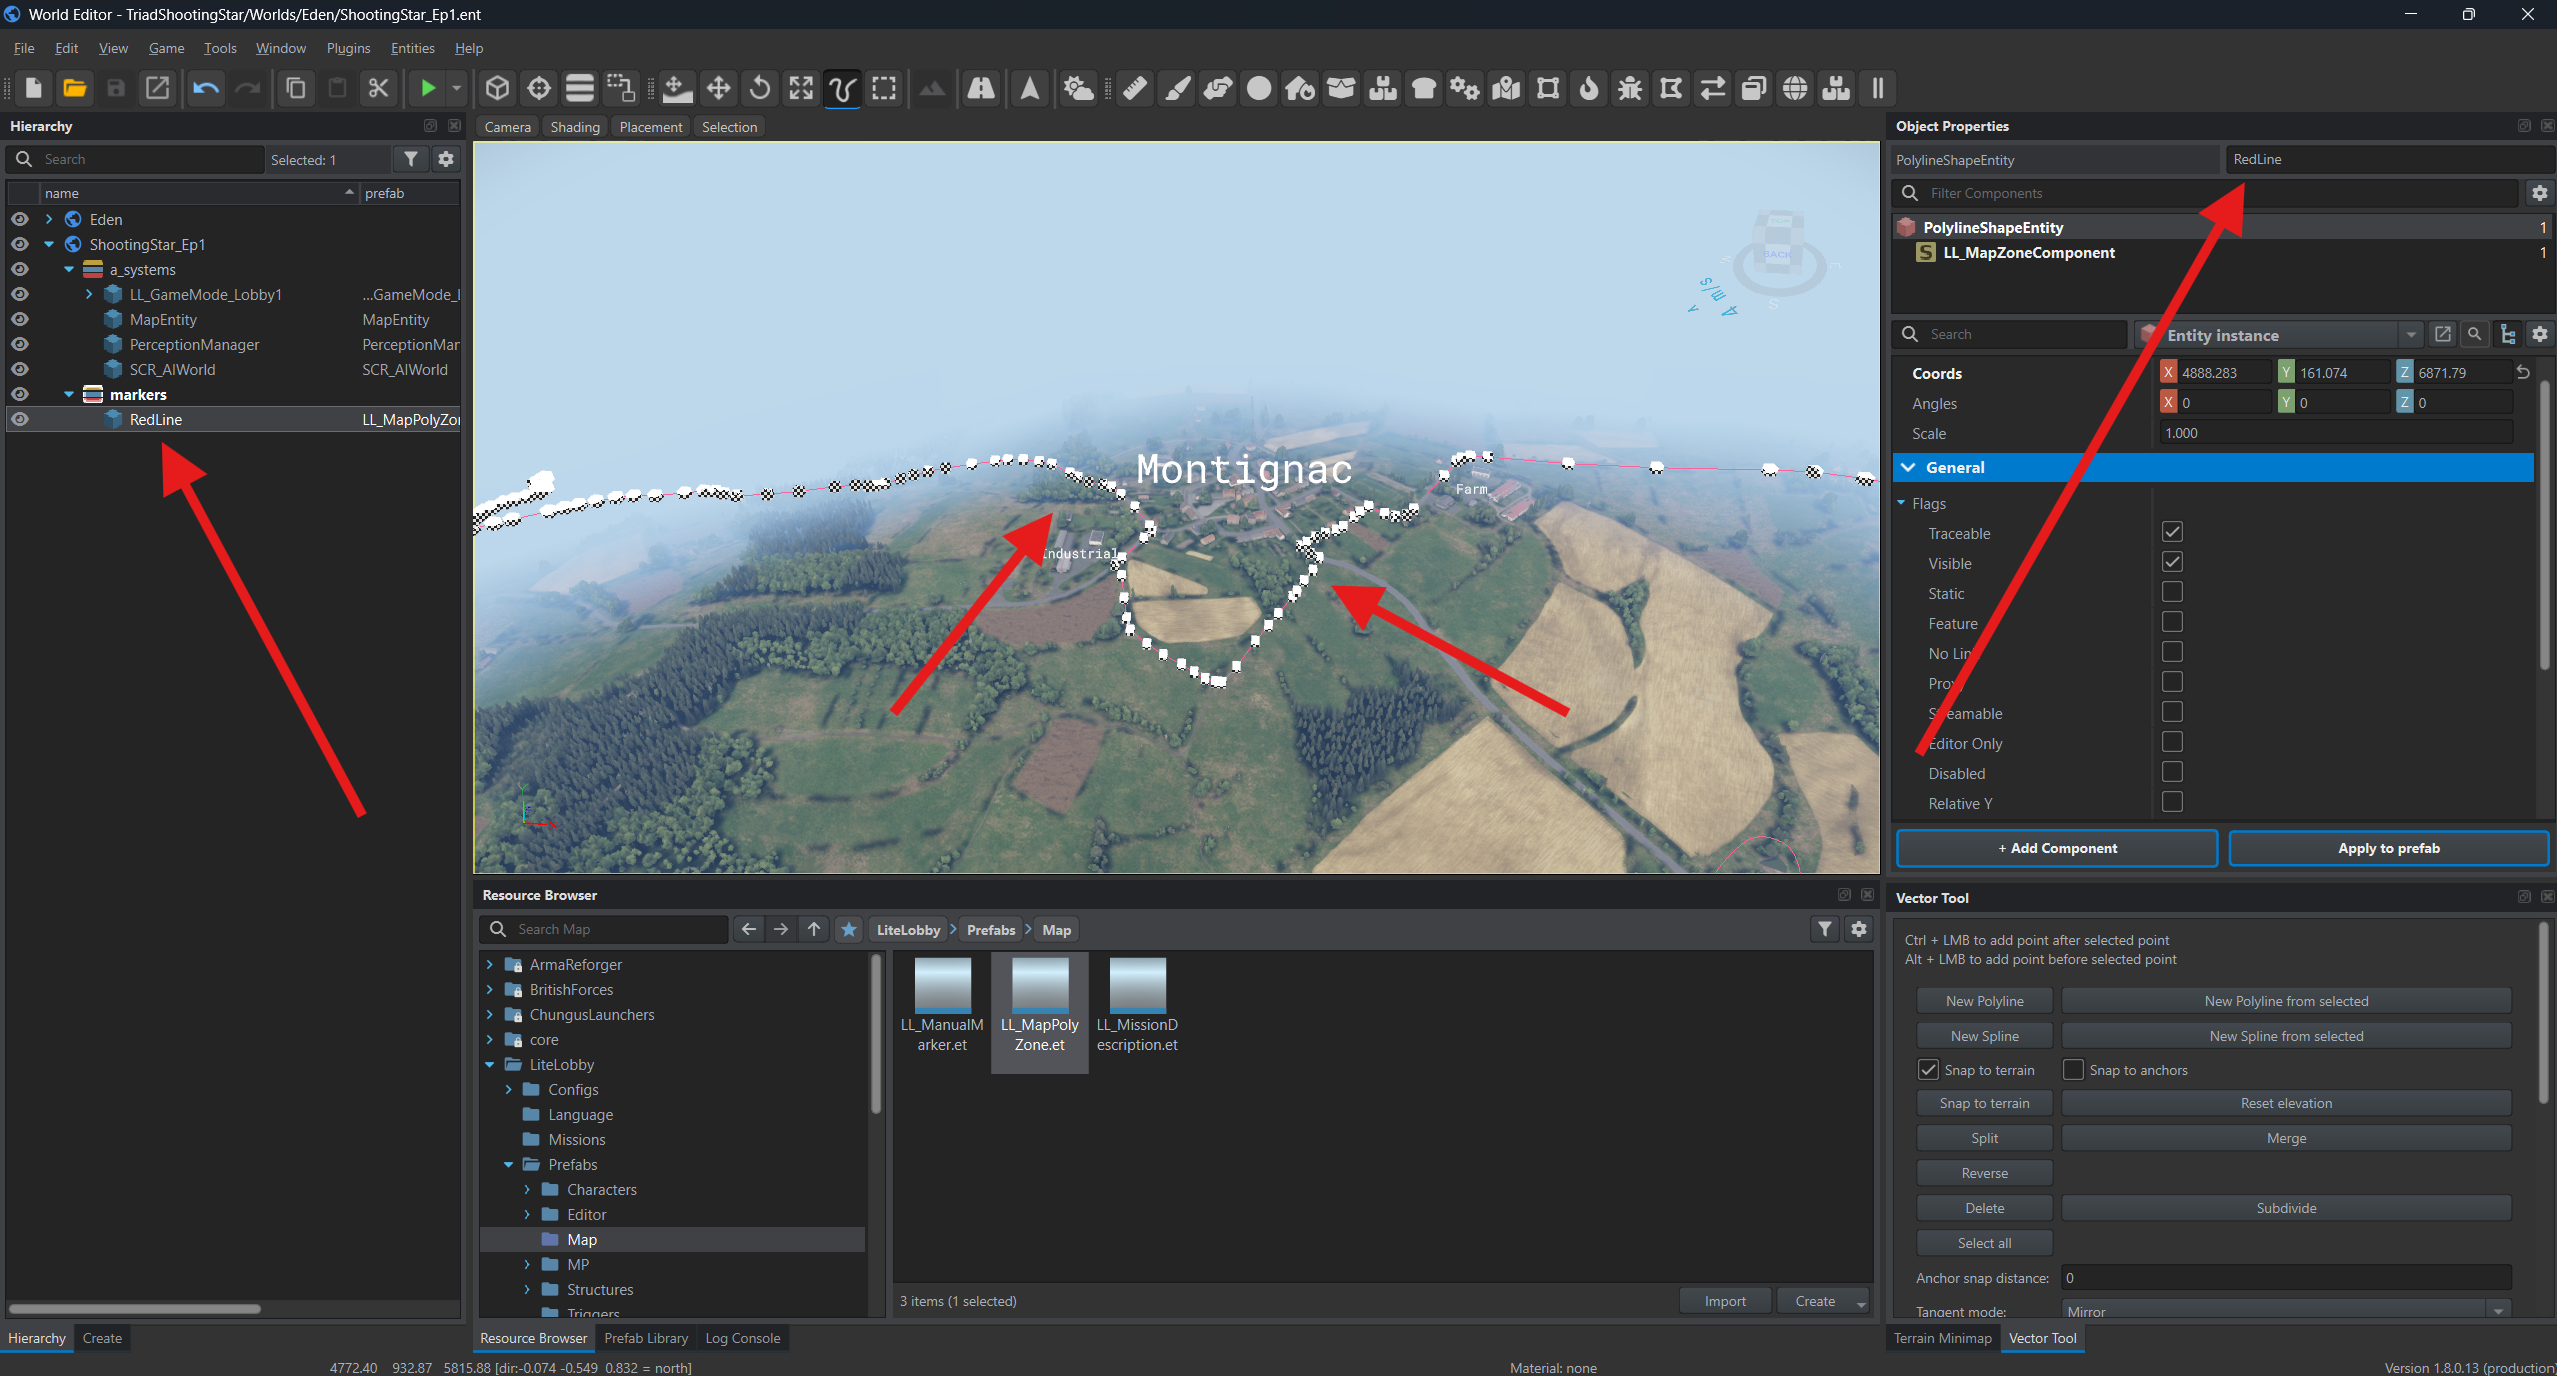
Enter RedLine in the name field at the top of Object Properties. This makes the object easier to find in Hierarchy.
Marking the port
Section titled “Marking the port”Add another LL_MapPolyZone.et to the markers layer and name it Port. Use Vector Tool to place points along the port boundary, as shown below.
In LL_MapZoneComponent, choose a green Outline Color and set Outline Width to 7. Enable Line Mode and Show For Any Faction, as for RedLine.
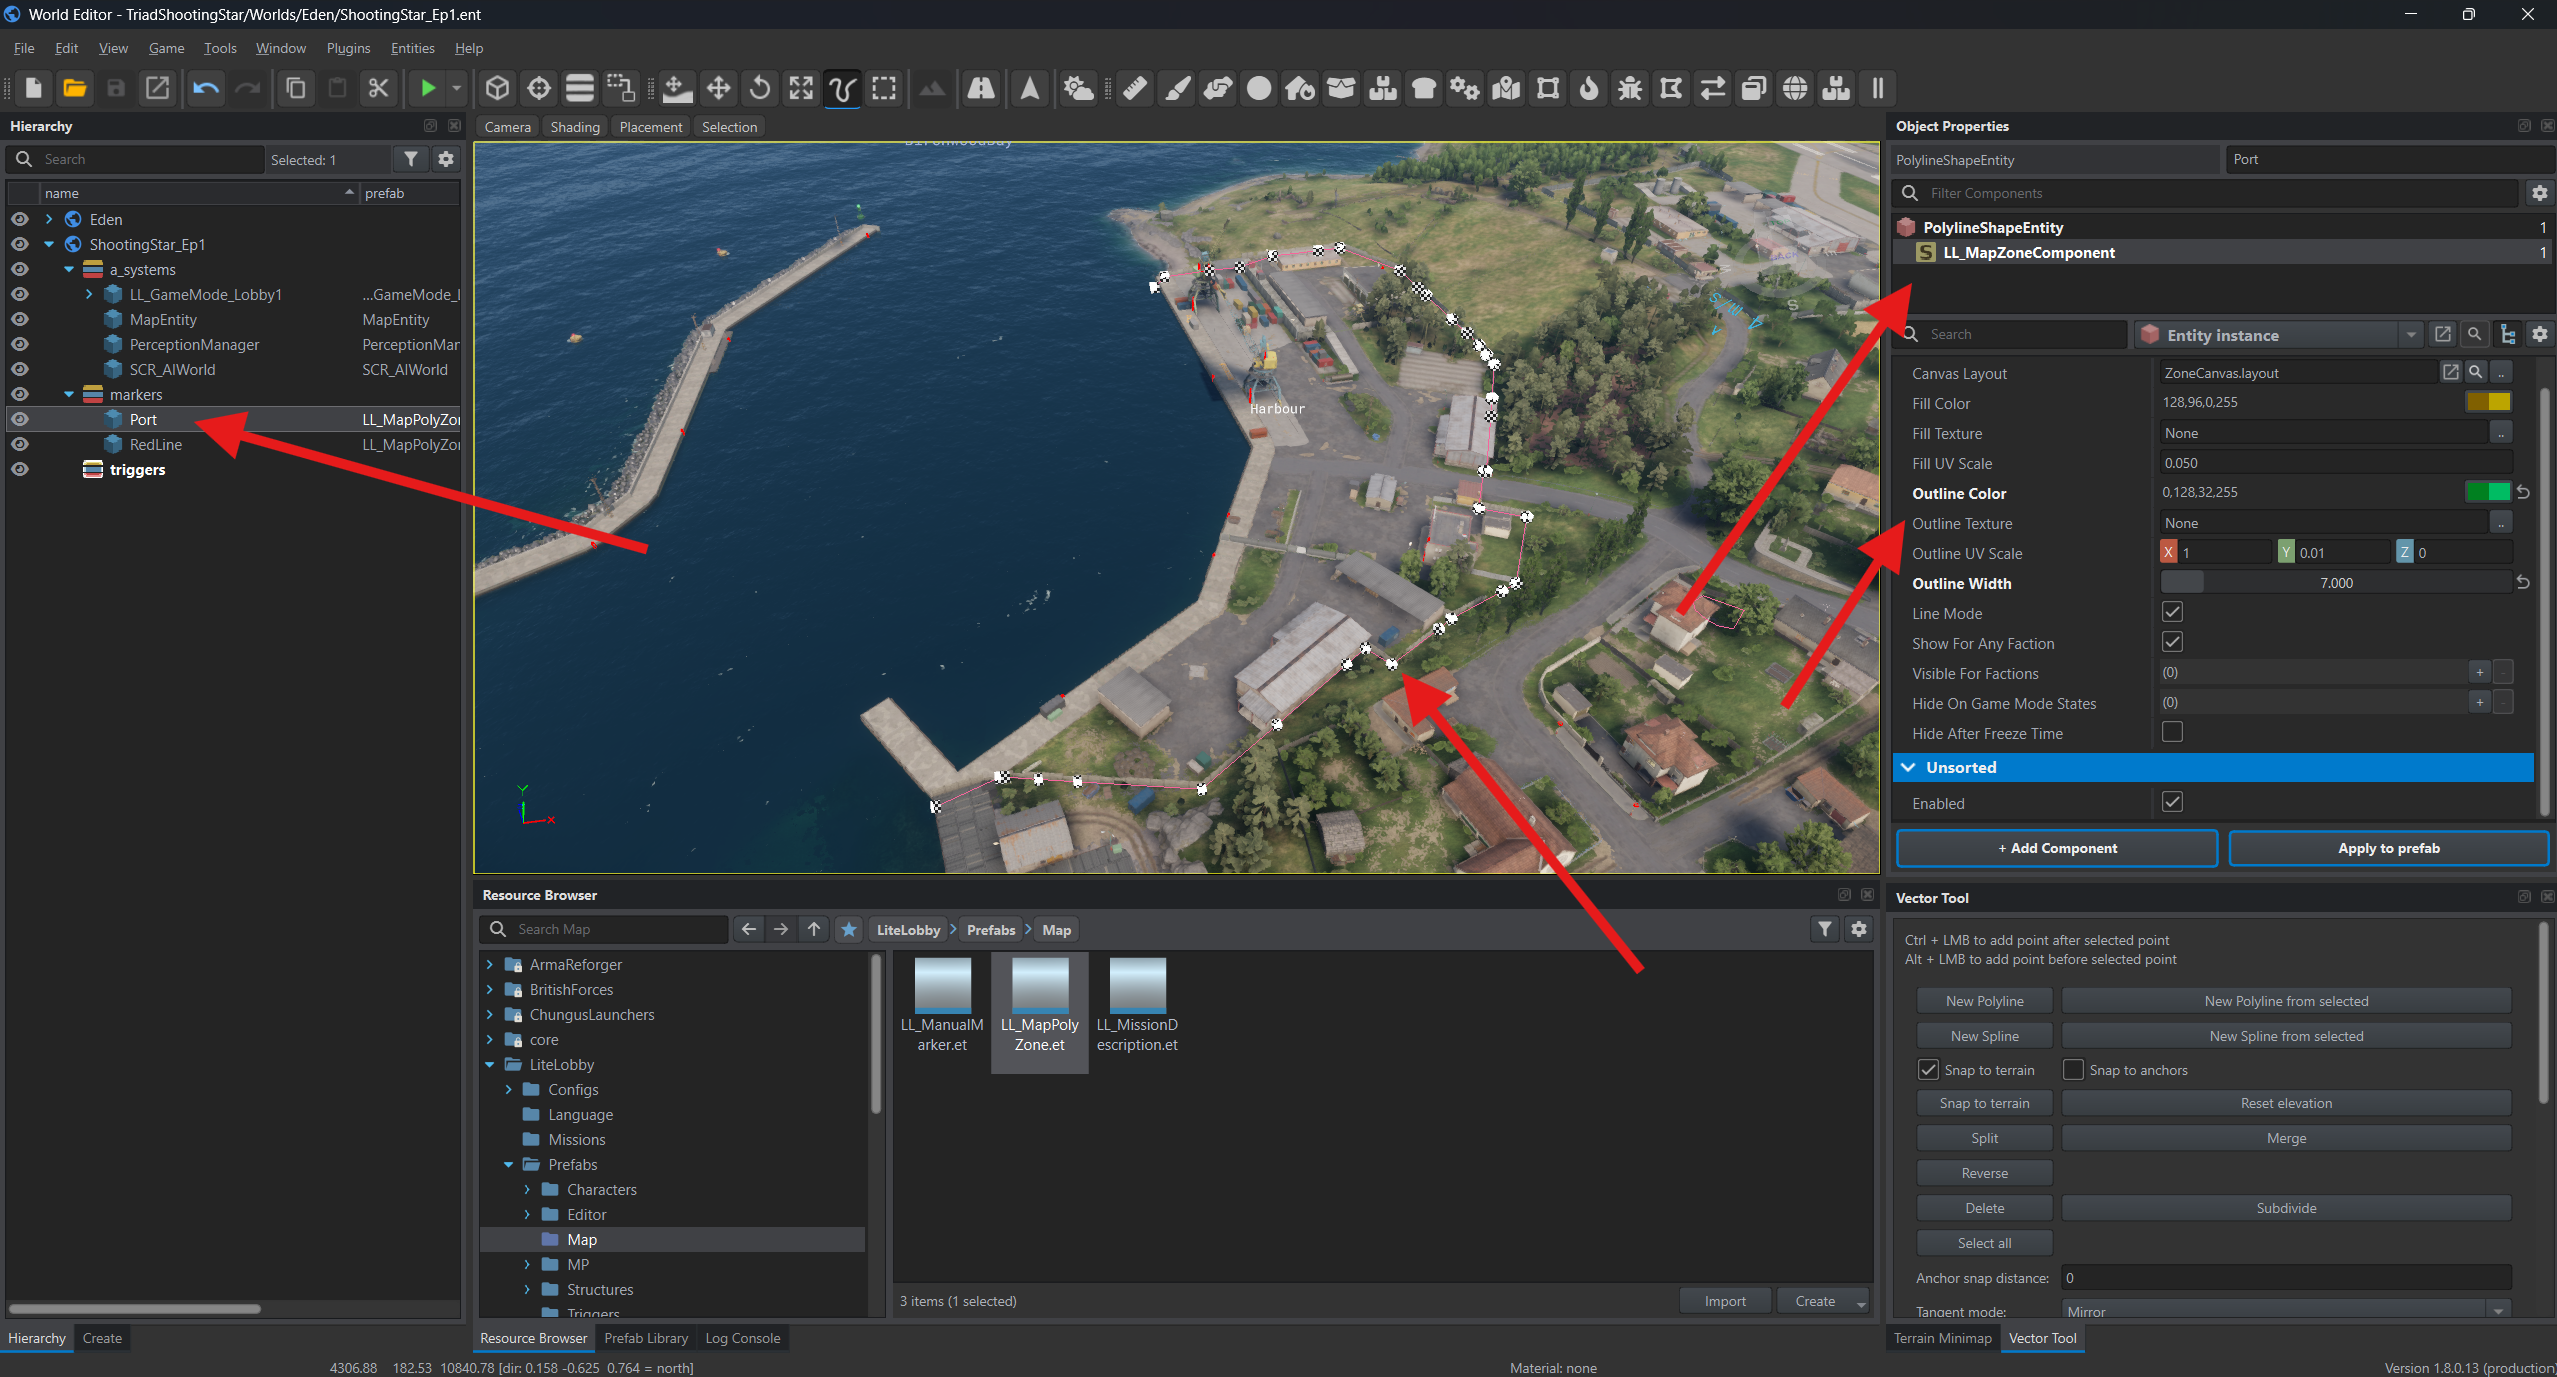
These lines only appear on the map. Next, create a separate area that defines the port capture conditions.
Press Ctrl+S to save the world.
Triggers
Section titled “Triggers”Triggers check mission conditions and announce when they are met. The example uses port capture, critical losses, a time limit and numerical superiority. Use the conditions that suit your own mission’s objectives.
Testing capture, losses and superiority requires groups on both sides with playable slots. If you have only placed Alpha so far, prepare and place the remaining participants first.
Placement and announcements
Section titled “Placement and announcements”The trigger prefabs are in LiteLobby → Prefabs → Triggers. Create a triggers layer in your scene if it does not already exist. Make the layer active and add the prefabs to it, then select each object’s corresponding component in Object Properties.
For each trigger, enable Broadcast Message and Show In Briefing. Enter the announcement in Message; leave Message Faction and Message Groups empty to address all sides.
Capture trigger
Section titled “Capture trigger”Define the port boundary, place flags, and connect them to the trigger.
Capture area
Section titled “Capture area”Make sure the triggers layer is active. In Vector Tool, click New Polyline to define the boundary of the area the trigger will check.
Place points around the port using Ctrl and the left mouse button. Enter PortTrigger in the name field at the top of Object Properties.
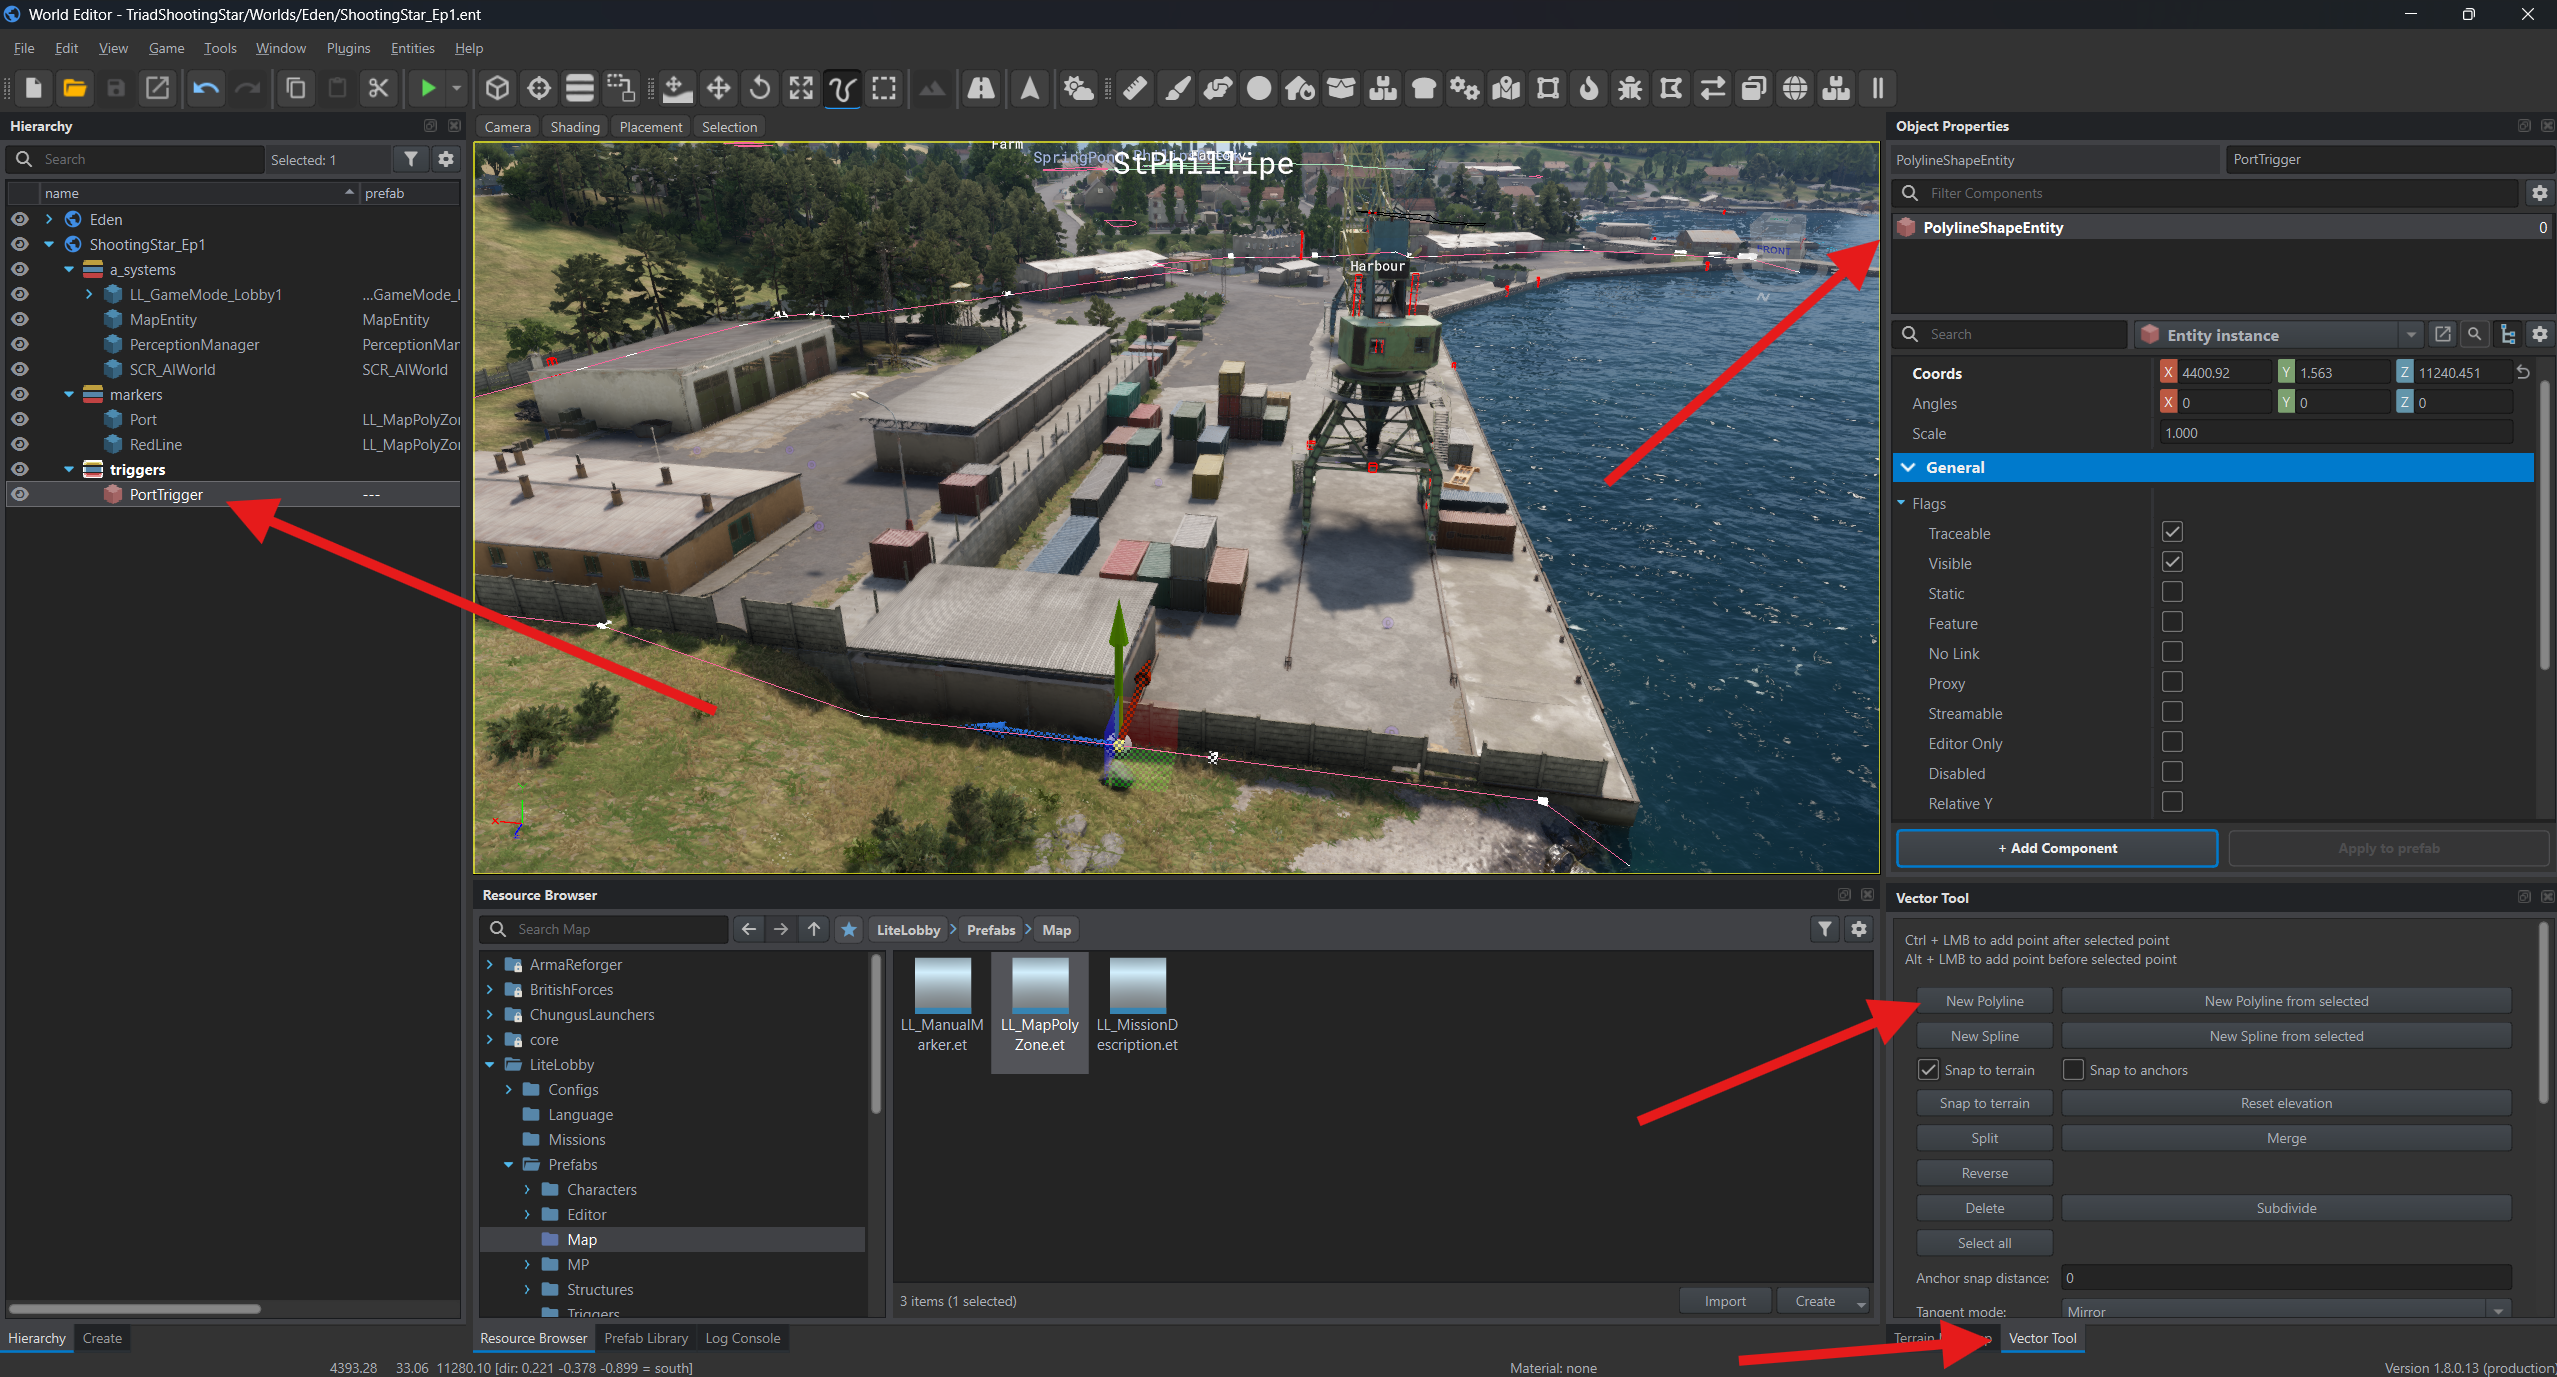
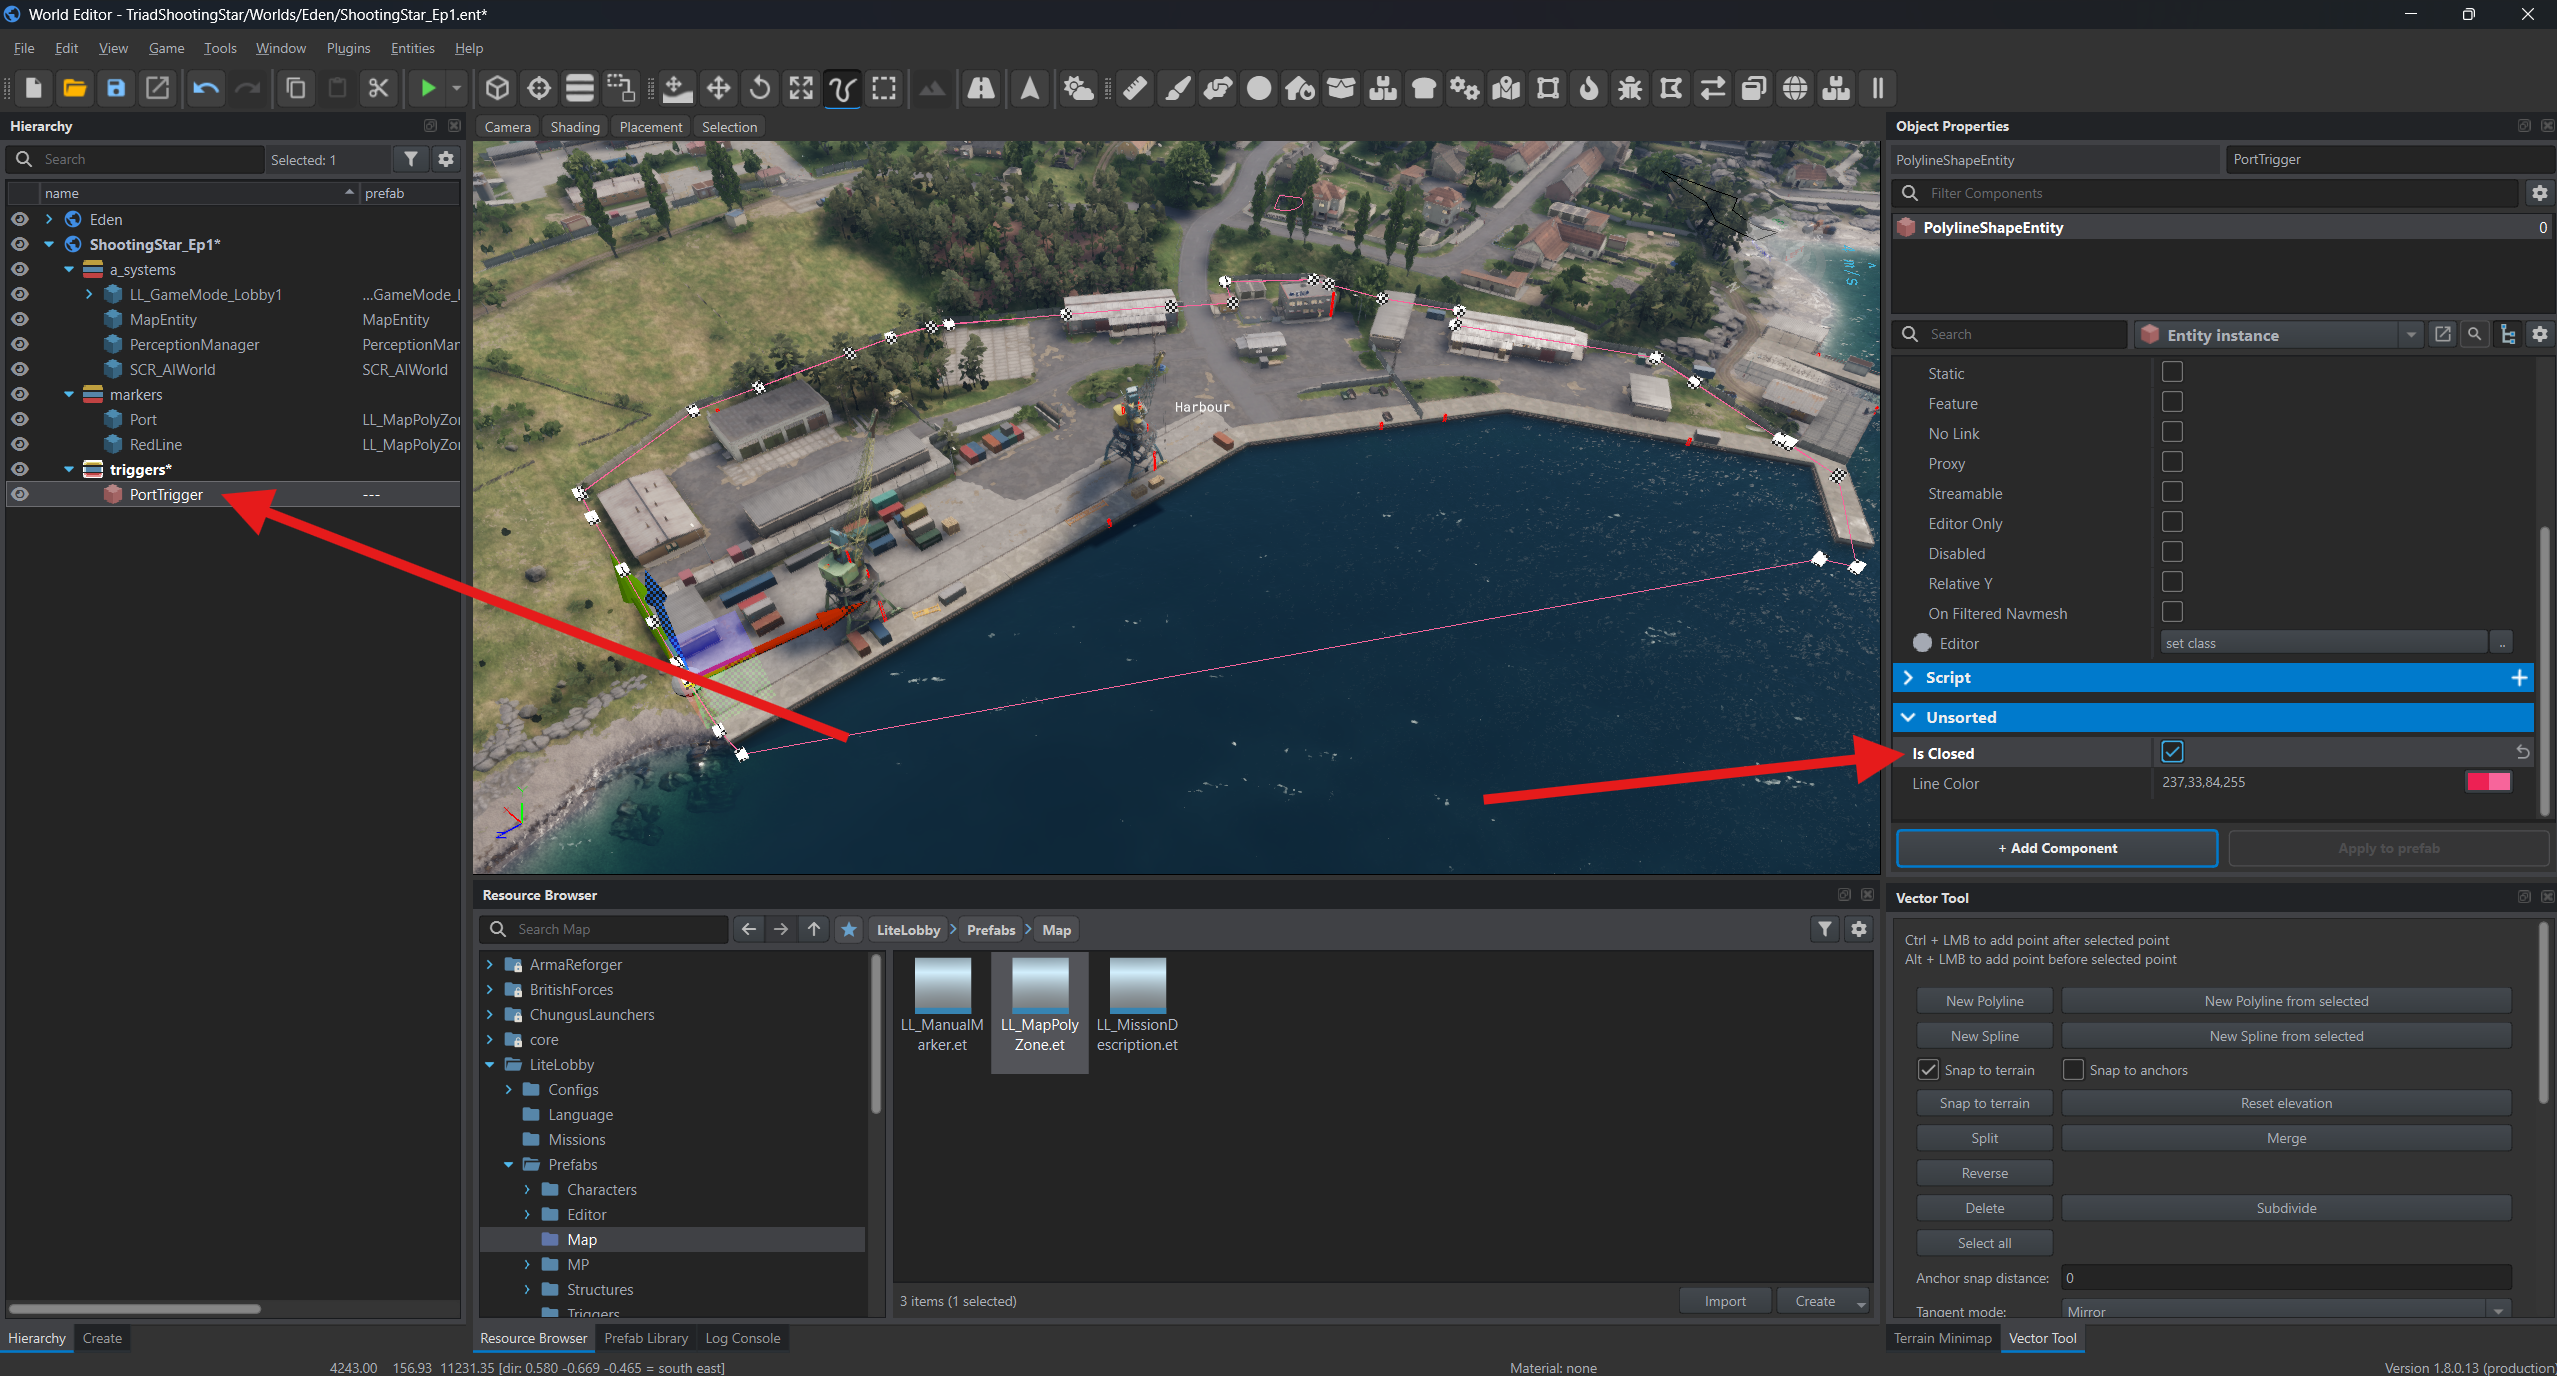
Select PolylineShapeEntity, expand Unsorted and enable Is Closed. This joins the last point to the first.
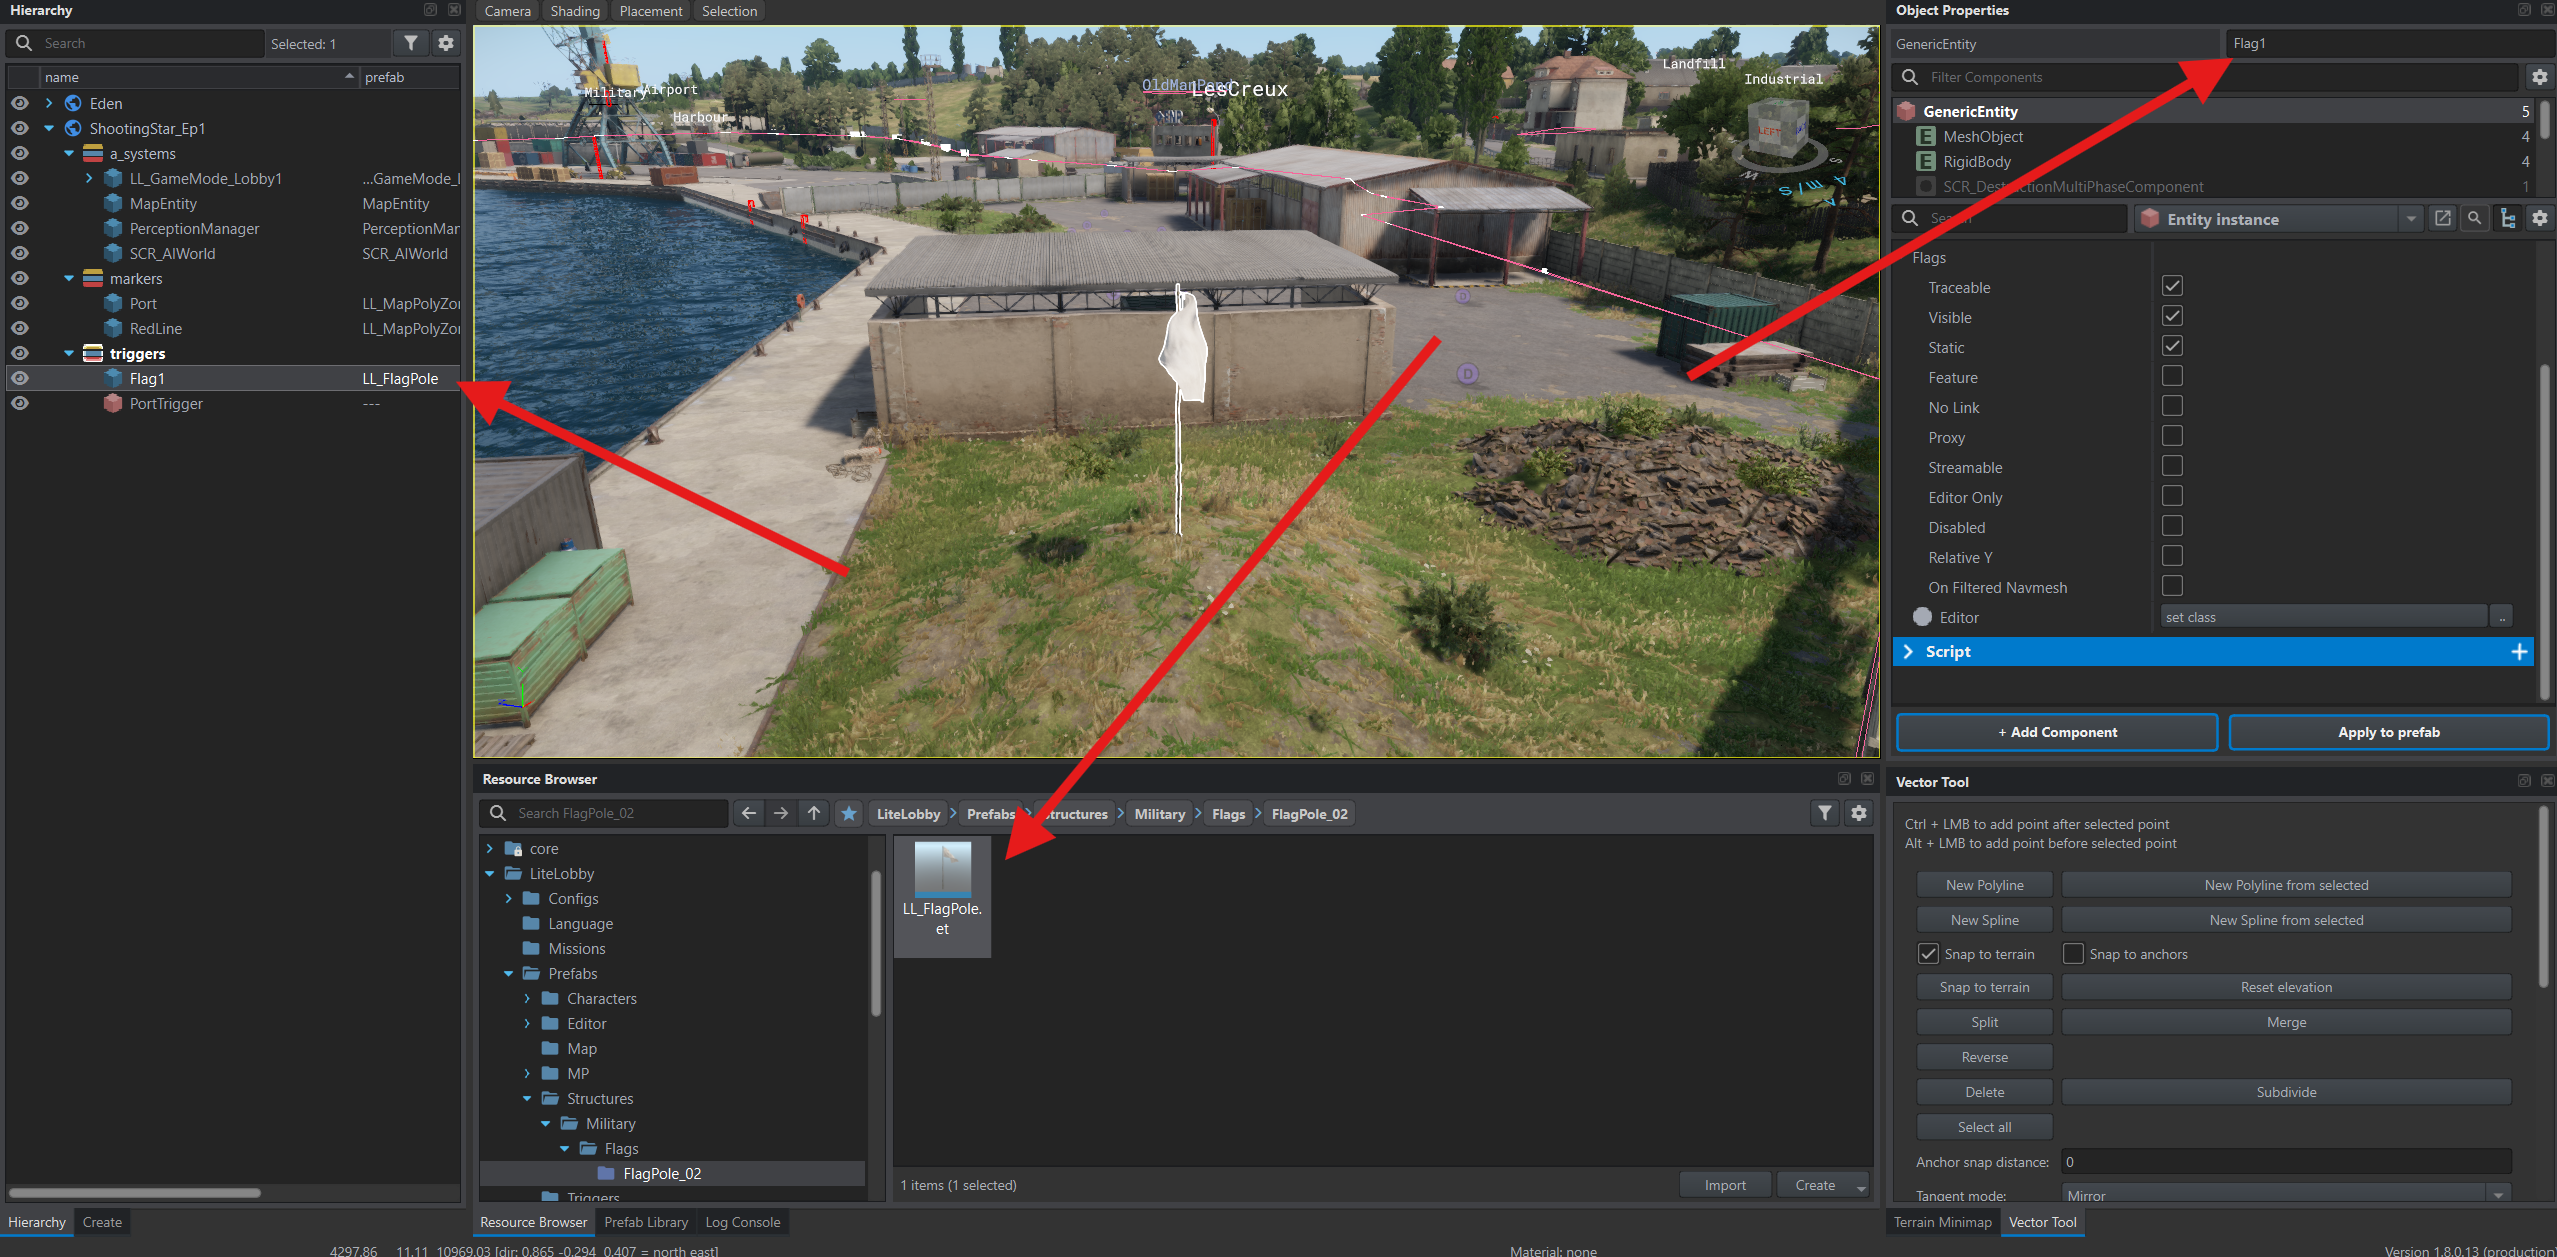
In Resource Browser, find LL_FlagPole.et in LiteLobby, under Prefabs/Structures/Military/Flags/FlagPole_02.
Drag it into the port and name the object Flag1. Place the other flags the same way. The example uses six: Flag1–Flag6. They show capture progress and which side owns the port.
Capture settings
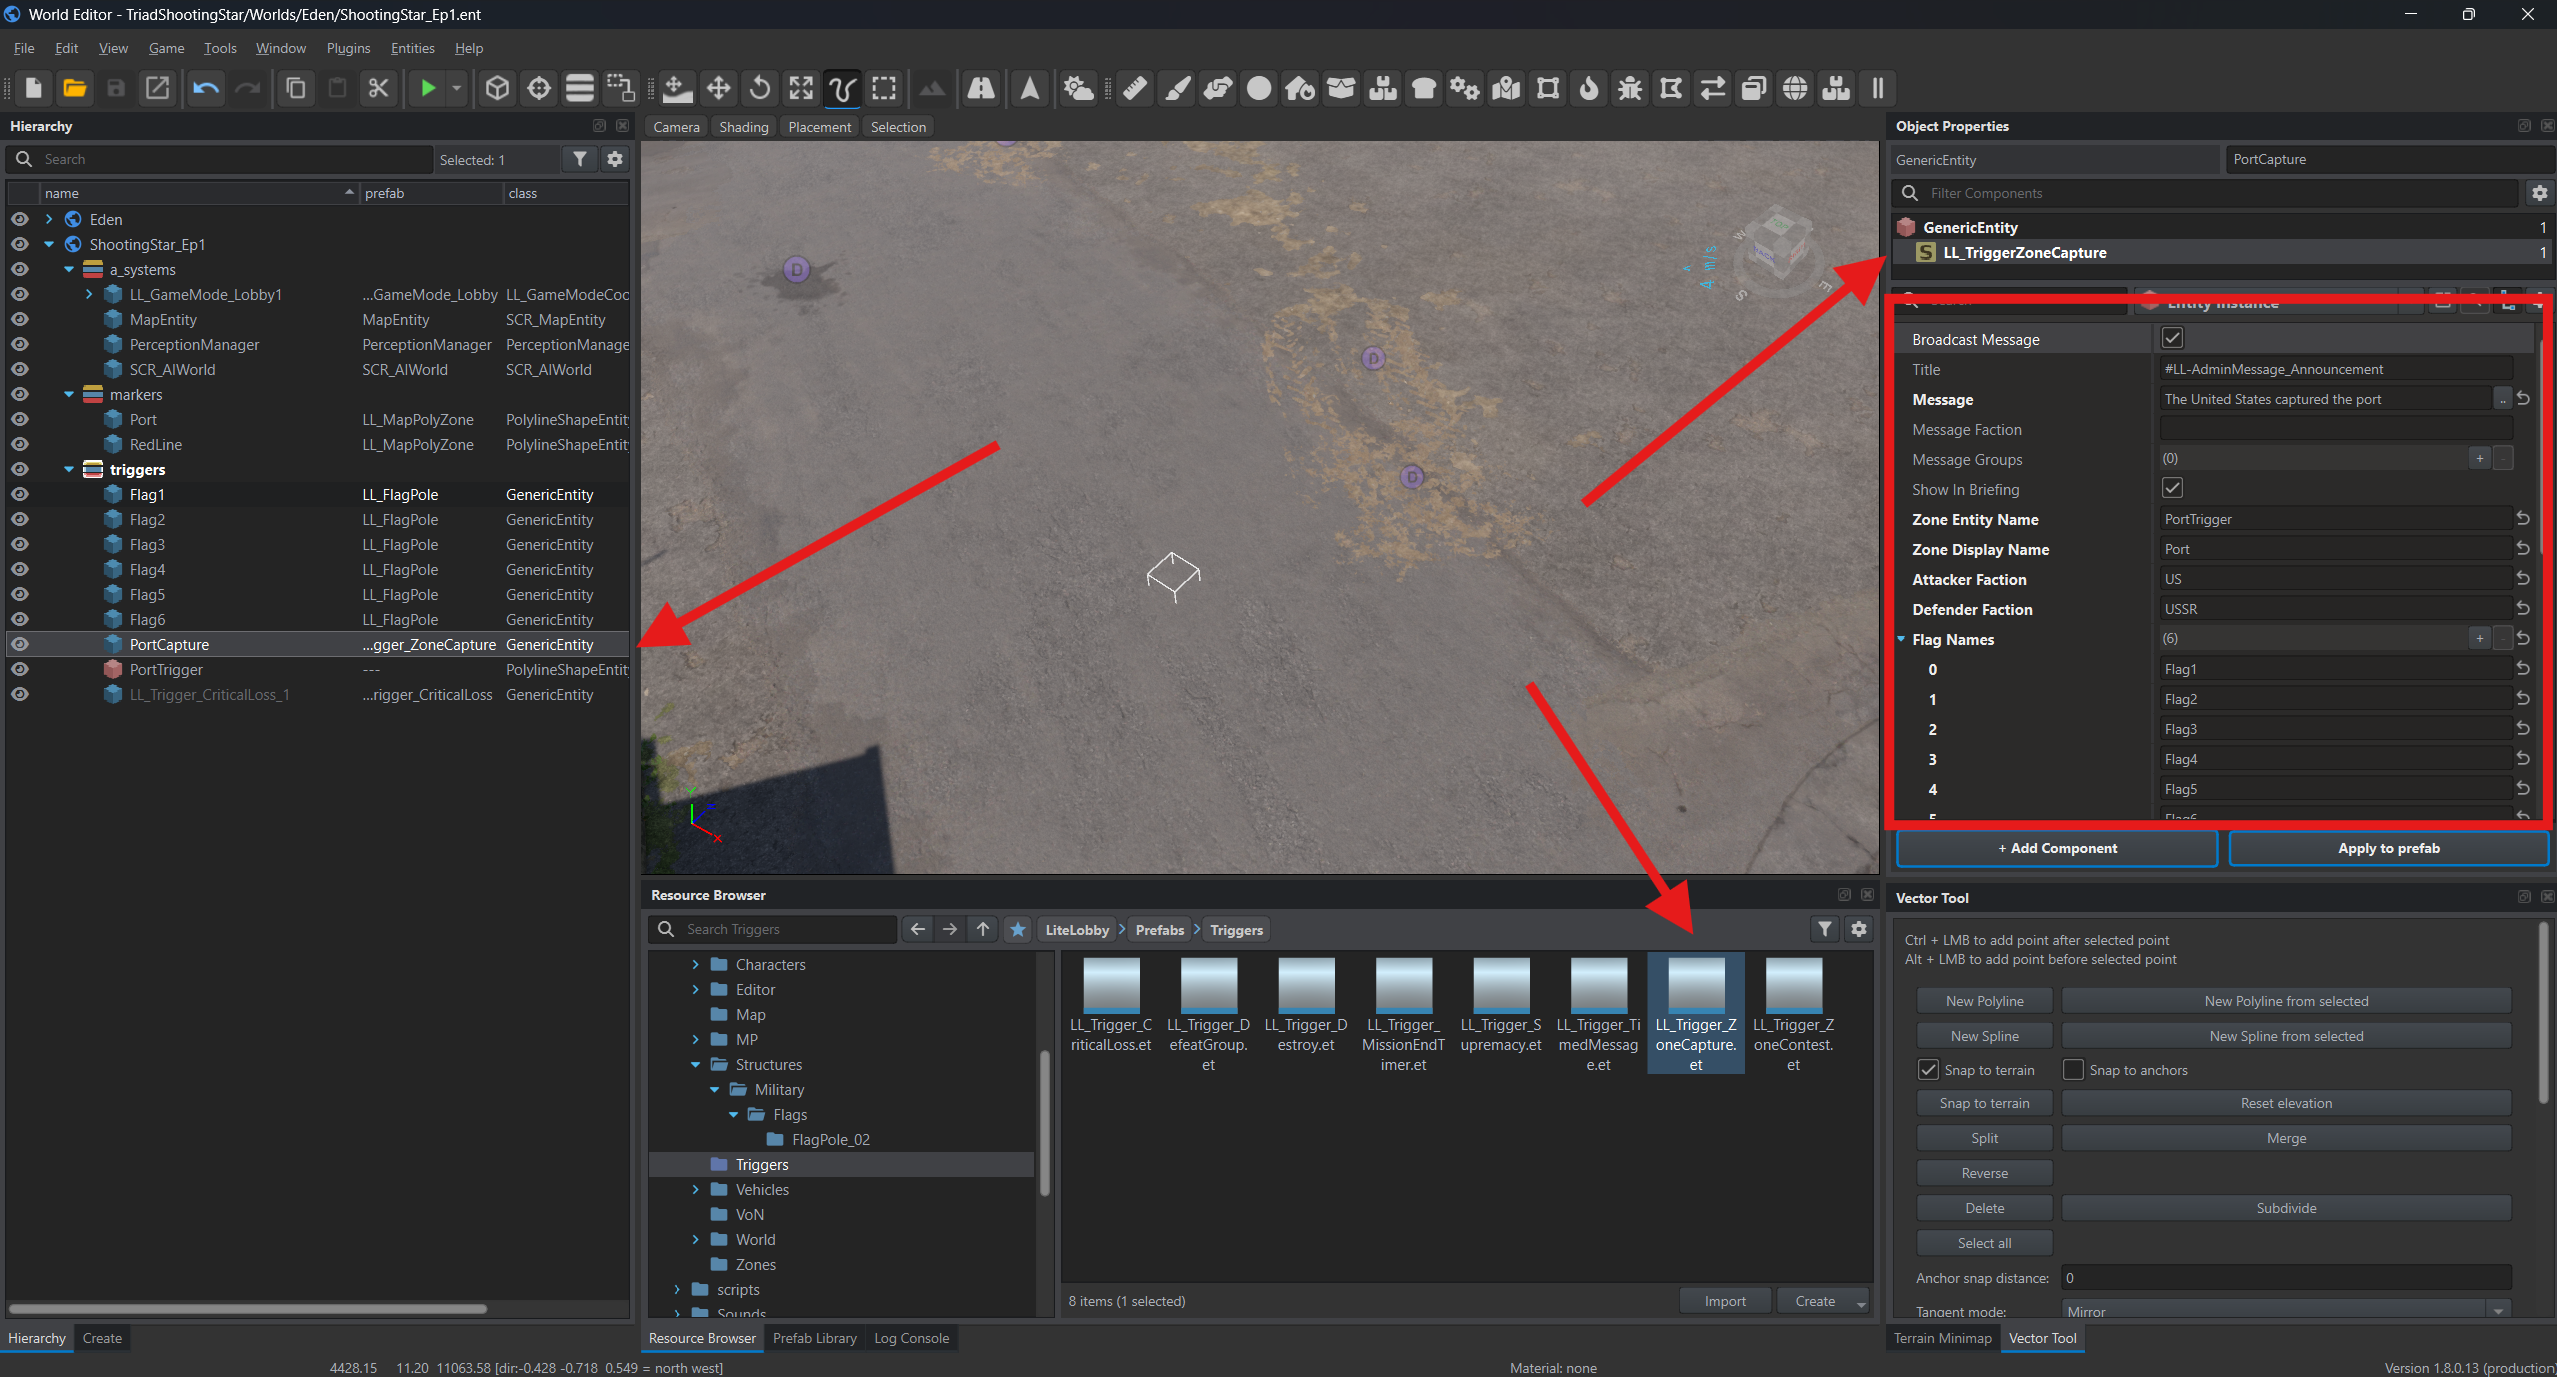
Section titled “Capture settings”From LiteLobby → Prefabs → Triggers, add LL_Trigger_ZoneCapture.et to the triggers layer. Name it PortCapture and select LL_TriggerZoneCapture.
| Field | Value |
|---|---|
| Zone Entity Name | PortTrigger — the name of the area you drew. |
| Zone Display Name | Port — the name shown to players. |
| Attacker Faction | US — the attacking side. |
| Defender Faction | USSR — the side that owns the port initially. |
| Flag Names | Use + to add Flag1, Flag2, …, Flag6. |
| Message | The United States captured the port. |
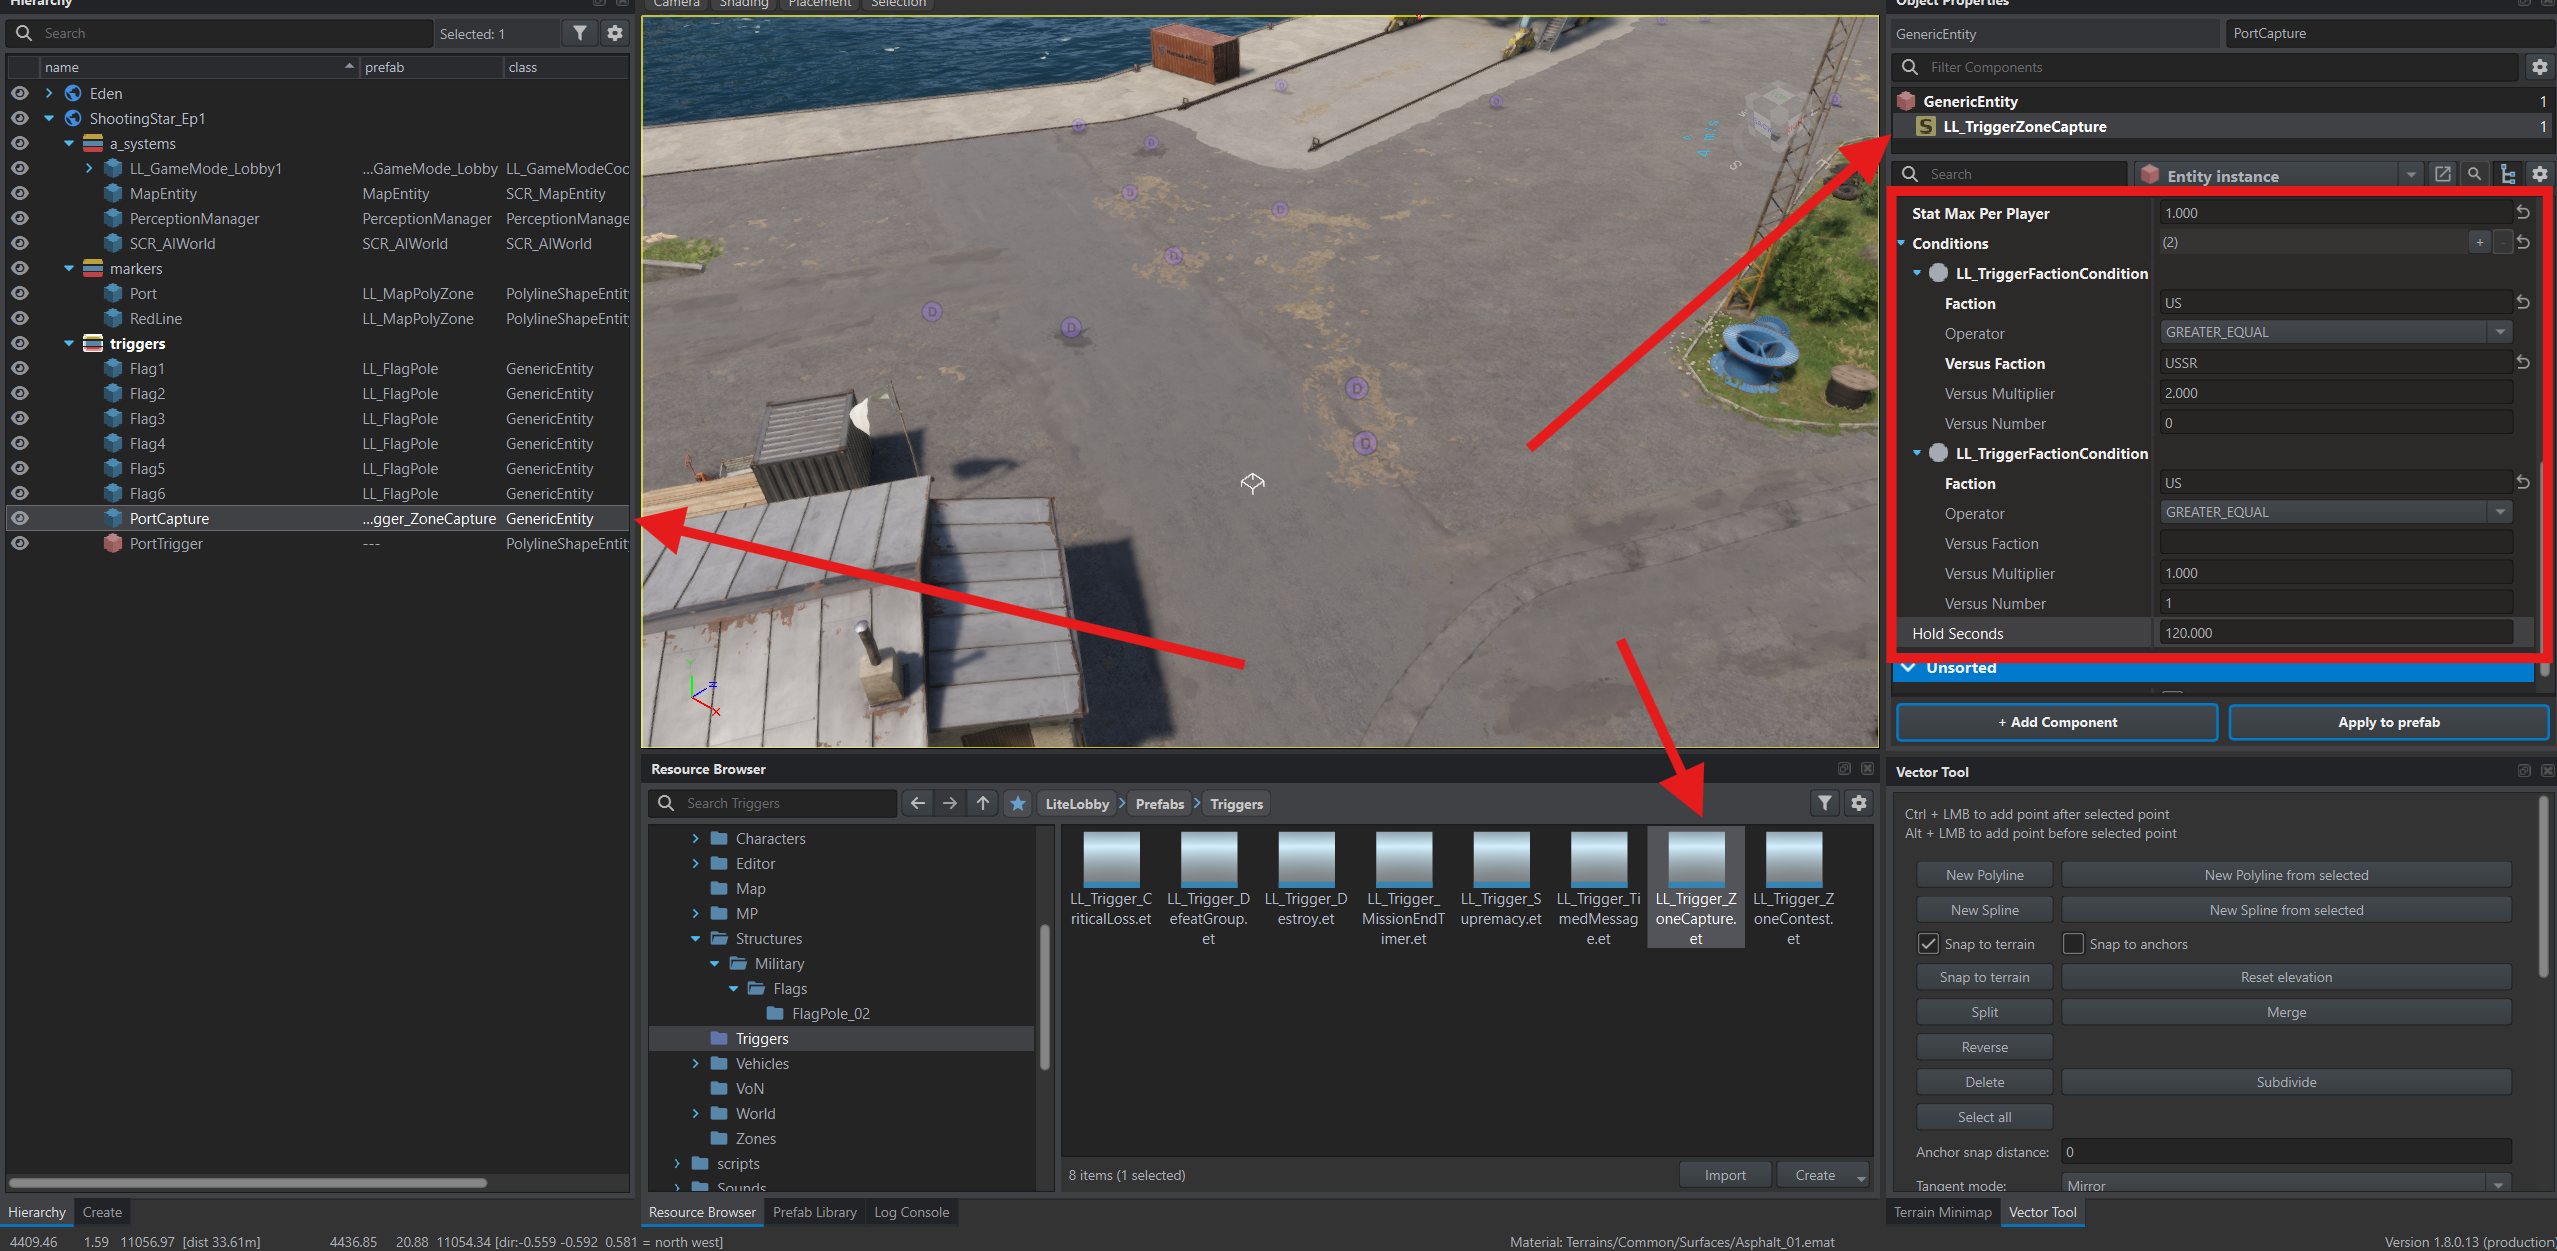
In Conditions, configure the two LL_TriggerFactionCondition entries already included in the prefab.
| Field | First entry | Second entry |
|---|---|---|
| Faction | US | US |
| Operator | GREATER_EQUAL | GREATER_EQUAL |
| Versus Faction | USSR | Empty |
| Versus Multiplier | 2 | Not used |
| Versus Number | Not used | 1 |
The first entry requires at least twice as many US characters as Soviet characters inside the port: four against two, for example. The second requires at least one US character. Without it, an empty area would also satisfy the first condition.
Set Hold Seconds to 120. Both conditions must hold continuously for two minutes. If either fails, the timer resets.
Critical loss trigger
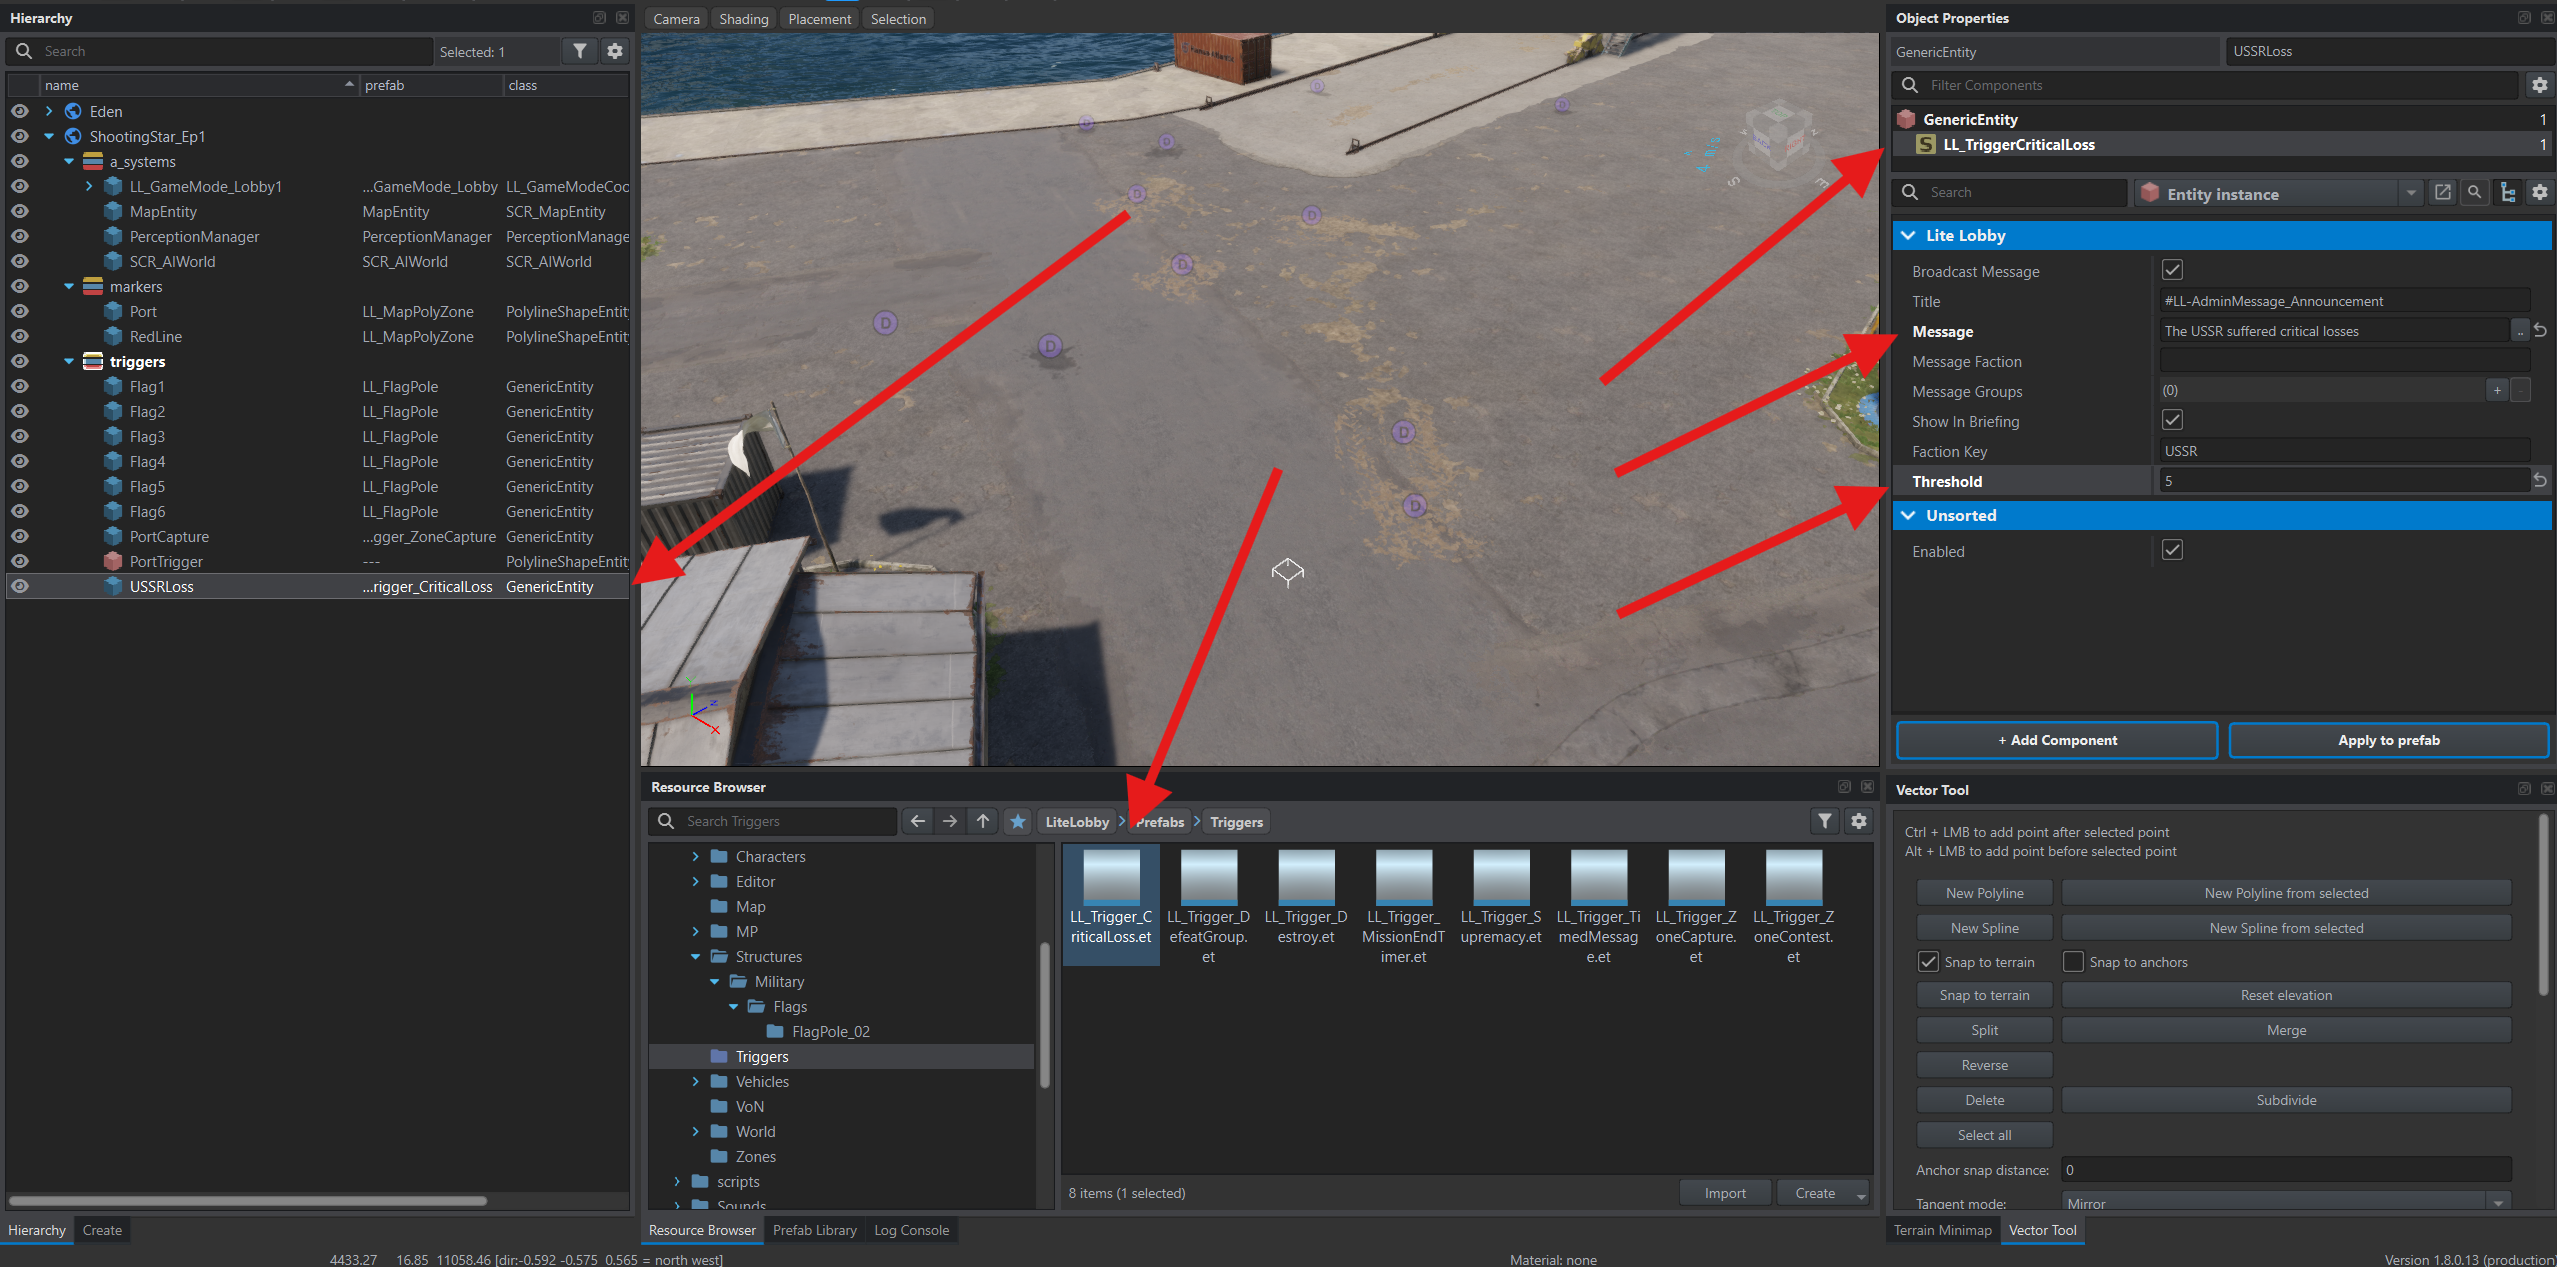
Section titled “Critical loss trigger”Add LL_Trigger_CriticalLoss.et, name it USSRLoss and select LL_TriggerCriticalLoss.
- Faction Key —
USSR. - Threshold —
5. - Message —
The USSR suffered critical losses.
This means five or fewer characters remaining alive, not five casualties.
Add a second trigger named USLoss. Set Faction Key to US, Threshold to 7 and write a message about the US side.
Choose thresholds that fit your mission’s numbers. To test this trigger, the living playable count must first exceed Threshold, then fall to that threshold through losses.
Timer trigger
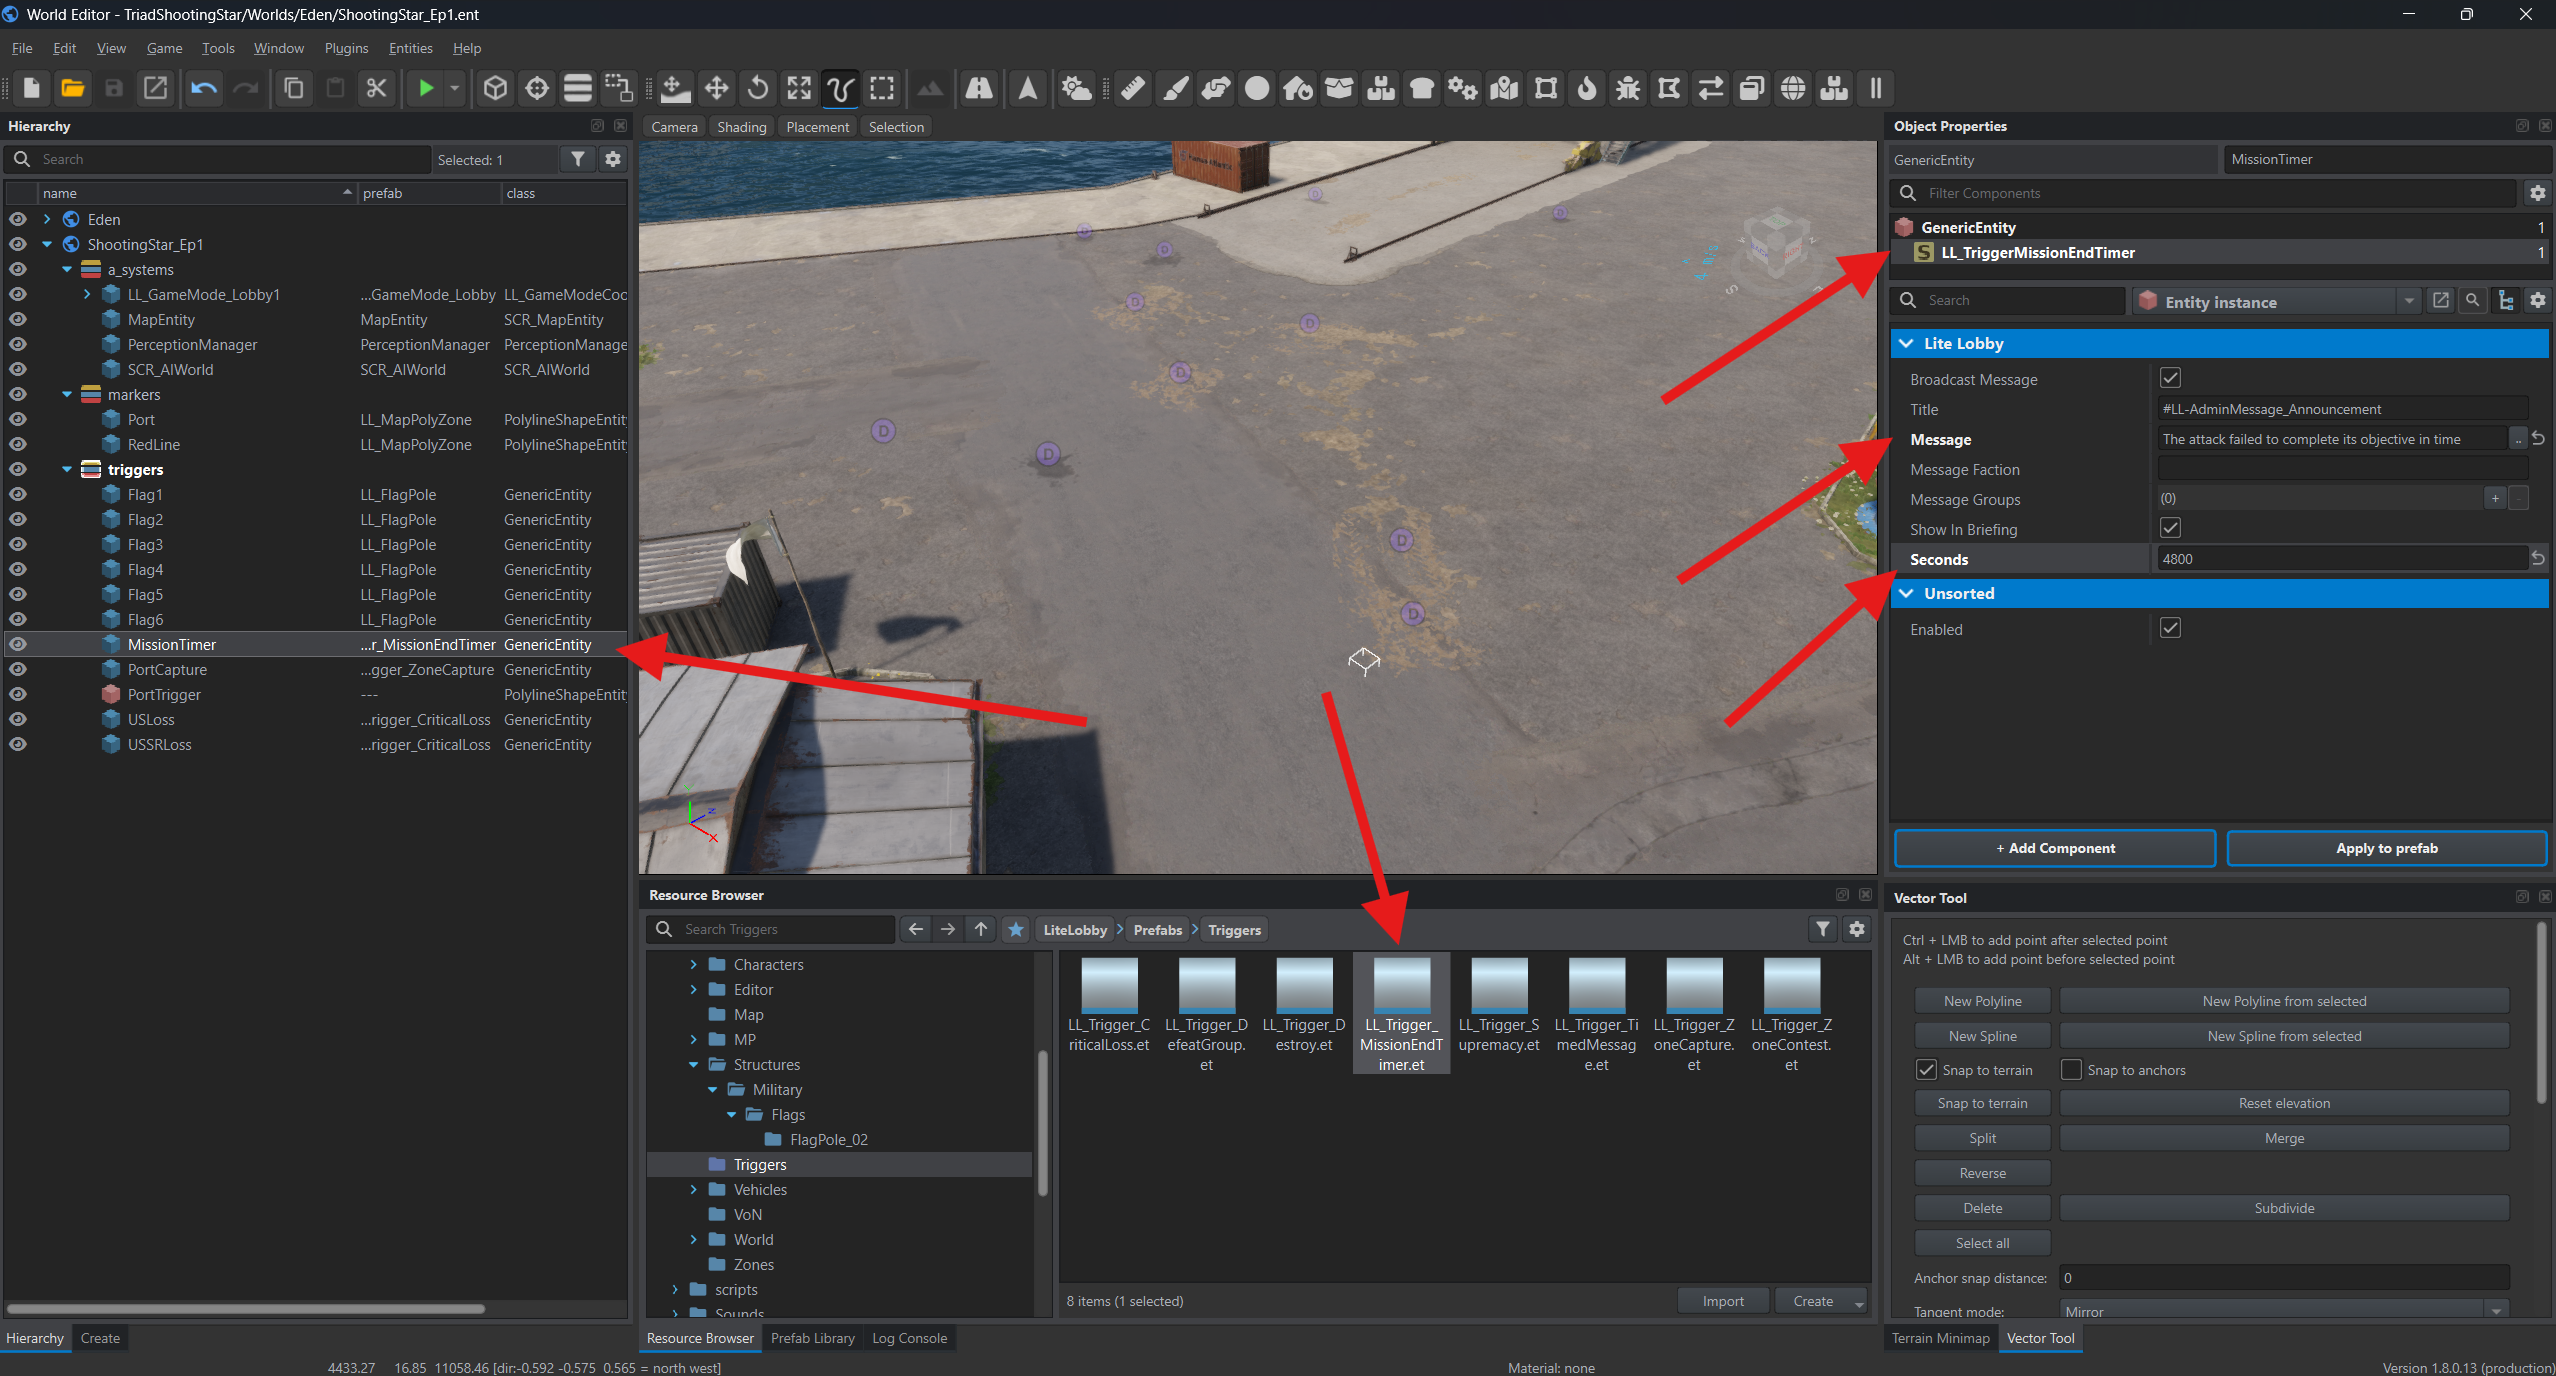
Section titled “Timer trigger”Add LL_Trigger_MissionEndTimer.et, name it MissionTimer and select LL_TriggerMissionEndTimer.
Set Seconds to 4800, or 80 minutes. The countdown starts after the freeze period ends. Set Message to The attacking side failed to complete its objective in time.
Superiority trigger
Section titled “Superiority trigger”Add LL_Trigger_Supremacy.et, name it USSRSupremacy and select LL_TriggerSupremacy.
- Faction Key —
USSR. - Versus Faction —
US. - Supremacy Ratio —
4. - Message —
The Soviet side gained a numerical advantage over the US side.
The condition is met when living Soviet characters outnumber US characters by at least four to one: 20 against 5, for example.
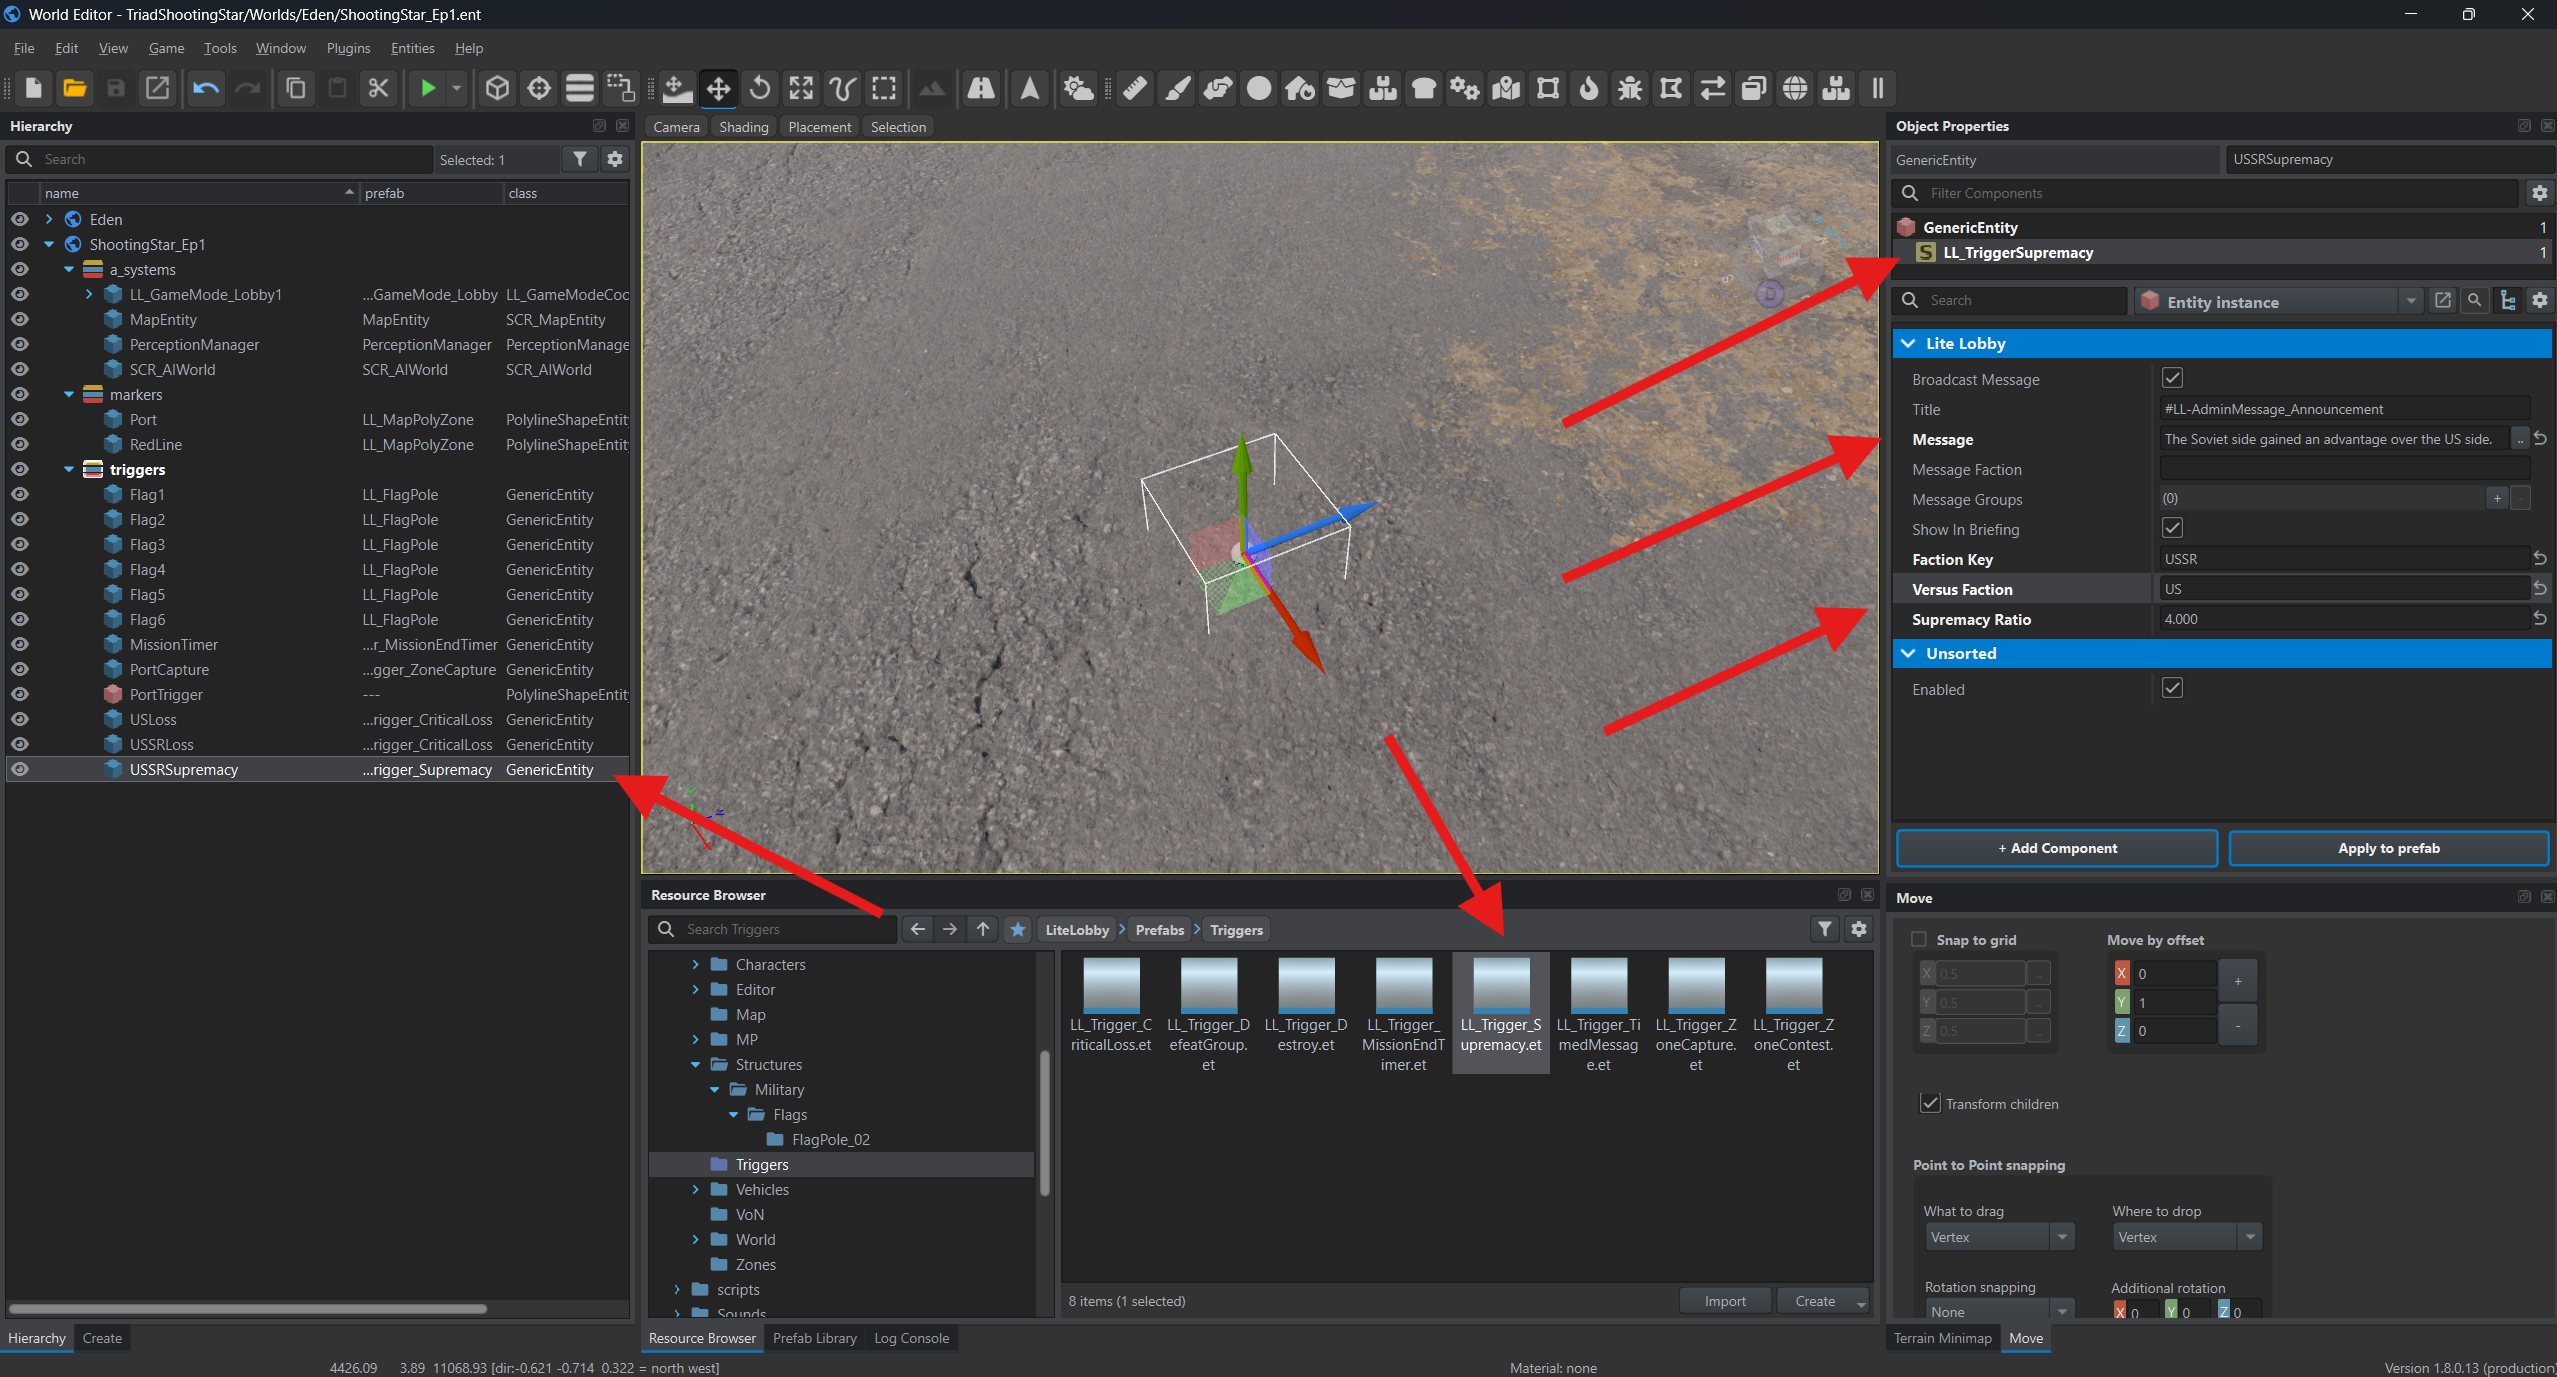
To check superiority for the US side too, add a second trigger named USSupremacy, swap the factions and choose the required ratio.
Conditions in the briefing
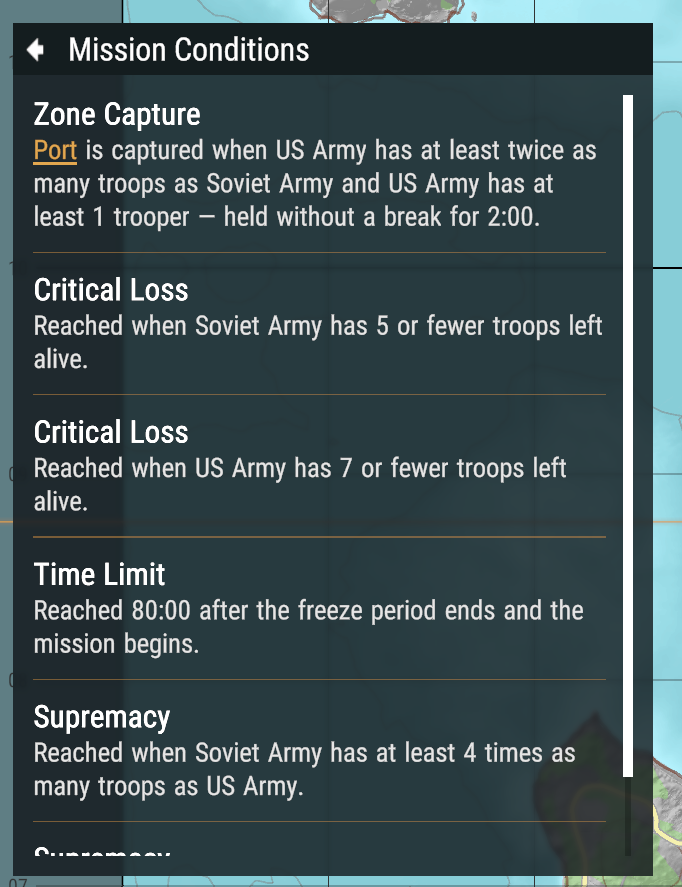
Section titled “Conditions in the briefing”With Show In Briefing enabled, Lite Lobby generates the condition’s description from its settings. You do not need to repeat it in the briefing text.
Briefing
Section titled “Briefing”Describe the situation, each side’s objectives and restrictions: where to go, what to capture and what the mission rules prohibit.
Create a descriptions layer and make it active. Drag LL_MissionDescription.et from LiteLobby → Prefabs → Map into the world. Name the object MissionConditions.
Select LL_MissionDescription in Object Properties. Set Title to Situation and objective. Click … beside Text Data and replace the sample with your own text.
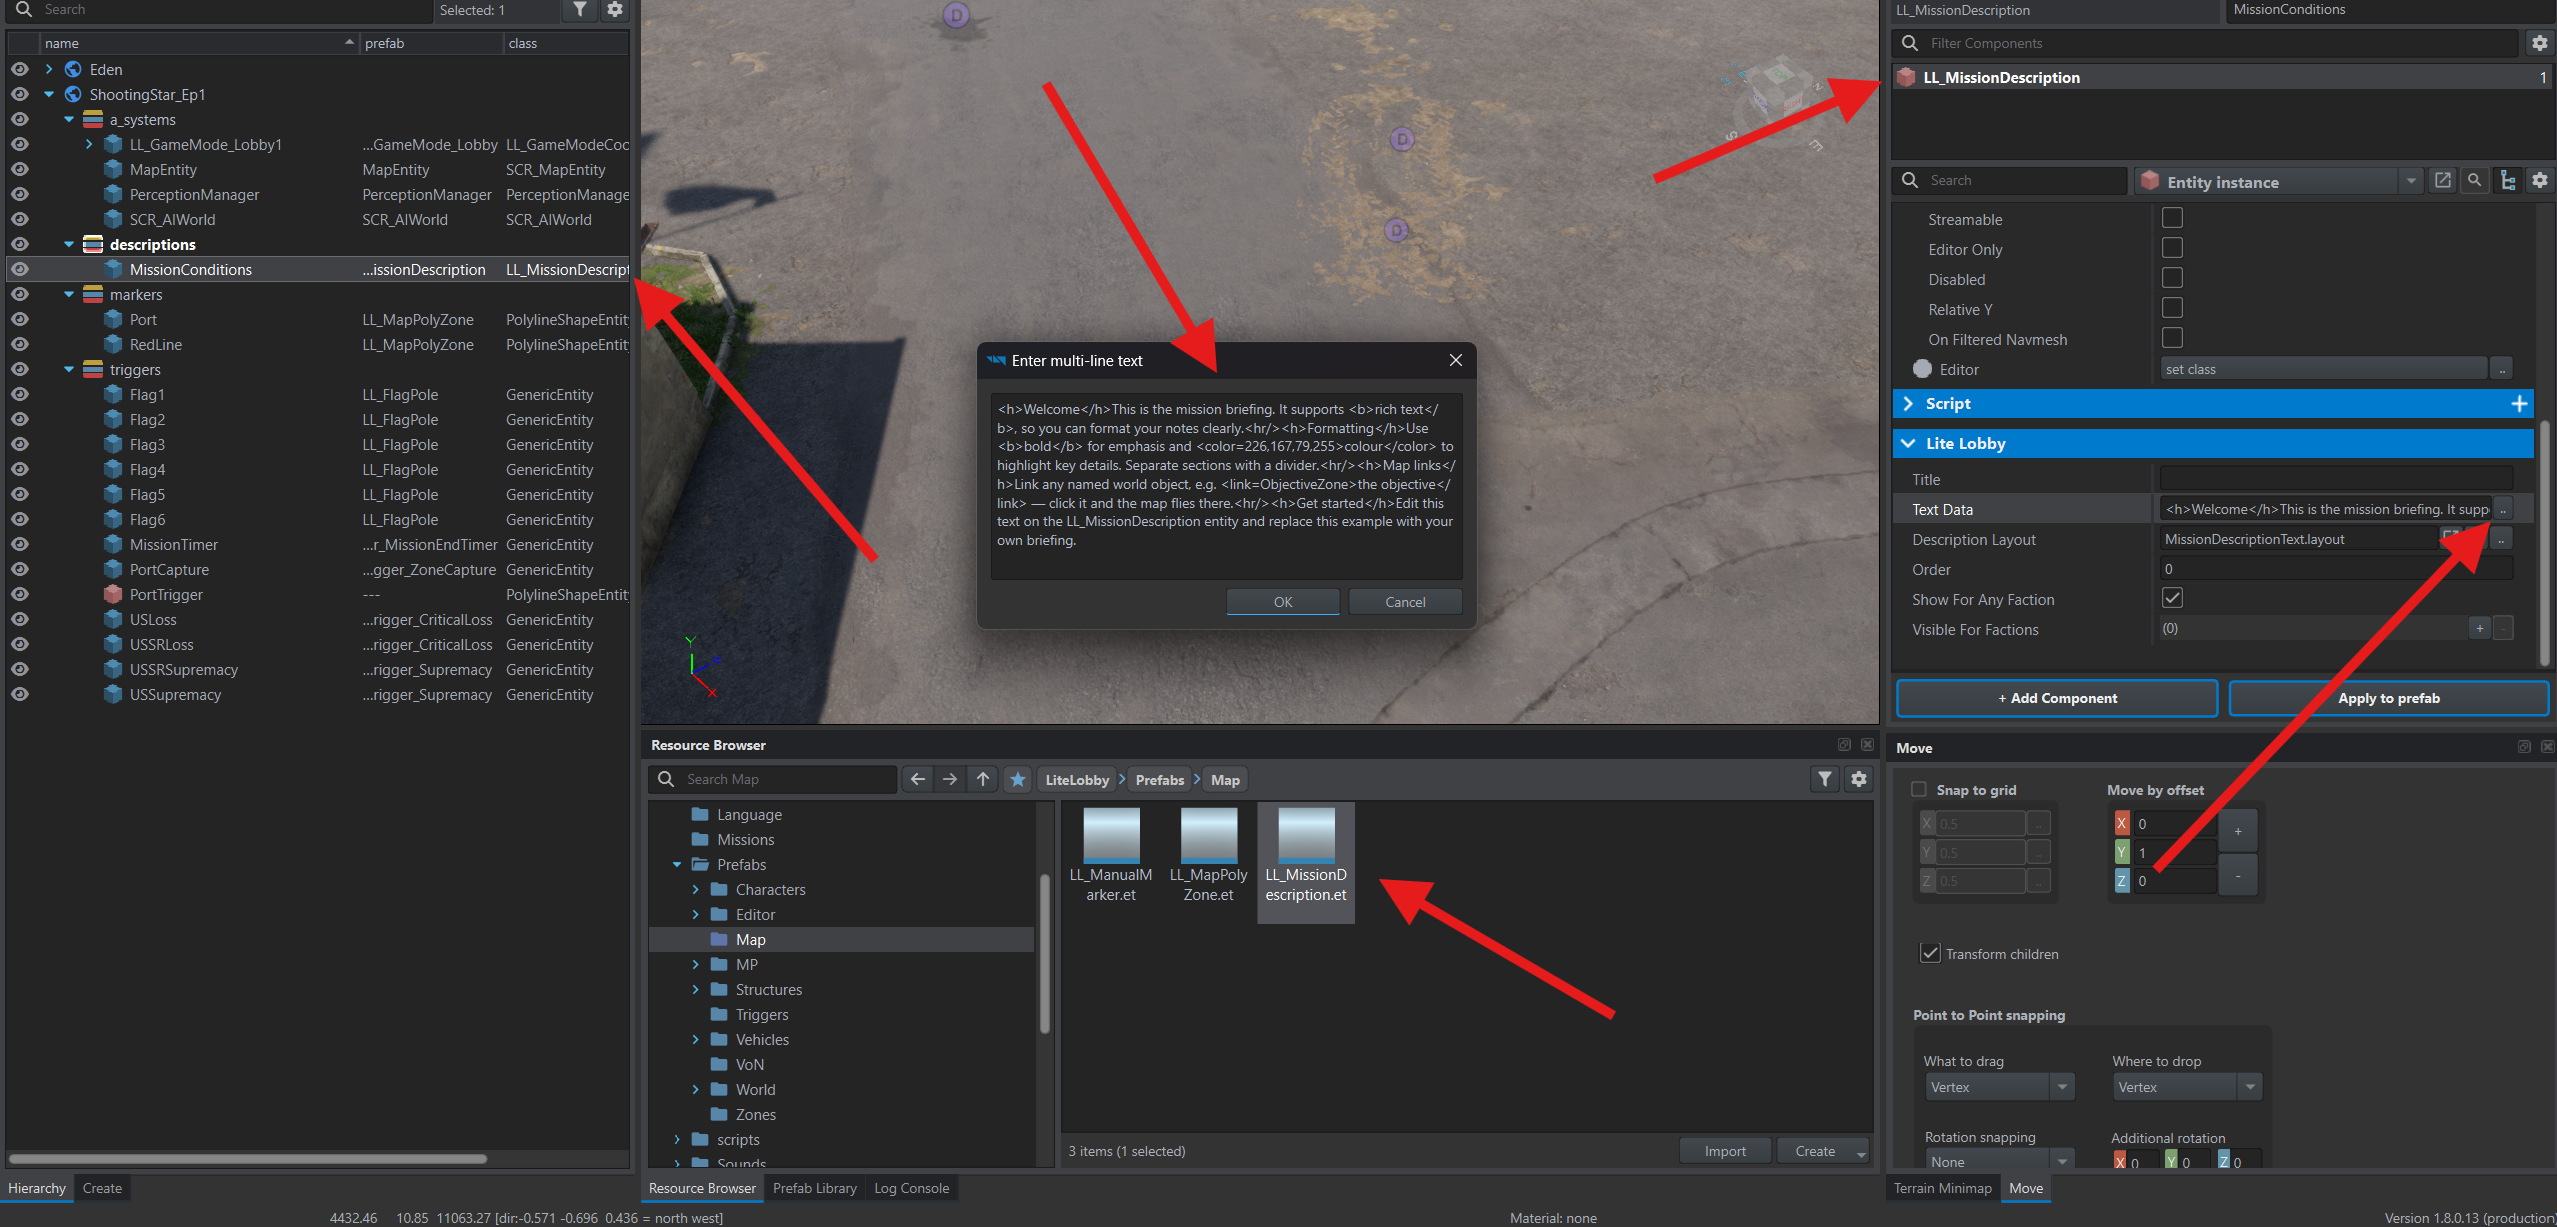
The field supports headings, dividers and links to map objects. The example below links to PortTrigger, the area created above. To link to a different object, replace PortTrigger with its name; that object must already exist in your world.
<h>Situation</h>Soviet forces hold the port.<hr/><h>US objective</h>Capture <link=PortTrigger>the port</link>.<br/>See the mission conditions for the capture requirements.<h> marks a heading, <hr/> adds a divider and <br/> inserts a line break. The <link=PortTrigger> link moves the map to the object named PortTrigger.
Show For Any Faction makes the text available to everyone. For a side-specific order, add another LL_MissionDescription.et, disable that checkbox and enter US or USSR in Visible For Factions. Order sorts the entries: lower numbers appear first.
Save the world with Ctrl+S. In the next chapter, test the mission and prepare it for publication.